

At the end of last year I replaced the cabinet doors in our mudroom. Since we wanted to swap from half-overlay doors to inset doors and from raised panel style to shaker style, it make more sense to build new doors than to rework the existing ones. The new doors were to be painted, so I used poplar rather than ‘waste’ the oak from the existing doors. All this to say, I’ve had a big pile of scrap oak sitting around from the old mudroom doors waiting for the right project to come along.
Fast forward to present day, and I’ve started building cabinets for the office. These will also be painted, so are mostly made of poplar and cabinet ply. One section of the cabinets will be a hutch with some counter space. After considering counter options for a while it eventually occurred to us to use the scrap oak to construct a butcher block for the counter. In addition to the scrap oak I also had the oak from the saw milling tests that could be used to ensure coverage.
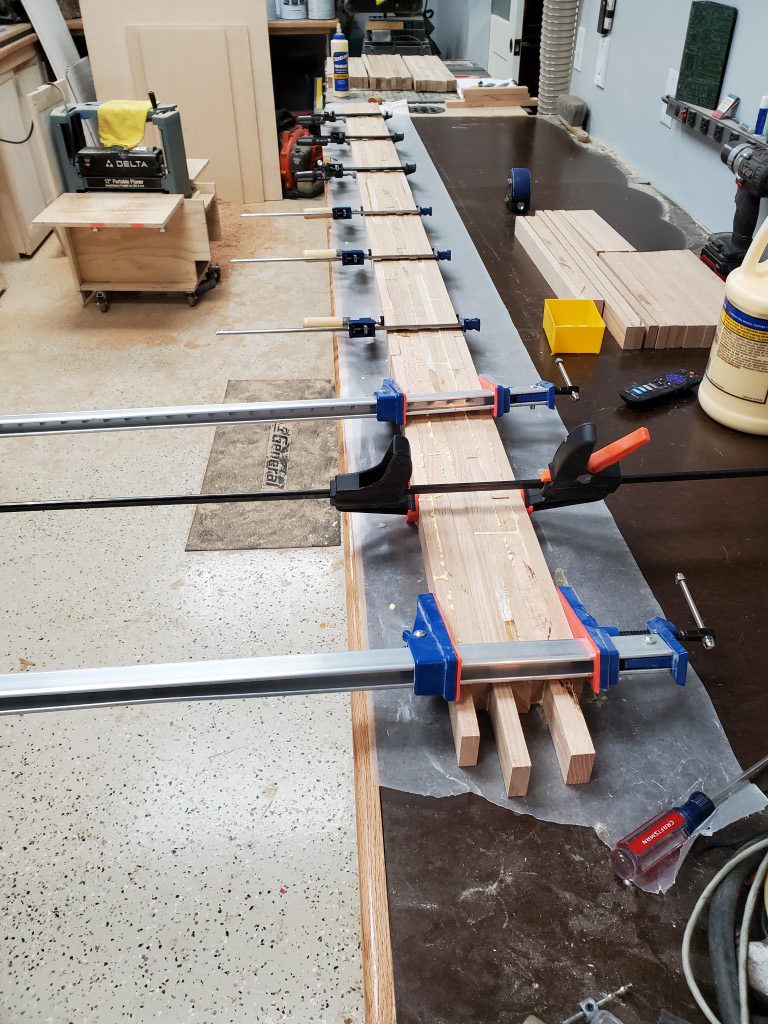
To start the build I sent all the scrap oak pieces through the planer to remove the stain/varnish layer on each side, and then I ripped down everything that wasn’t already 1.5″ wide (though most pieces already were). There were a few different thicknesses involved since the wood from the door panels was a little thinner than the wood from the door frames, and the wood from saw milling was a little thicker than the rest. The variation in thickness isn’t a problem though as long as all wood pieces of the same thickness are kept on the same row. It is very important that all pieces in the same row are planed to the exact same thickness to ensure no gaps.
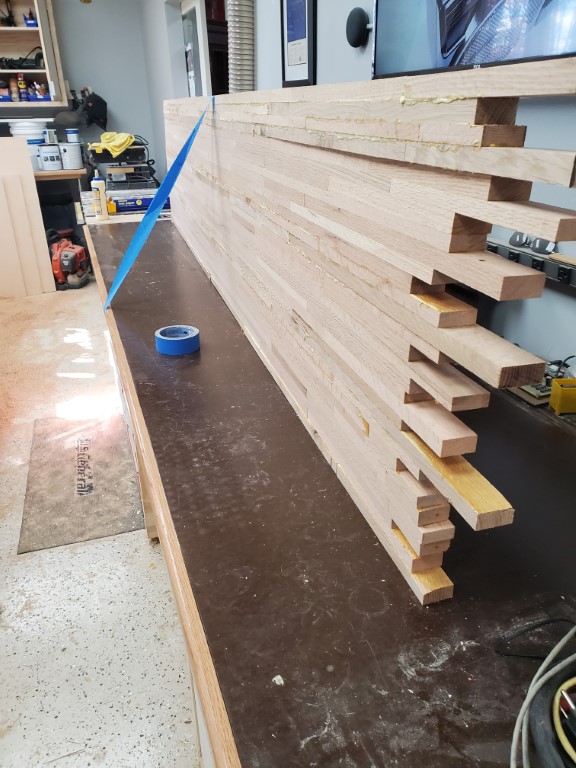
I laid everything out first to make sure the pattern would cover the size needed. For the edge that would face out I used a piece of store-bought oak that I had leftover from making the shop work benches, this piece was long enough to cover the entire length of the counter so that no joints would be on the edge and so that the edge would have a consistent thickness. With the layout confirmed, I then I glued up about 1/3 of the width in 3 sessions before then gluing and clamping those sections together. I used a solid roller/brayer to spread the glue, all together about 1/2gal (!) of glue was required.
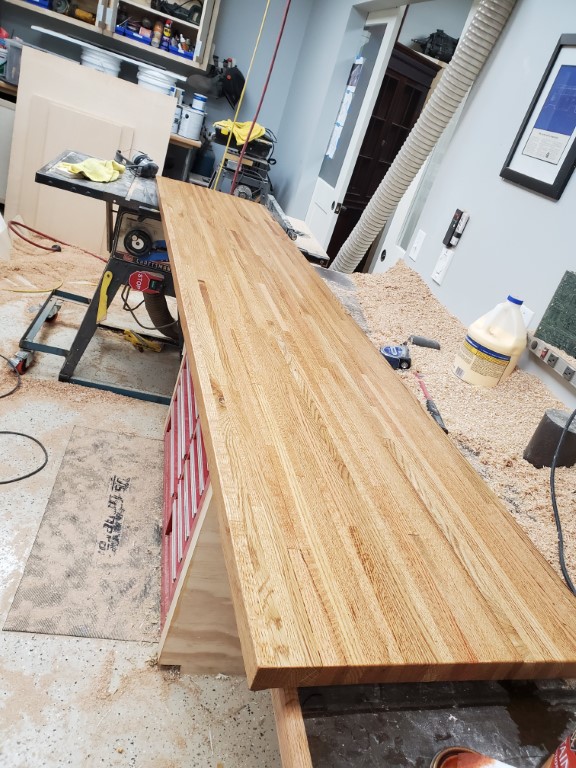
After the glue dried I planed the top flat with a handheld power planer and cut the ends to length. I then further fine tuned the flatness with a belt sander before a final sanding with an orbital sander. The slab then got a medium stain (Early American) to even out the red oak’s color variation a bit, followed by wipe-on poly.


This is a situation where a similar slab could be bought for less after considering the time spent. It’s neat though to have a custom piece that encapsulates some history of the house as well as solving the ‘problem’ of getting rid of the scrap oak (I’d never throw it away and it was taking up a lot of room); so altogether I’d say it was worth the time spent. Planing created a mountain of sawdust and before the next big project involving the planer I need to make a dust collector connection for it.
