

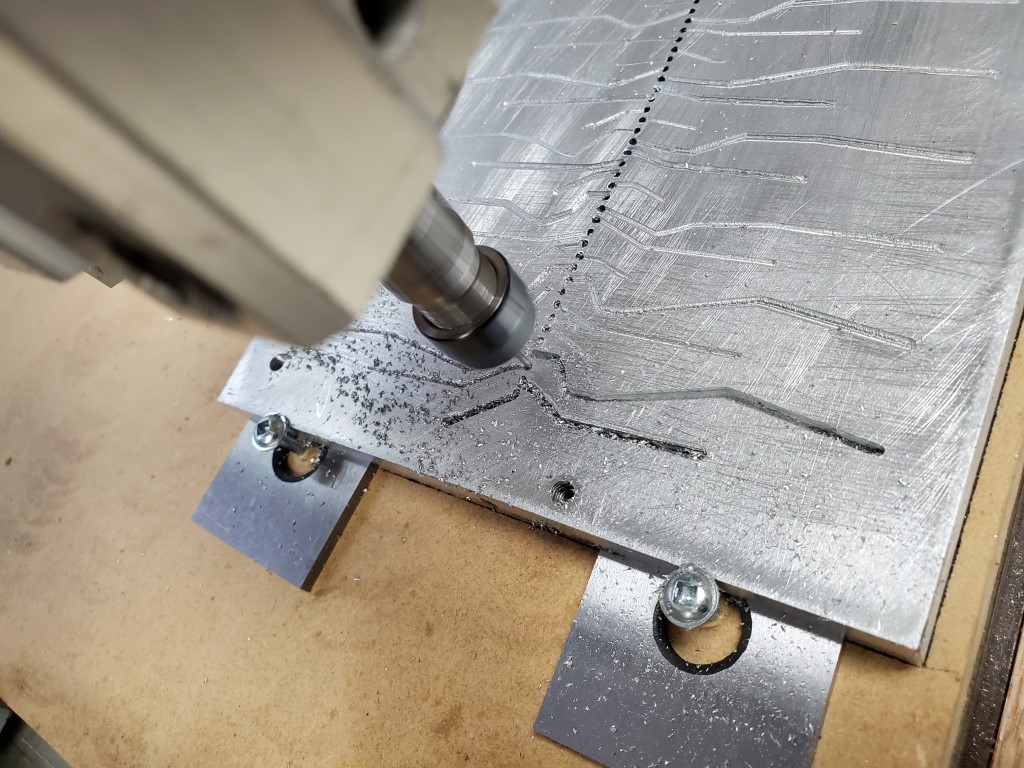
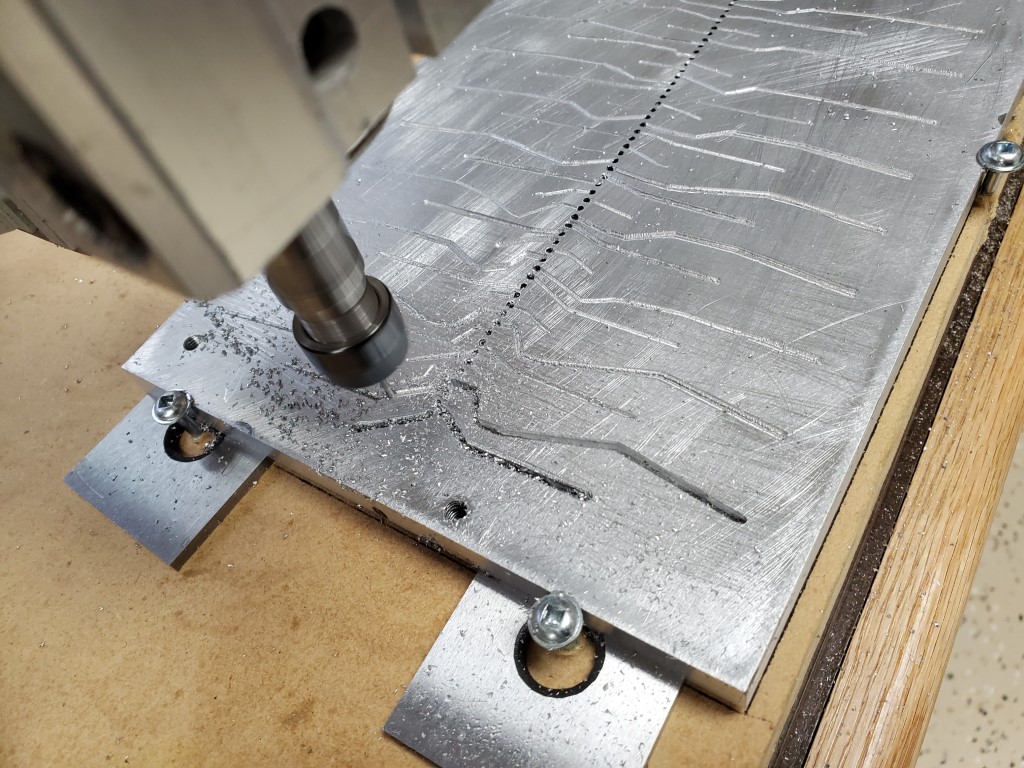
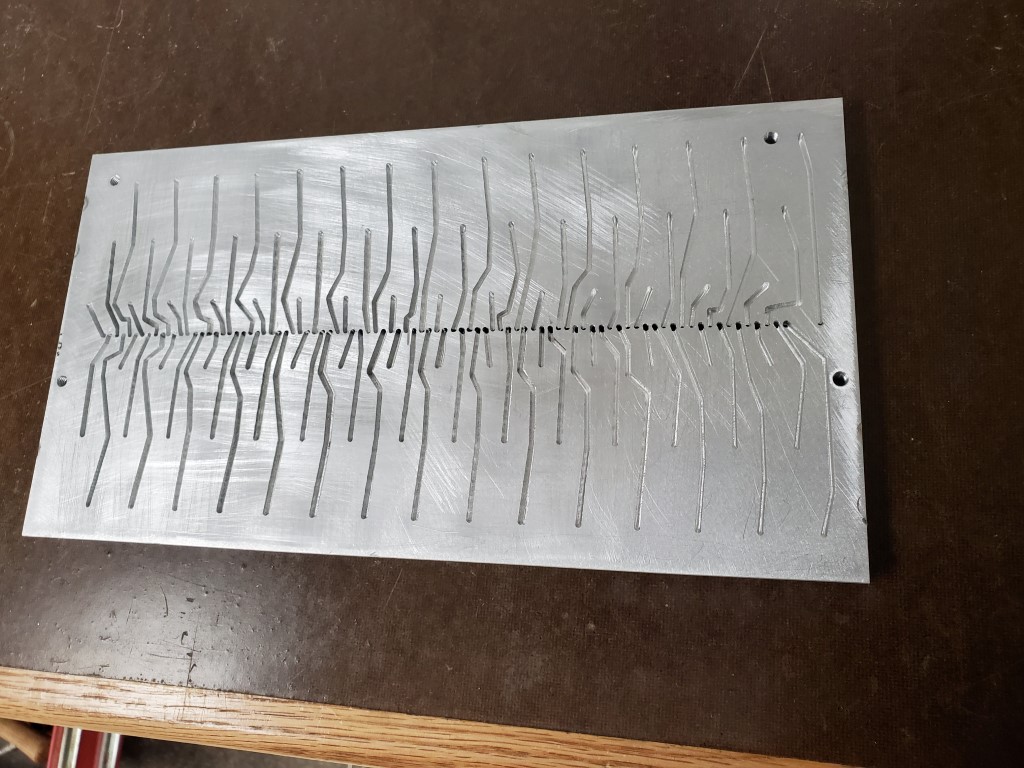
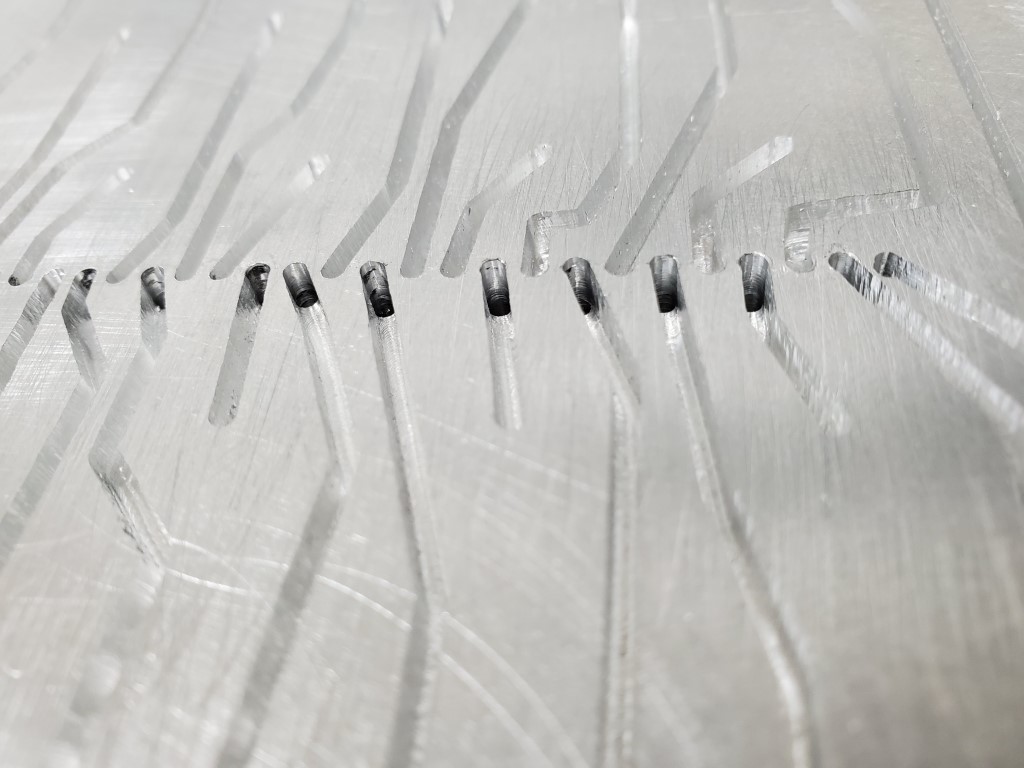
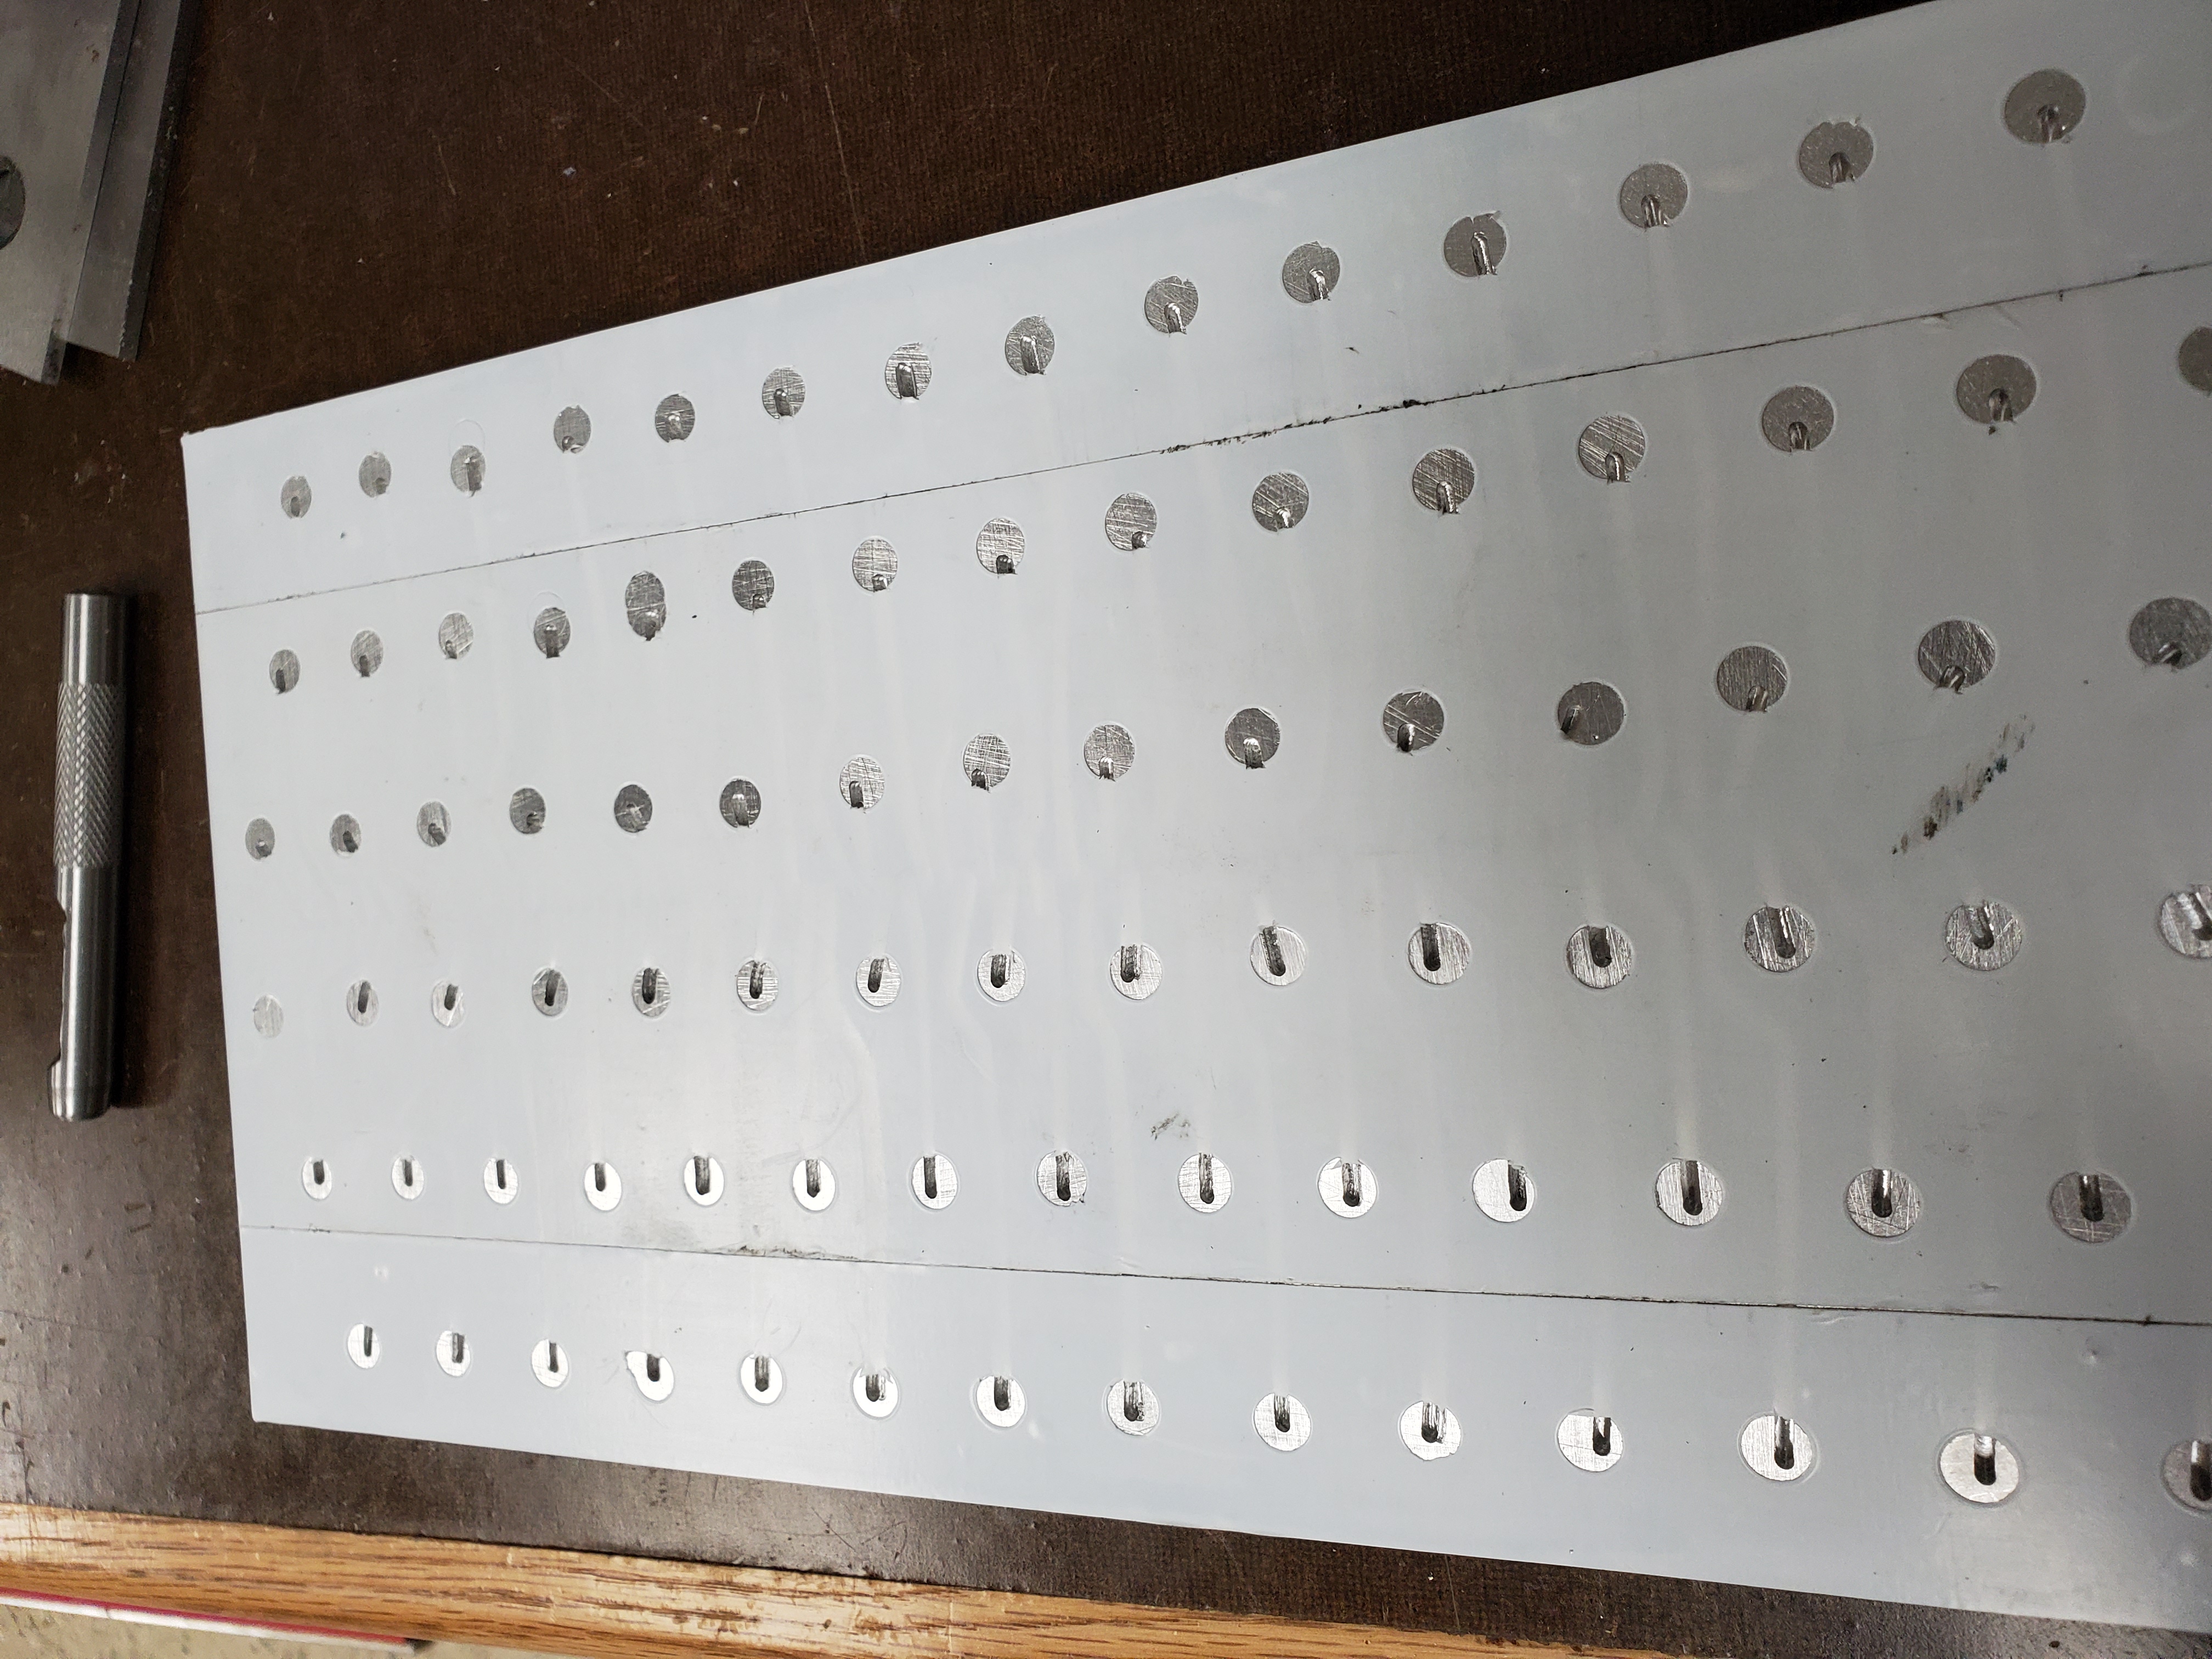
Over the past week I finished the lower valve manifold plate. The lower plate connects the row of holes on the piano tracker bar to the valves on the top plate. Obviously it would have been nice to just put the valves directly over each hole, but since the valves are much wider than the hole pitch I had to instead design the manifold with the valves arranged in multiple rows. Each tracker bar hole is connected to the valve above via passages that are routed into the bottom plate. The path of each passage was chosen carefully to avoid connecting to other valves/passages and to avoid running into the bolt holes that connect the manifold halves – each valve should connect to exactly one tracker bar hole. I let the CNC router do this work; it was relatively slow going with a 1.5mm end mill in aluminum but it turned out OK.
After the passages were milled I created a gasket using wide tape. The tape covers and seals the top of the passages and a hole punched at each valve location allows each valve to connect to its passage. The tape has enough compression that any imperfections in the plates will be sealed once the plates are bolted together. I also added a lip/shelf to the back of the manifold to hold it in vertical alignment against the tracker bar.
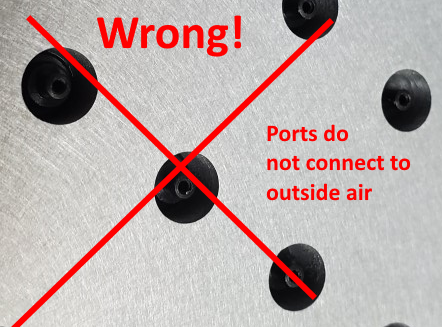
With the manifold ready, I connected it to the piano and tried firing the outputs. Results were not good, there was some vague correlation between outputs being on and notes being played but something was wrong. I had originally assumed the air passed all the way through the valves but closer examination revealed that they actually pass air from their stem to ports near the base of the stem. Since I had the entire stem/base of the valve mounted inside the manifold there was nowhere for air to flow when the valve opened. I re-made the top plate with smaller holes and re-installed the valves with only the stem in the manifold.

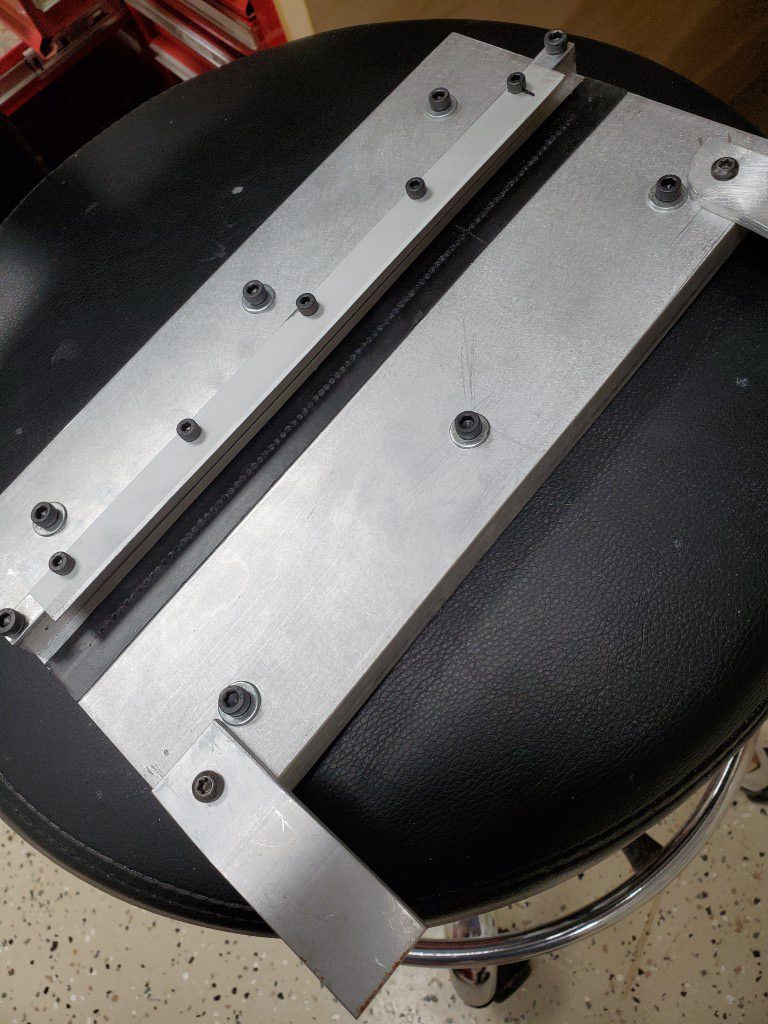
Remaking the top plate solved the valve problem but there were many dead notes due to air leaks at the tracker bar. I experimented with several materials to seal the tracker bar to the manifold and ultimately landed on thick rubber outdoor electrical tape as the best performing, though many leaks remained. I found that the tracker bar was not very flat and I was able to carefully bend it back. This helped considerably but leaks still remained. I found that the force needed to push the manifold against the tracker bar for a good seal had the effect of bowing the tracker bar away from the manifold in the middle, so I added a thin aluminum lip to the shelf on the back of the manifold. The lip is just thin enough to fit between the tracker bar and the wood cover behind it and it allows the manifold to hook over the top of the tracker bar and more positively hold the bar along the entire length of the manifold with enough preload on the tape to seal. This essentially solved the leak problem.
Currently there are ~12-15 keys that I’m tracking down problems with, this started from ~20 and was reduced by working through electrical/alignment problems. On the remaining dead keys I’ve ruled out problems on the piano side, problems with the lower plate, and any electrical problems; so next step may be replacing the valves themselves. It’s possible that those keys need more airflow, which would require milling their passages deeper and/or modifying the valves; hopefully it doesn’t come to that. Once they’re all firing though then the mechanical work on this is basically done and I’ll be able to shift focus to the control system side.
