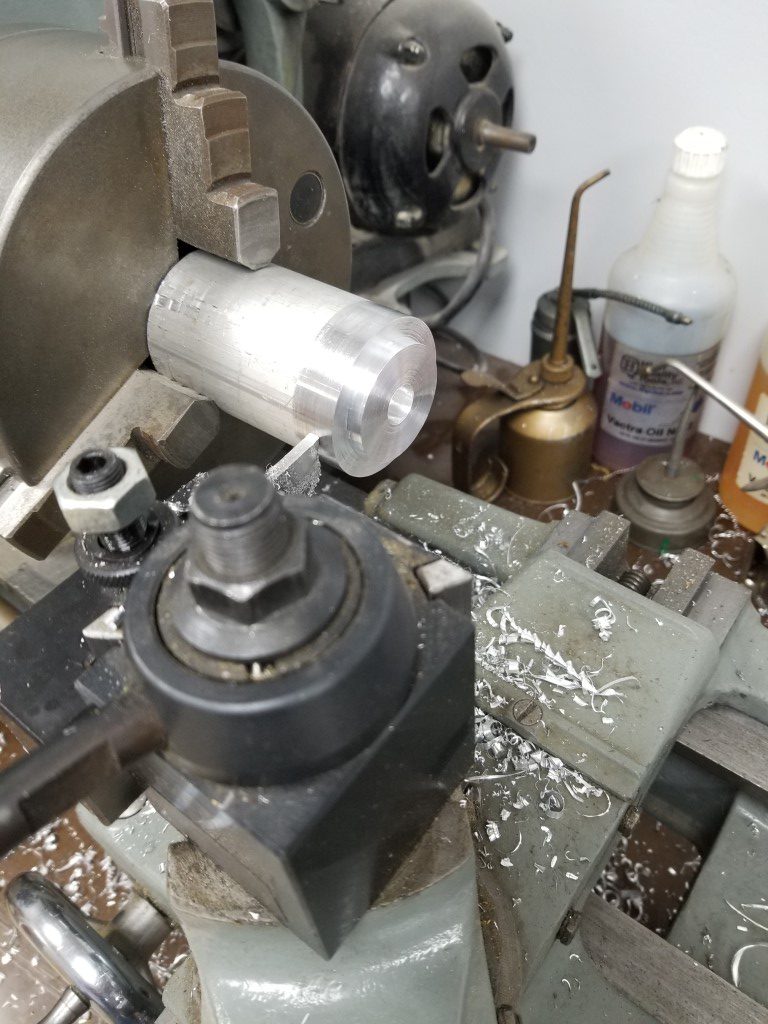
Kubota F2000 Wheel Rebuild
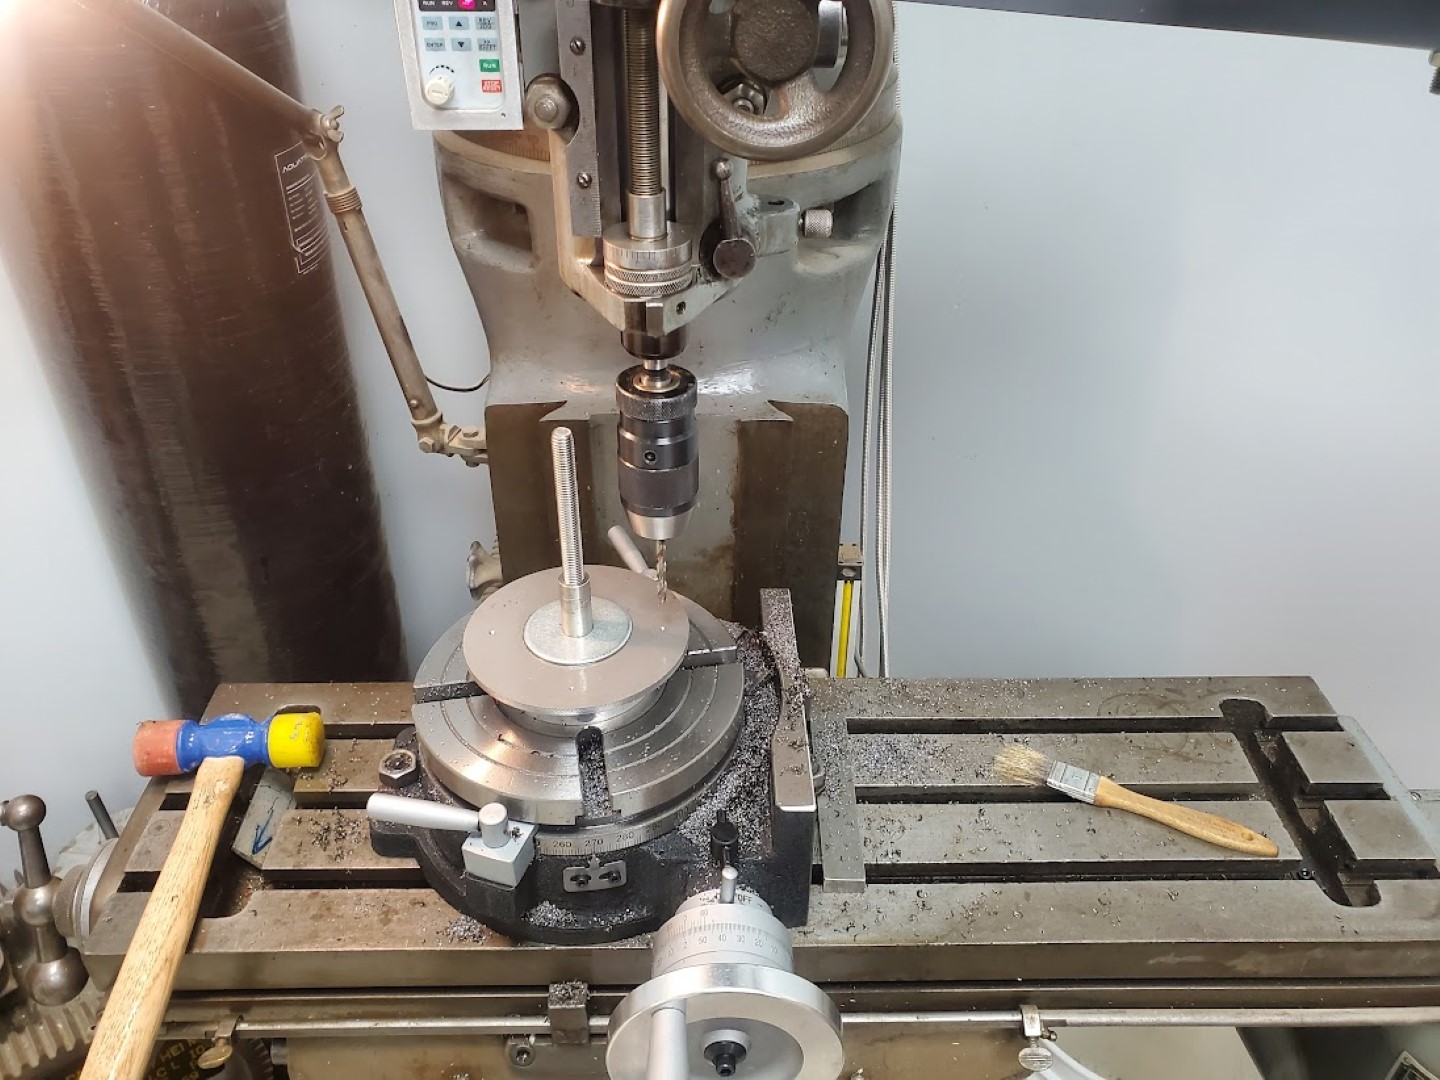
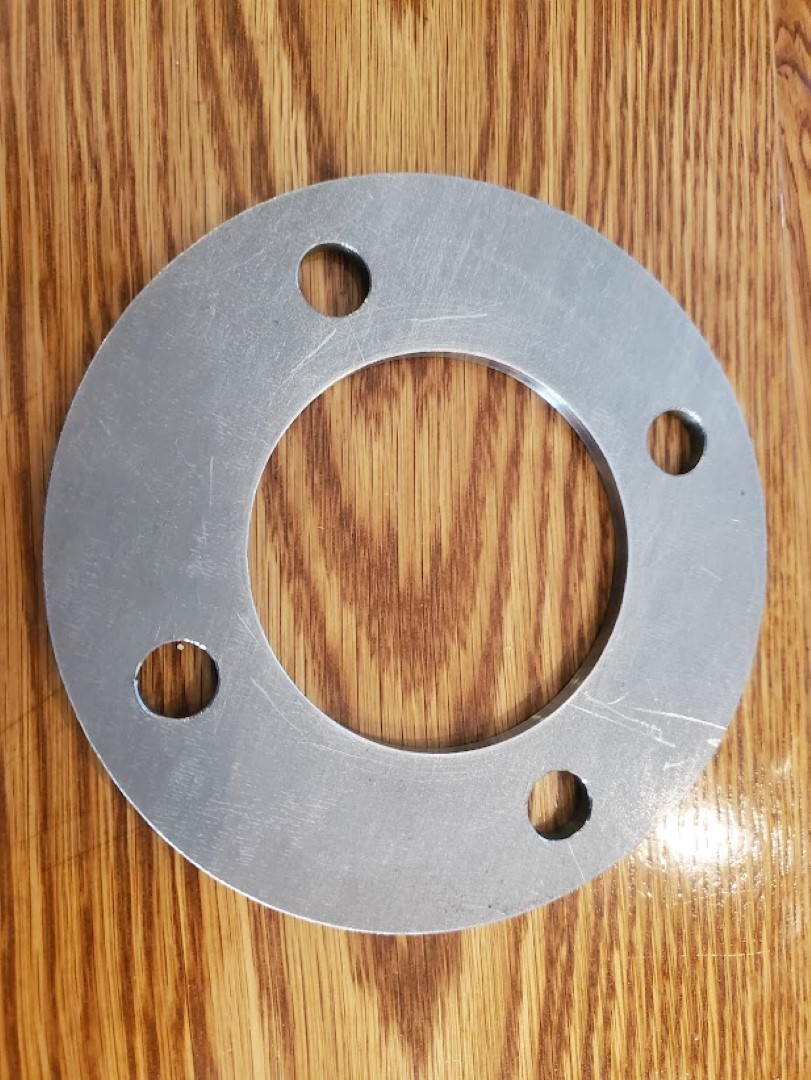
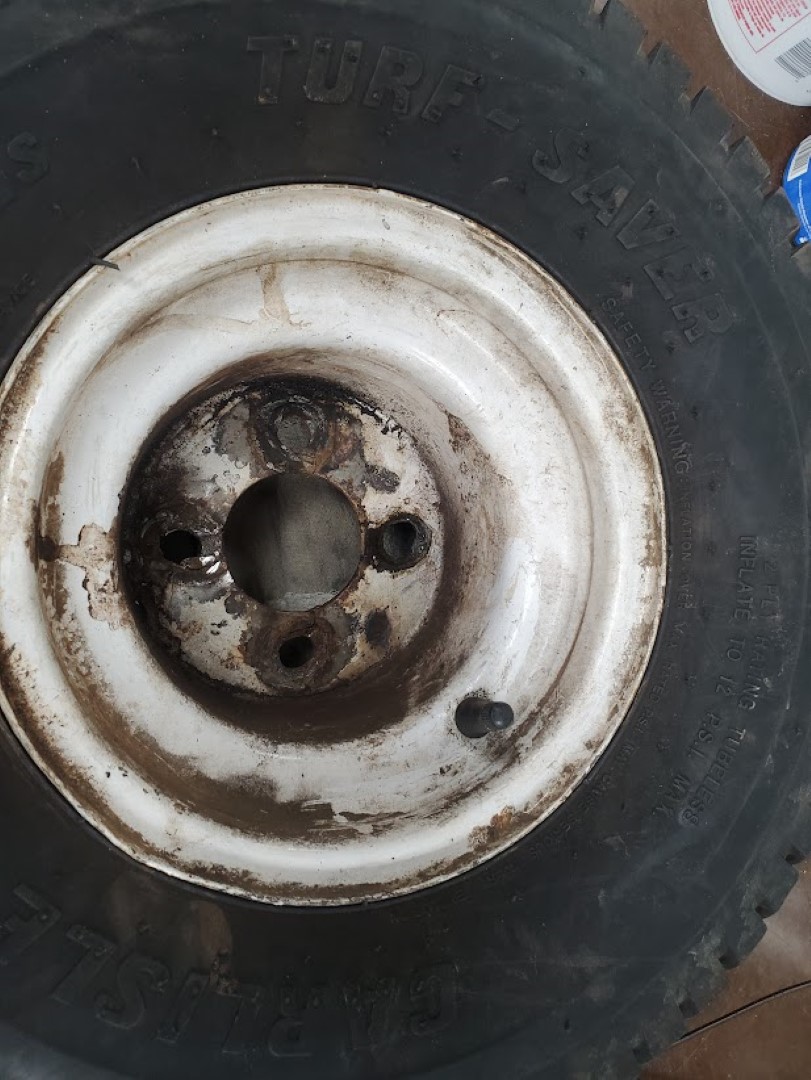
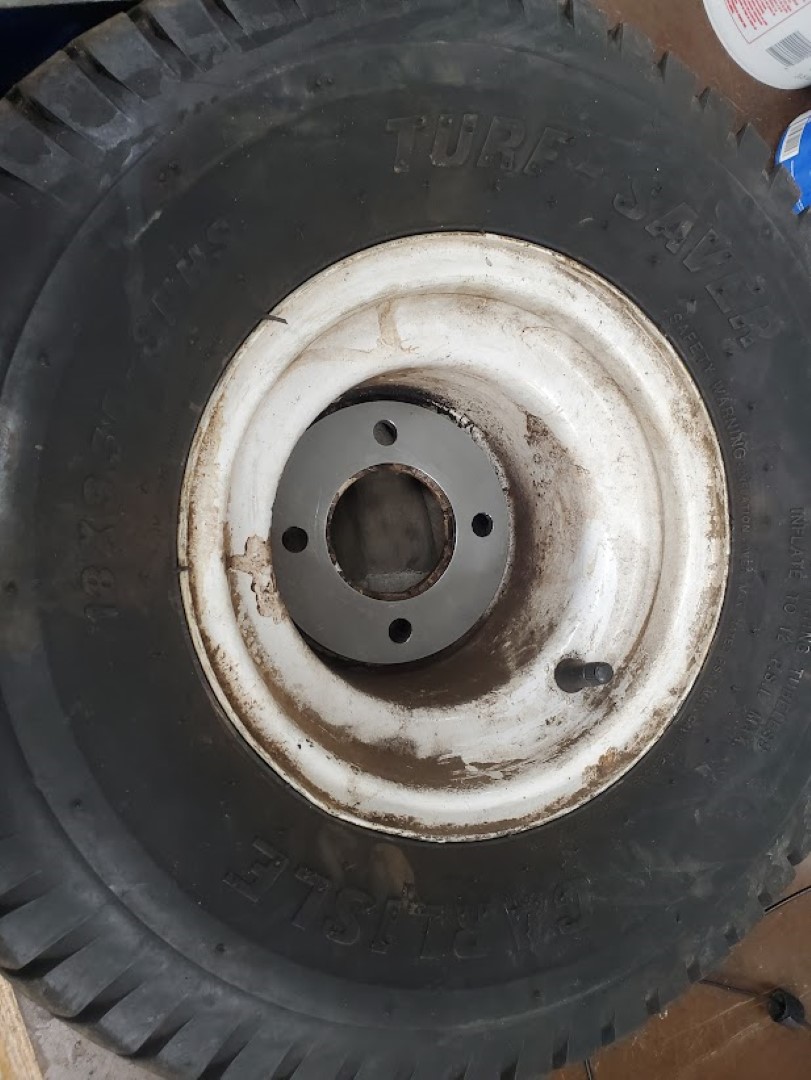
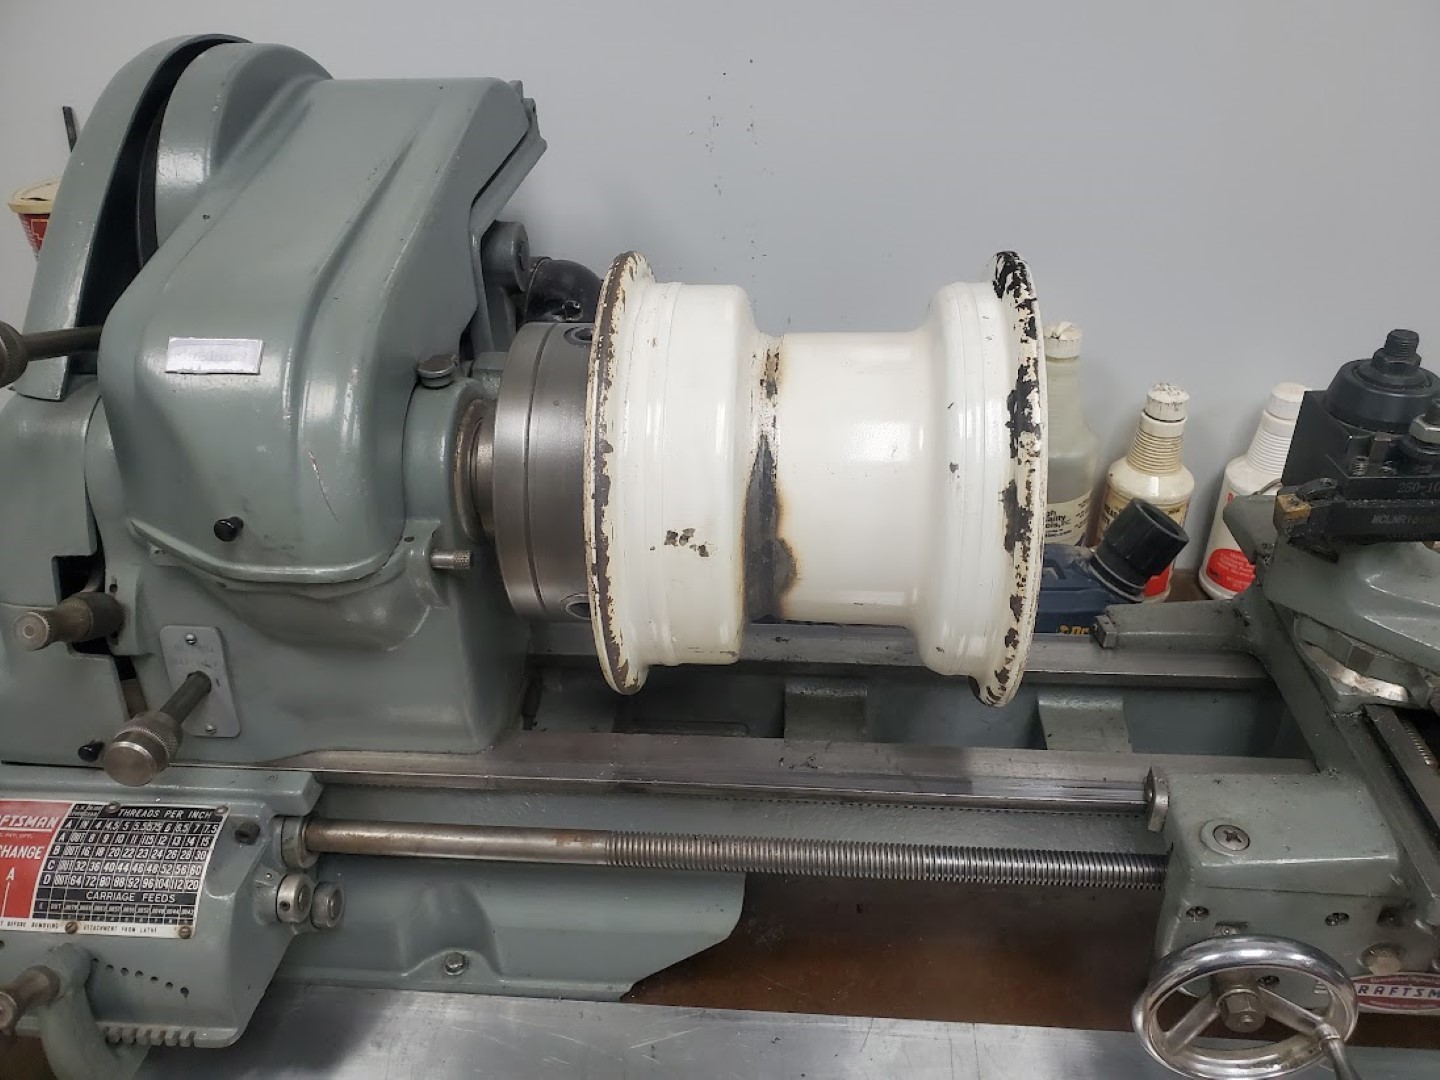
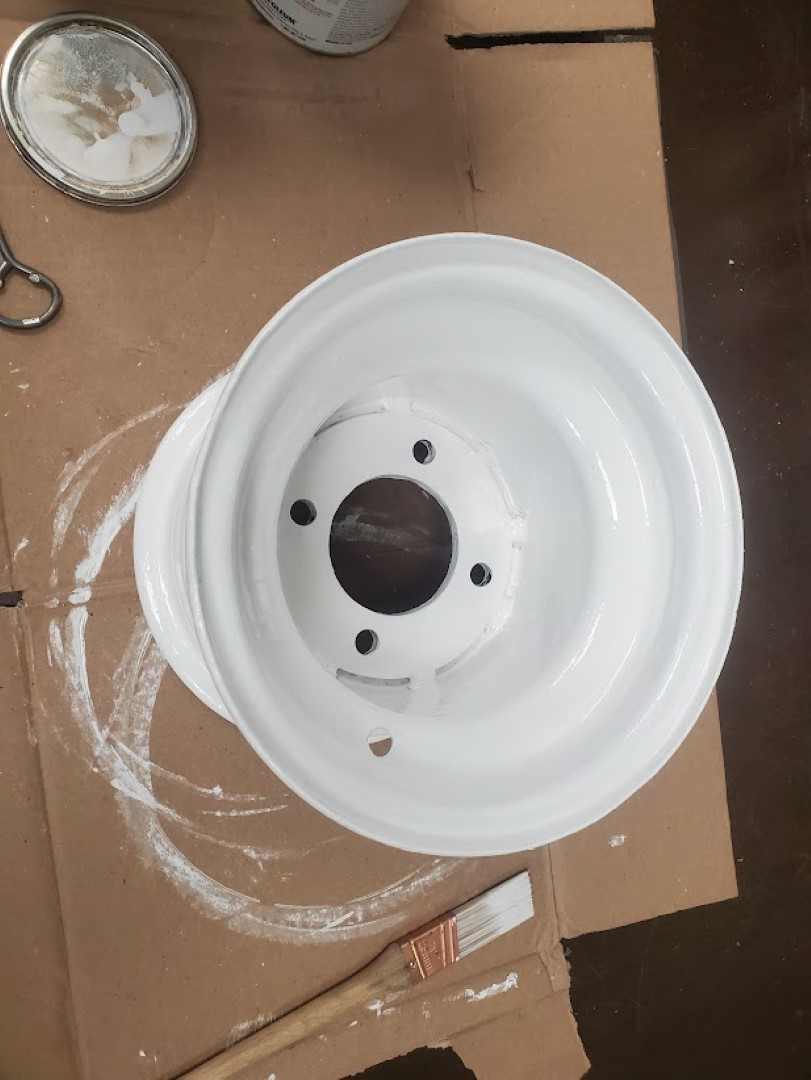
Recently one of the wheels on the mower broke. This hub of this particular wheel has always been a weak point and I’ve welded it back at least once. This time it was too far gone though and I intended to replace it… that is until I realized this wheel is a very odd size and offset that’s specific to this series of mowers. It wasn’t clear that replacements were obtainable. With that being the case I decided to machine a new flange that could be welded in place to reinforce the inner wheel. The flange consisted of a 1/4″ steel plate turned down to the right diameter, then center bored and hole pattern drilled on the rotary table. The flange was then welded in the wheel and the back side faced on the lathe to ensure the face of the wheel would be perpendicular to the axle hub.

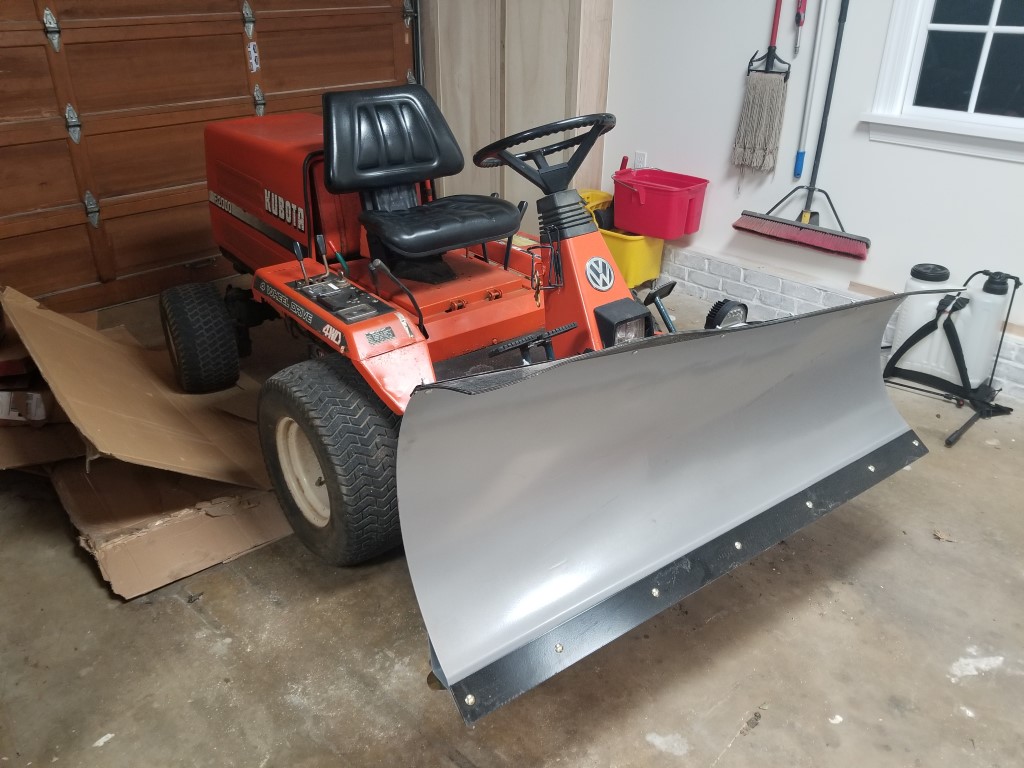
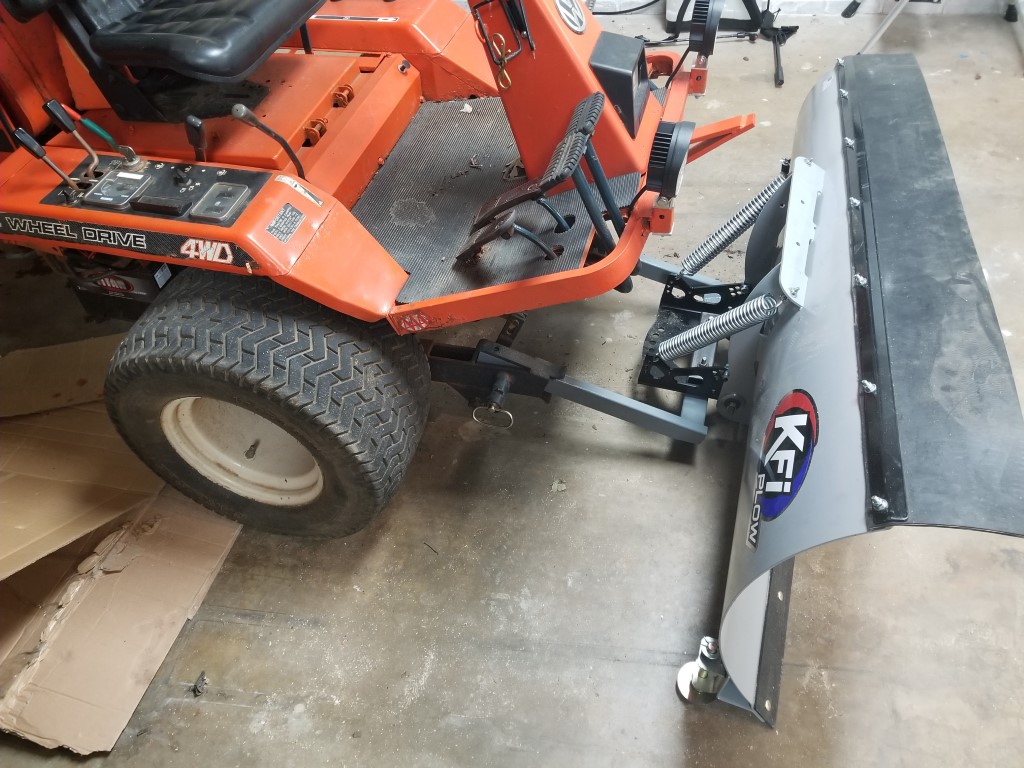
Kubota F2000 Snow Plow
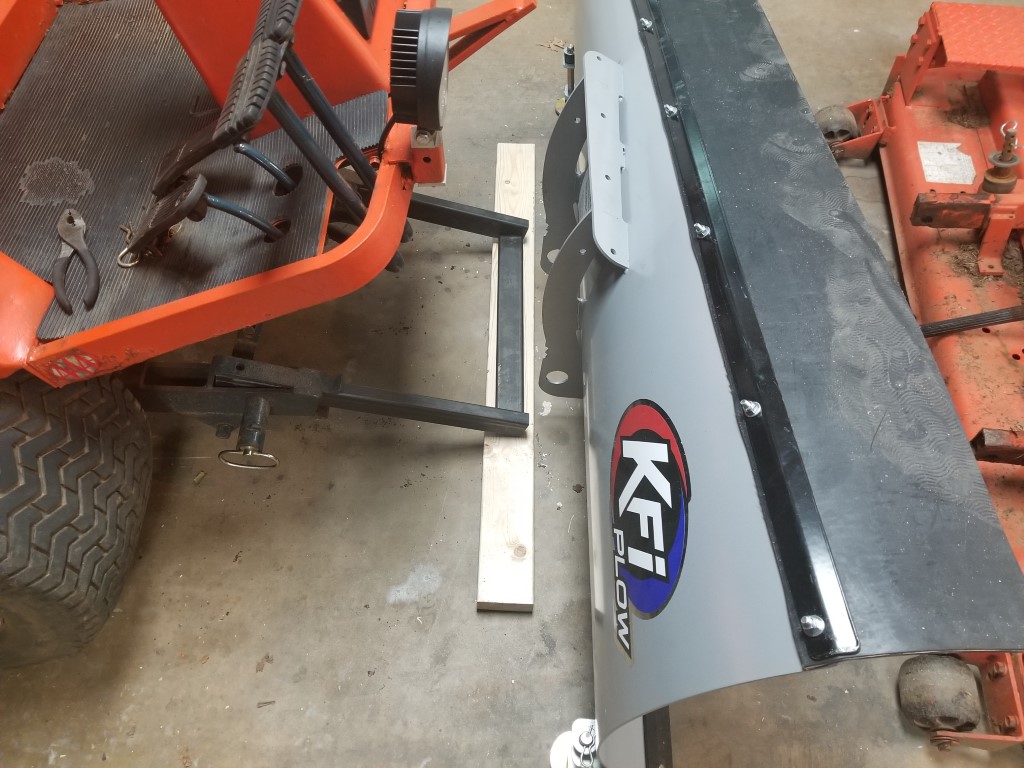
We don’t get much snow here, but when we do it takes a lot of shoveling to get out to the road. If conditions are just right we can be stuck for several days waiting for it all to melt. As a result I’ve had a mower/atv sized plow on my watch list since last winter. Recently a new open-box plow popped up that, after factoring in their free shipping, I got for basically scrap value or less. I think the reason for the low price was that it had originally been part of a kit, but all the mounting parts were missing. For my purposes that’s OK though – no one makes a kit specific to the F2000 anyways, so I was always going to need to fabricate the mounting parts myself.
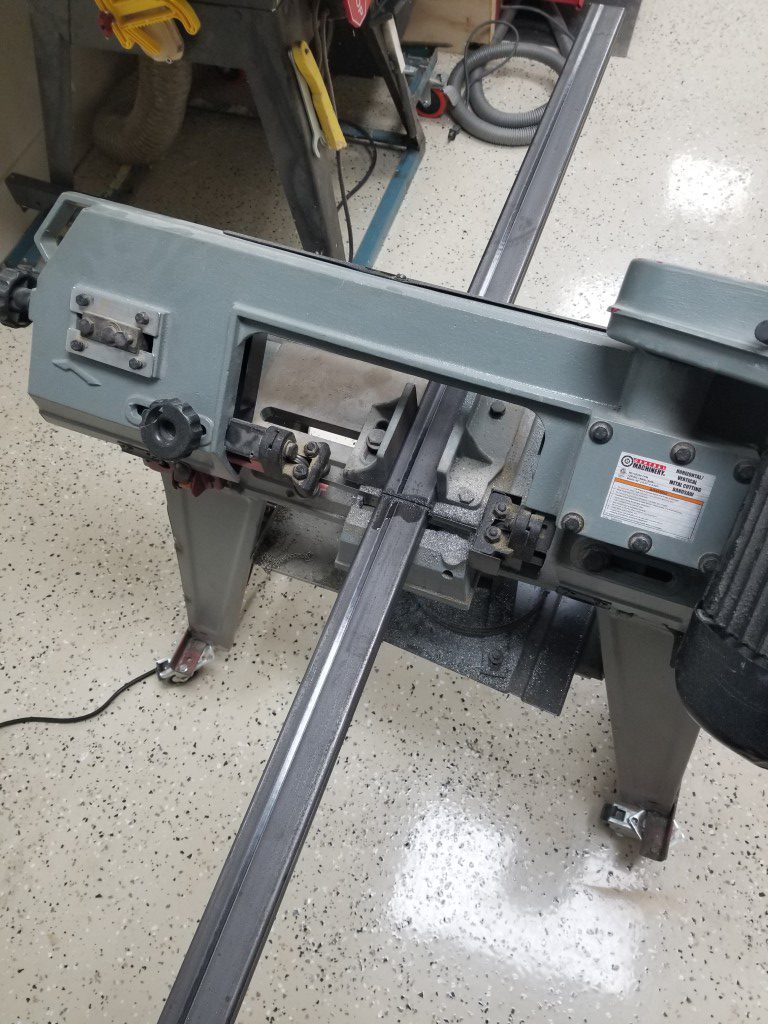
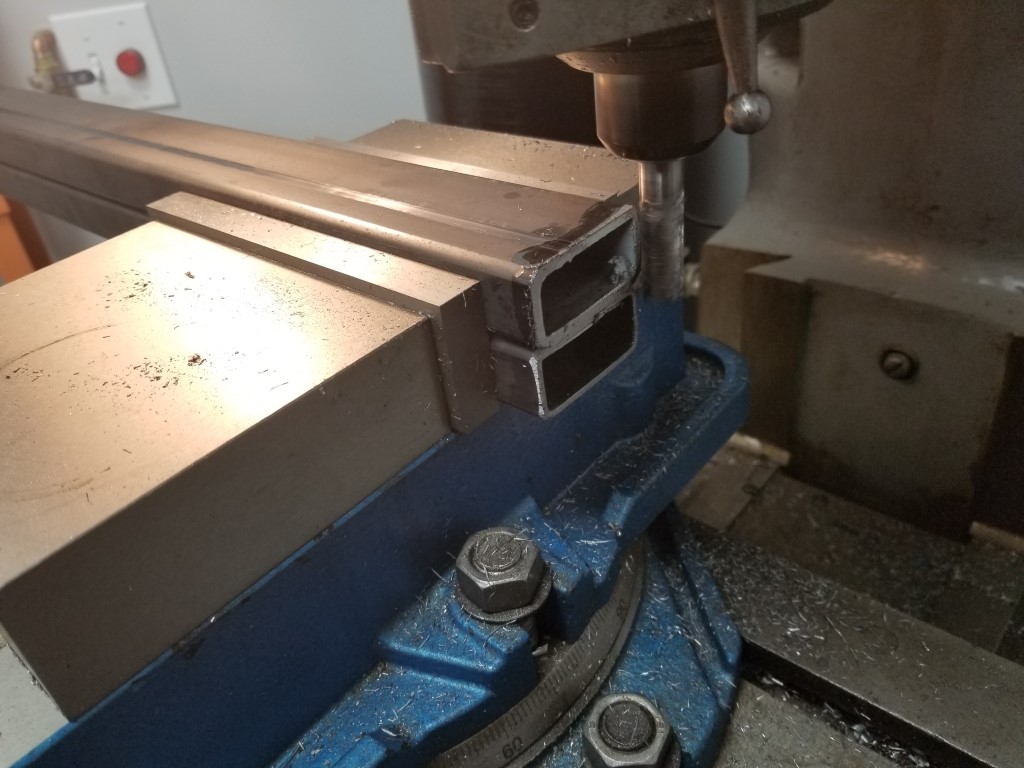
Making the mounting bar just consisted of cutting some 1″x2″ tube to length, squaring off the cuts on the mill, drilling holes for the pins, and then welding everything together. From there the plow’s base just clamped between the mounting bar and another section of tube.I made the clamping bolts fit just inside the plow base’s big hole so the plow can be rotated by loosening the bolts. Since the push bar connects to the standard implement mounting points, the plow can be raised/lowered the same way as the mower deck. I also needed to make some stepped bushings on the lathe to fit the plow base to the plow.
Kubota doesn’t list a tow/plow rating for the F2000, but it’s 4WD with a 3 cylinder diesel and built exactly the same as a ‘normal’ compact tractor, the only difference is that its seating position is spun around 180deg. For occasional plow usage I don’t foresee any issues. I may need to tie into the plow base’s rear holes for stability and to prevent unwanted rotation, but I’ll try it out first to see if this is necessary.
As part of the plow installation project I also went through the mower’s electrics and replaced a lot of corroded connectors with solder/heatshrink splices. It turns out the glow plugs hadn’t been working all along. With the glow plugs now working it starts a lot faster and in winter this will likely be a necessity to start at all.


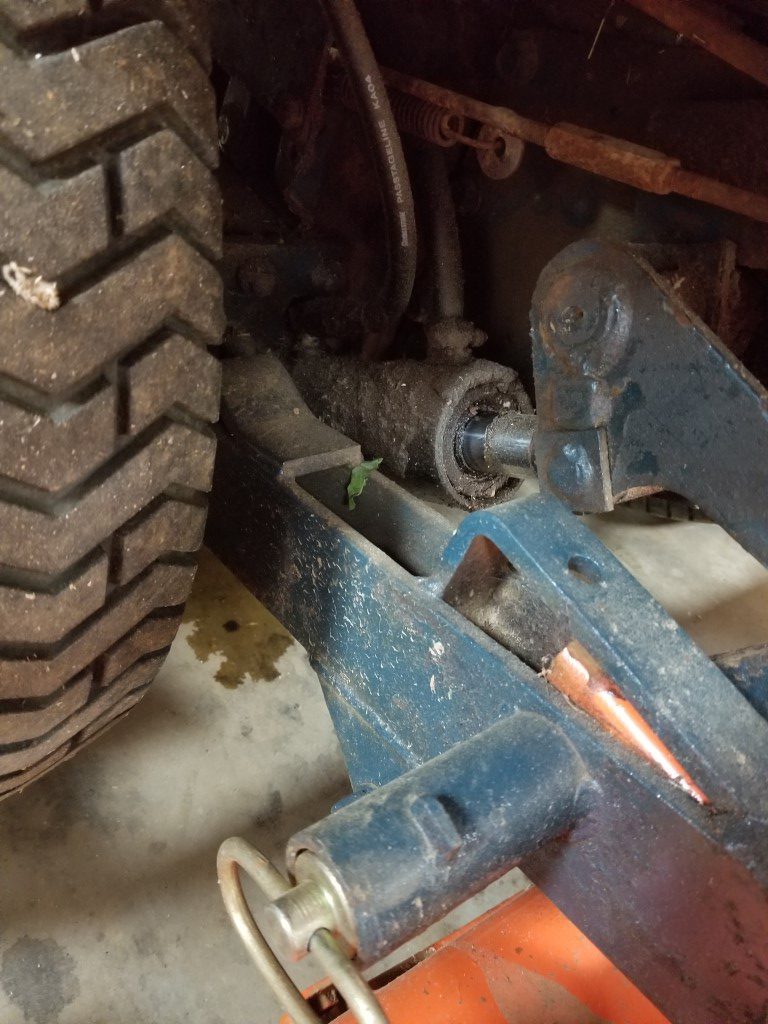
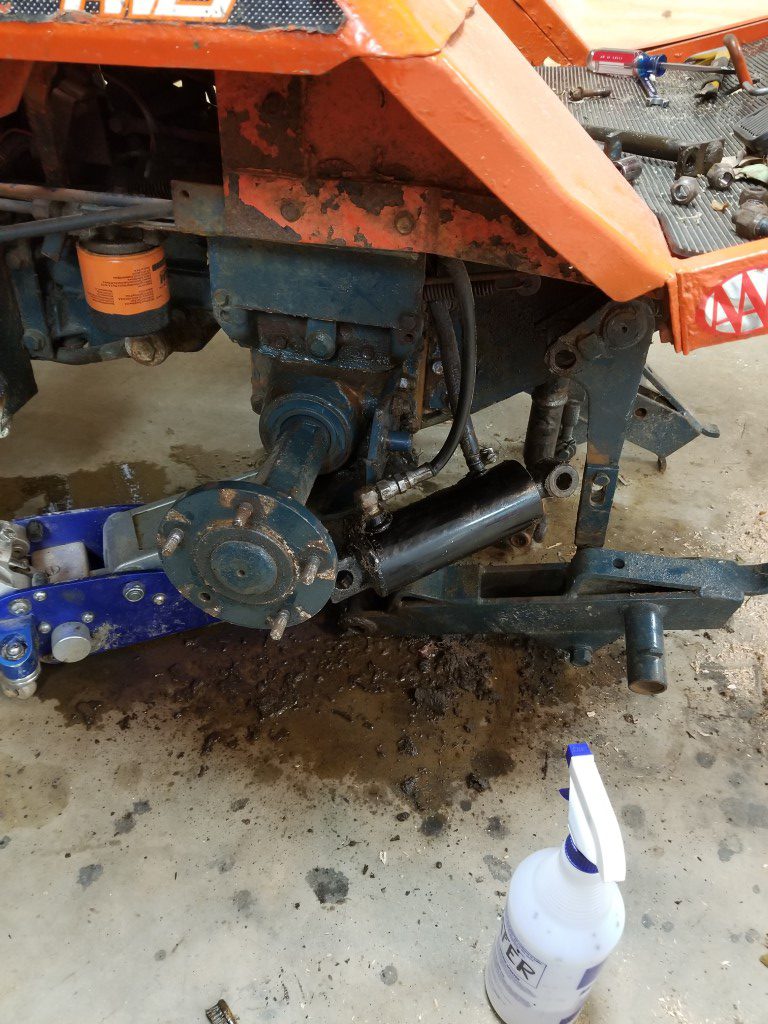
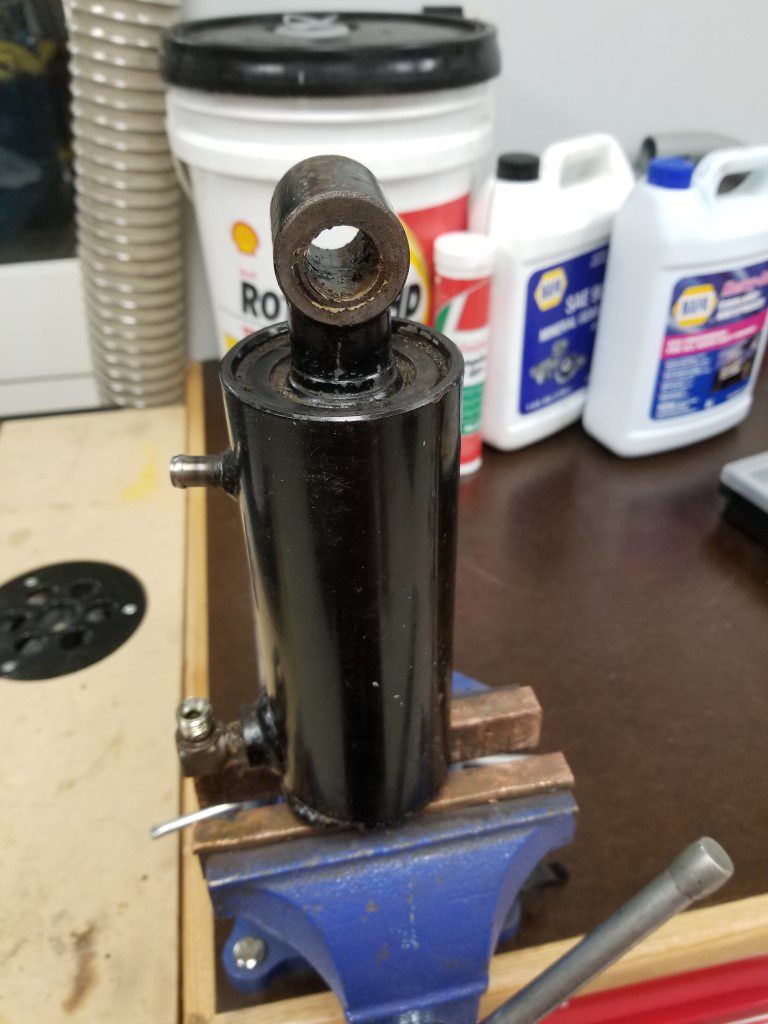
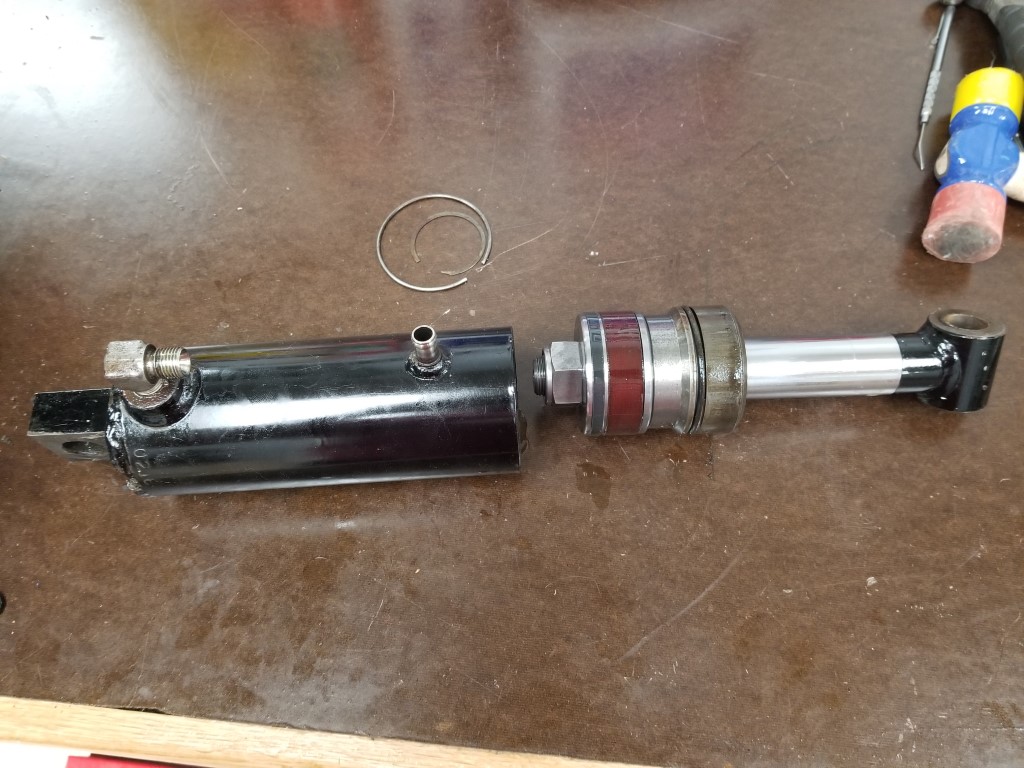
Kubota F2000 Lift Cylinder Re-Seal
Tonight I rebuilt a leaking hydraulic cylinder on the mower. The leak was coming from the scraper/seal that seals the rod to the end of the cylinder. Unfortunately since the end of the rod is larger than the seal, the cylinder has to be disassembled to replace it. The process went as follows:
#1 – Remove cylinder from mower.
#2 – Remove the internal cir-clip that holds the cylinder end inside the cylinder bore. This was extremely fiddly and took 20min or so with dental picks and small screwdrivers to get the end of the clip pulled out.
#3 – Remove the cylinder end and piston/rod from the cylinder bore. The cylinder end’s O-ring catches on the cylinder’s cir-clip groove, so while it moves freely to a position that’s ‘almost’ out of the bore the last bit of movement requires clamping the rod in place and persuading the cylinder downwards with a hammer.
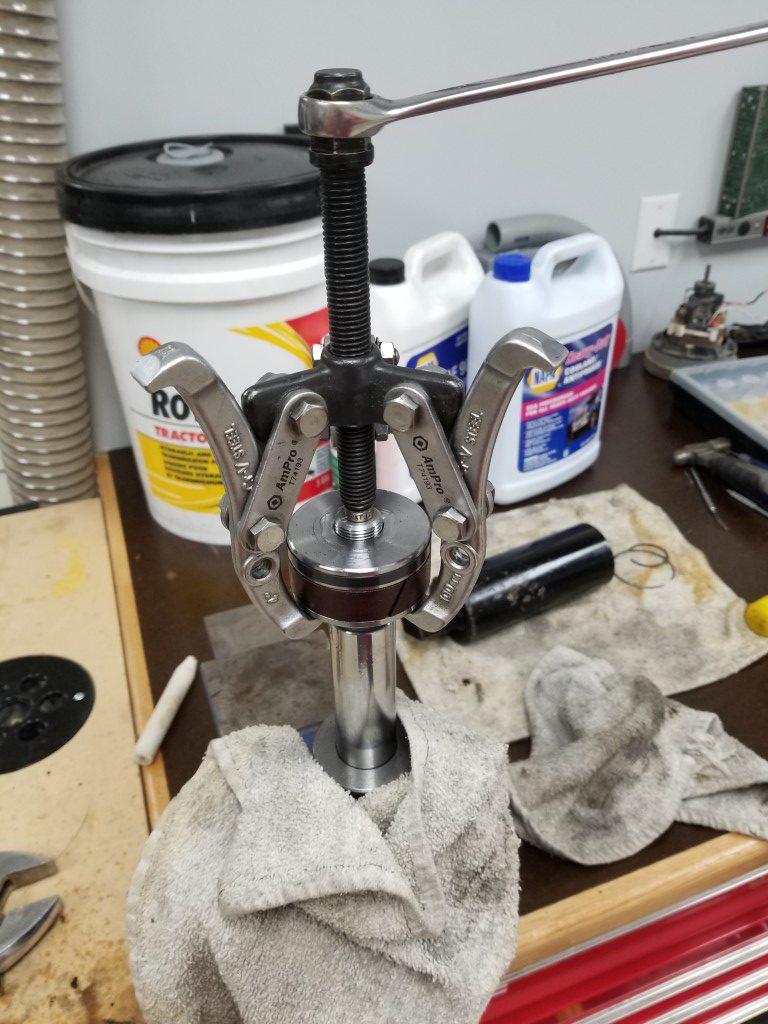
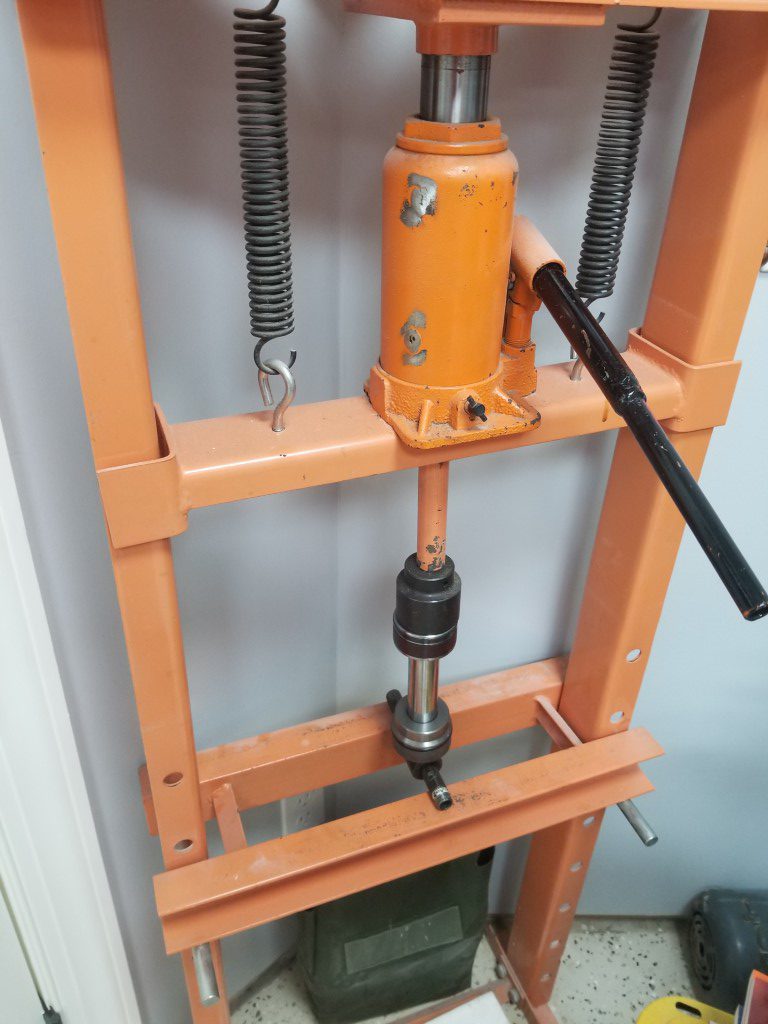
#4 – With the piston/rod/end removed from the cylinder, the nut can be loosened and the piston removed. The piston is a press fit and requires a gear puller to remove and a hydraulic press to reinstall.
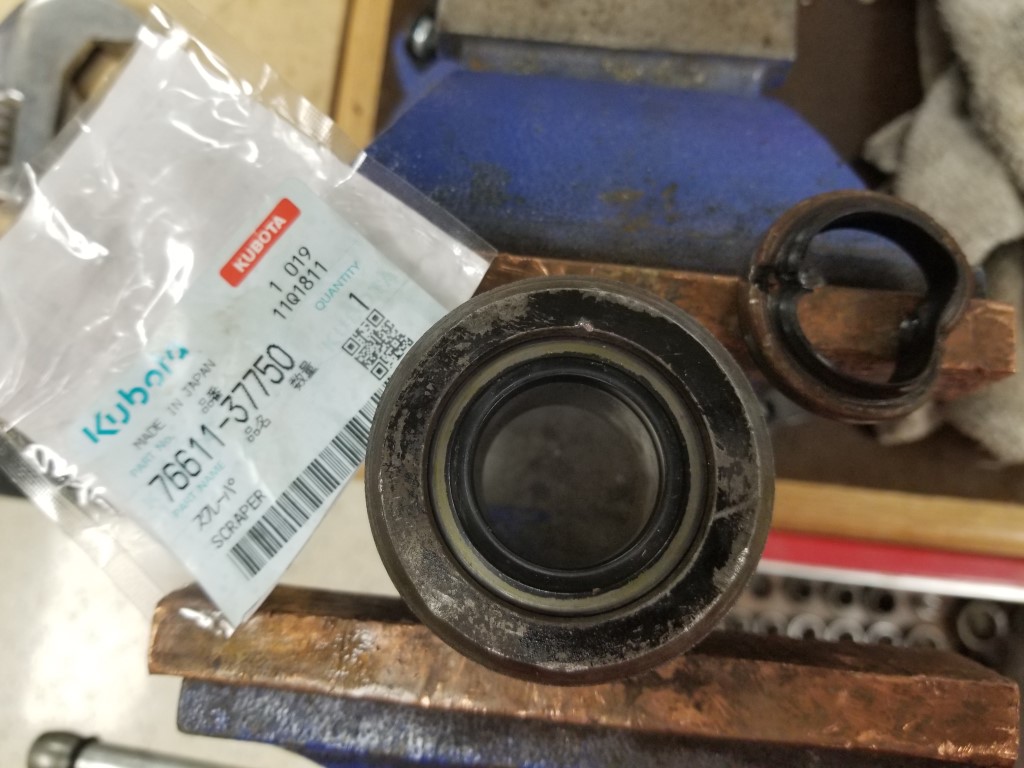
#5 – With the piston removed the cylinder end slides off of the rod and the scraper/seal can be replaced. The scraper has it’s own small cir-clip that’s much easier to remove.
#6 – Re-assembly is the opposite of assembly, while I was at it I also replaced the cylinder end O-Ring.
#7 – Reinstall
After the rebuild the mower no longer has any hydraulic leaks; the last remaining leak is an engine oil leak that I’ll be tracking down next…
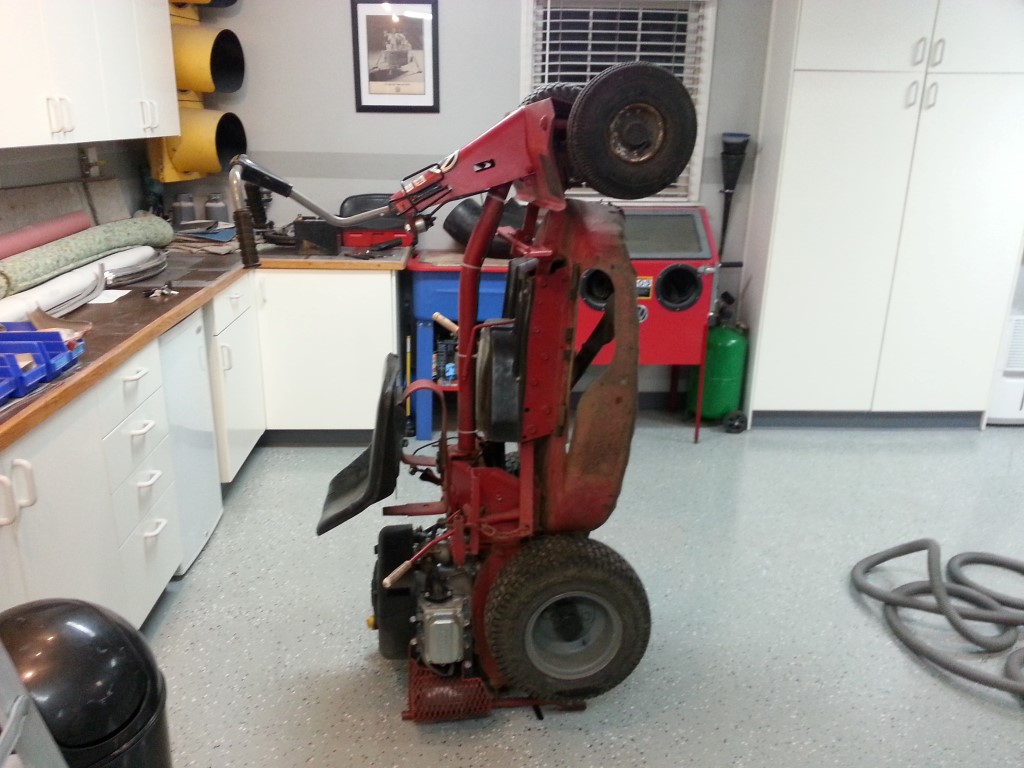
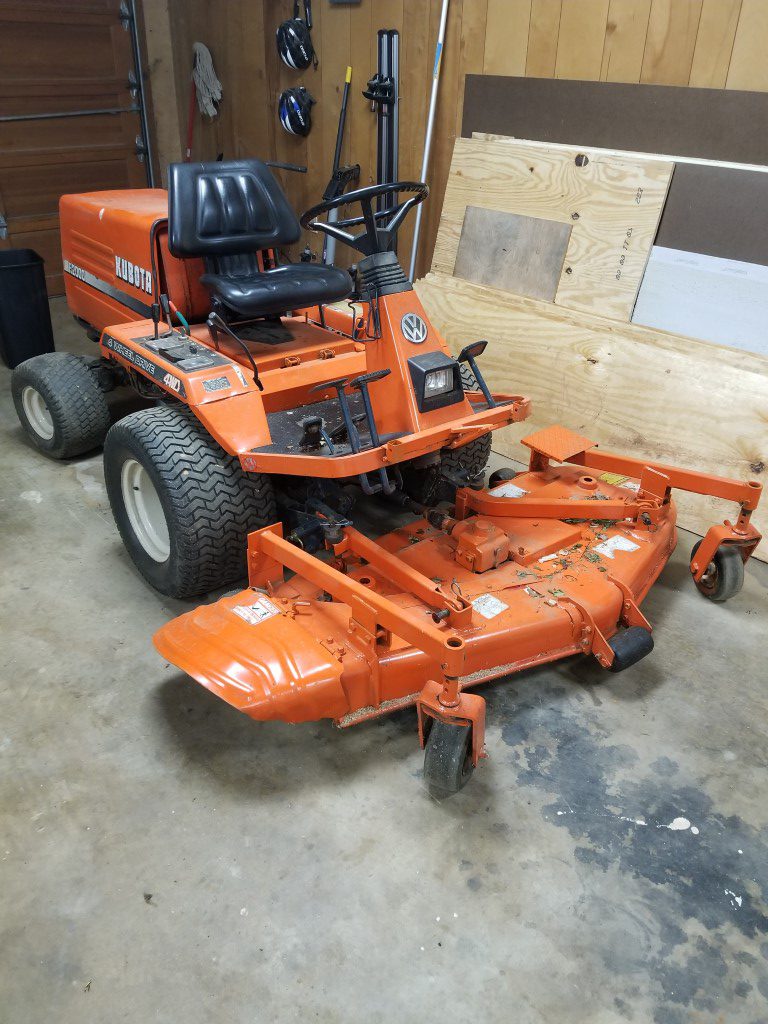
Garage floor finished, leaf harvest begins
I didn’t get “after” pictures from the garage floor project, but it’s visible in the mower pictures below. Overall it turned out very well and will be much easier to keep clean.
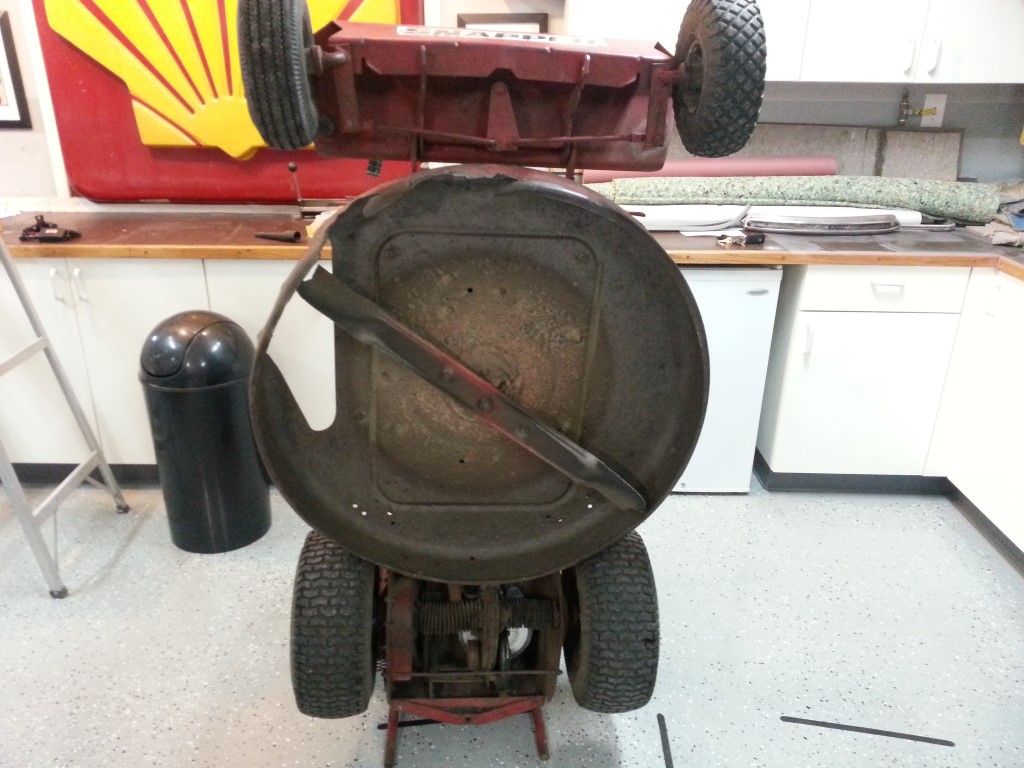
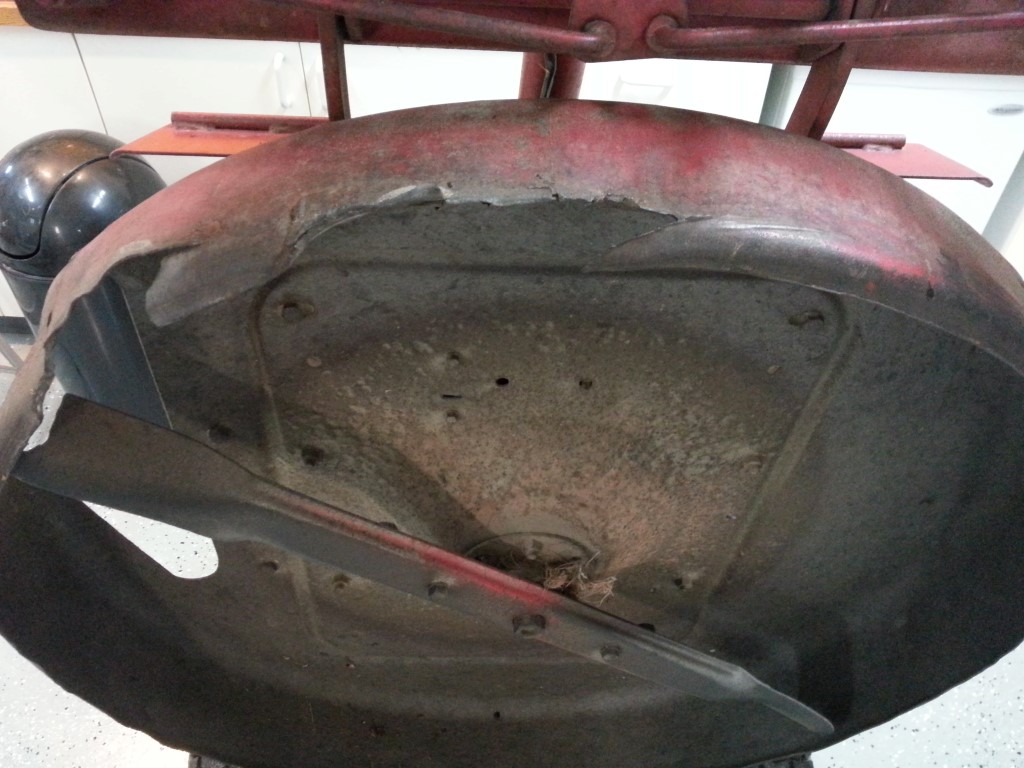
The leaves are falling this time of year and if left alone they are able to form a mat several inches thick over the entire yard/house/driveway/garage every few days. To combat this in years past I’ve used an arsenal of leafblowers, rakes, and mowers; the secret weapon in this arsenal though is the 33″ snapper rear engine rider from the mid 1970’s. It’s not great as a mower since the long single blade does not conform to the terrain; but as a leaf collection device there’s nothing better since the single long blade moves tons of air (think airplane prop). This moving air carries all of the leaves/sticks/nuts off of the yard and into the collection bag.
The mower’s deck had taken a beating from using it for trail-clearing; and once the deck deformed enough the blade began to wear against it. I’m replacing the blade and welding the deck back together so it can get back to clearing leaves. In the process of fixing the deck I may also add some sort of reinforcement or “cow catcher” to the front to prevent future damage.