-
Recent Posts
Recent Comments
Category Archives: Bus
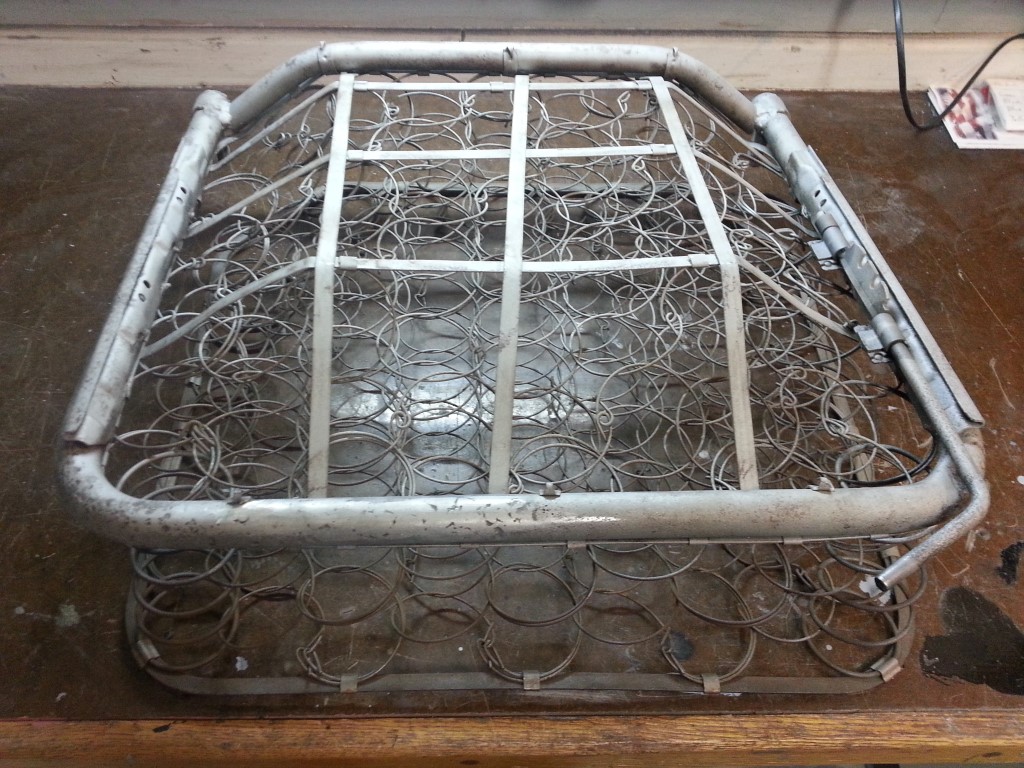
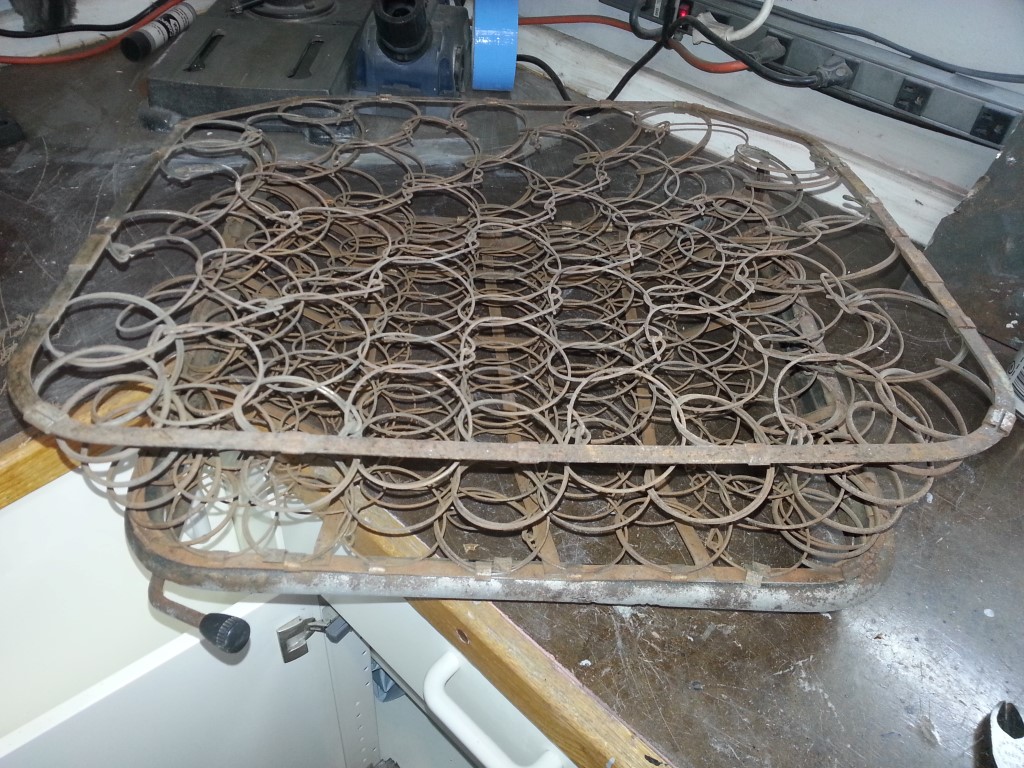
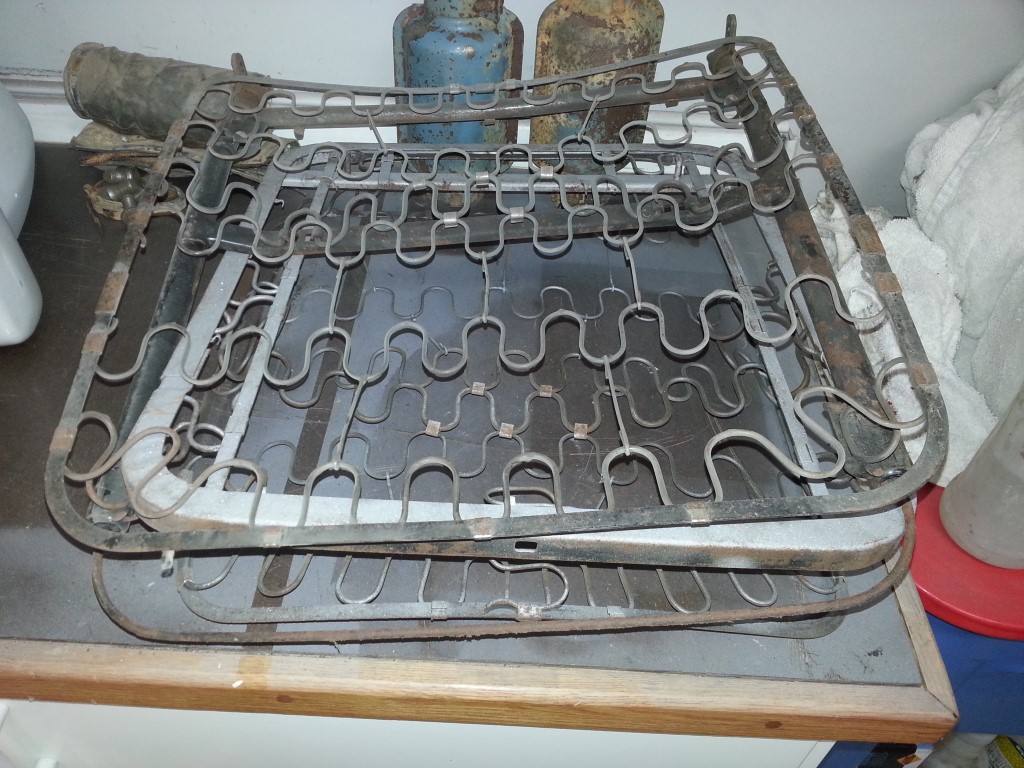
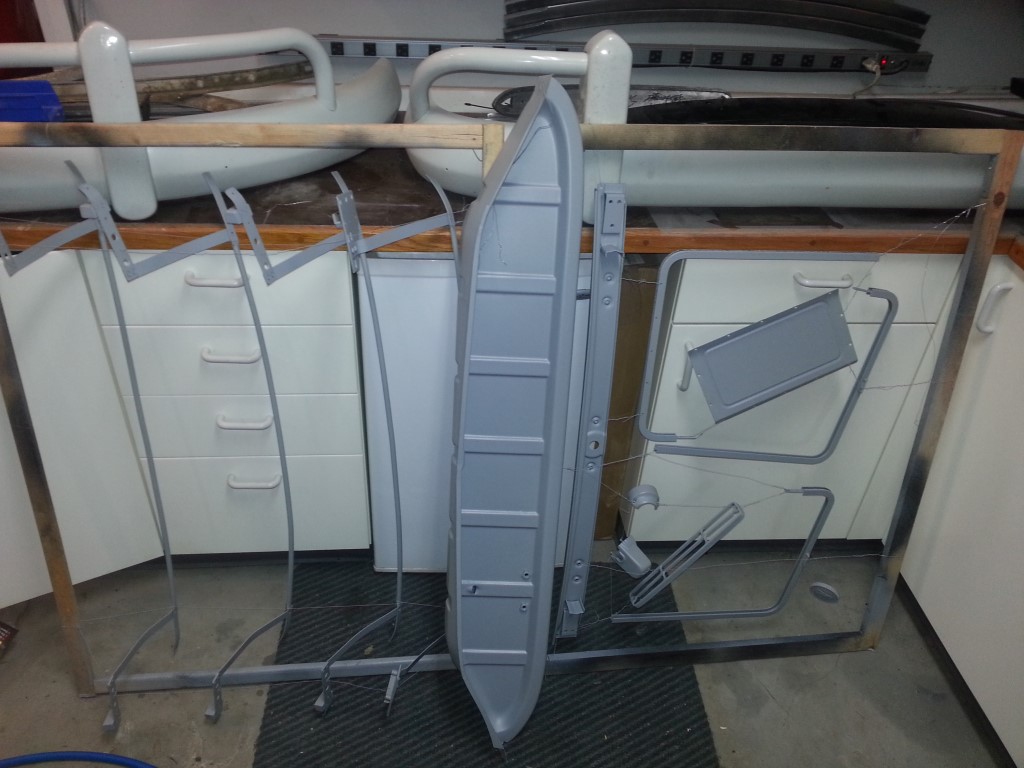
Seat Frames Blasted
Tonight the seat frame repair welds were ground down and the frames were media blasted in preparation for paint.
Weekend Progress
Lots of activity this weekend:
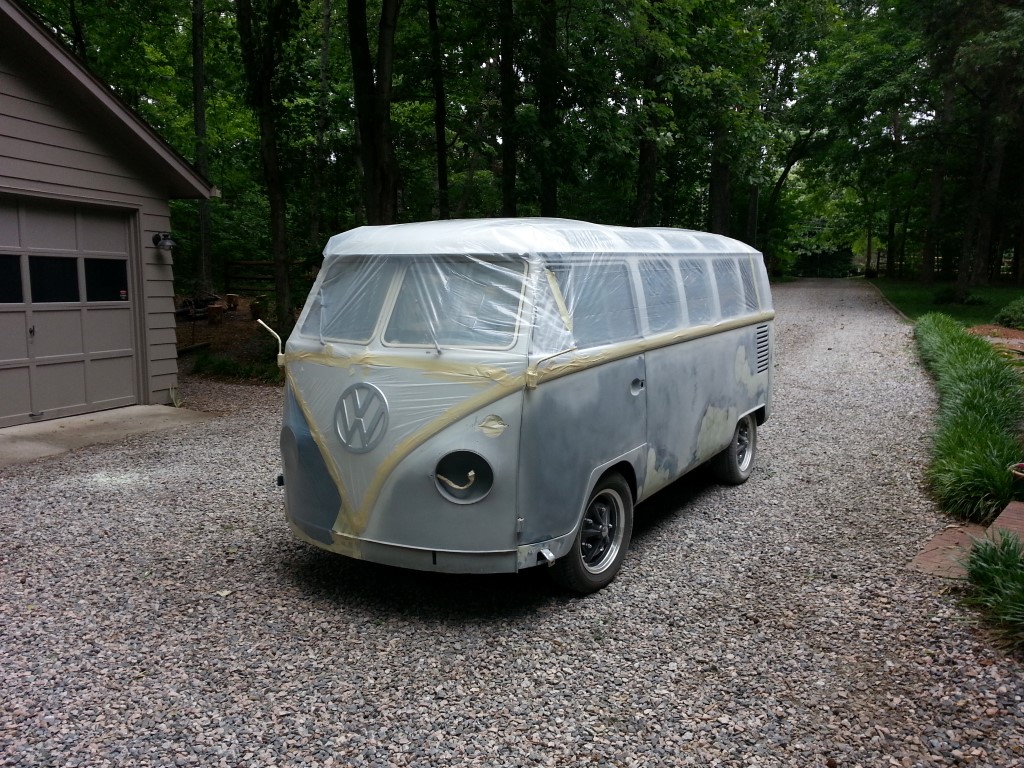
#1 – Another coat of high build primer was applied and block sanded. Block sanding is very time consuming but I’m starting to see very good results. The pattern of colors that the primer/filler makes after sanding started off looking like a topographic map of the Himalayas; with each coat I can see it’s flattening out substantially.
#2 – The pop-out frames were glazed, sanded, and re-primed.
#3 – The black parts in the latest round of small parts (mostly sunroof parts) were painted black.
#4 – The low spots on the body got yet another coat of high build primer after #1.
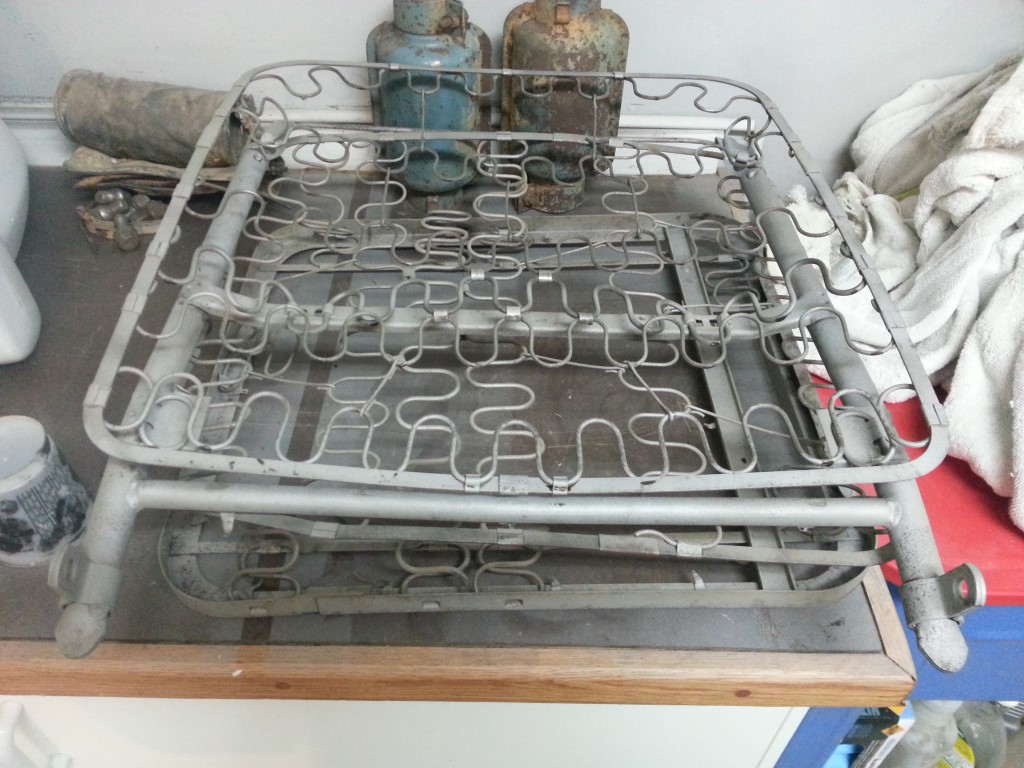
#5 – The seat frames were partially sandblasted, but the effort was cut short since the blaster kept clogging. I rebuilt the blaster and it should perform much better on the next rain-free blasting opportunity.
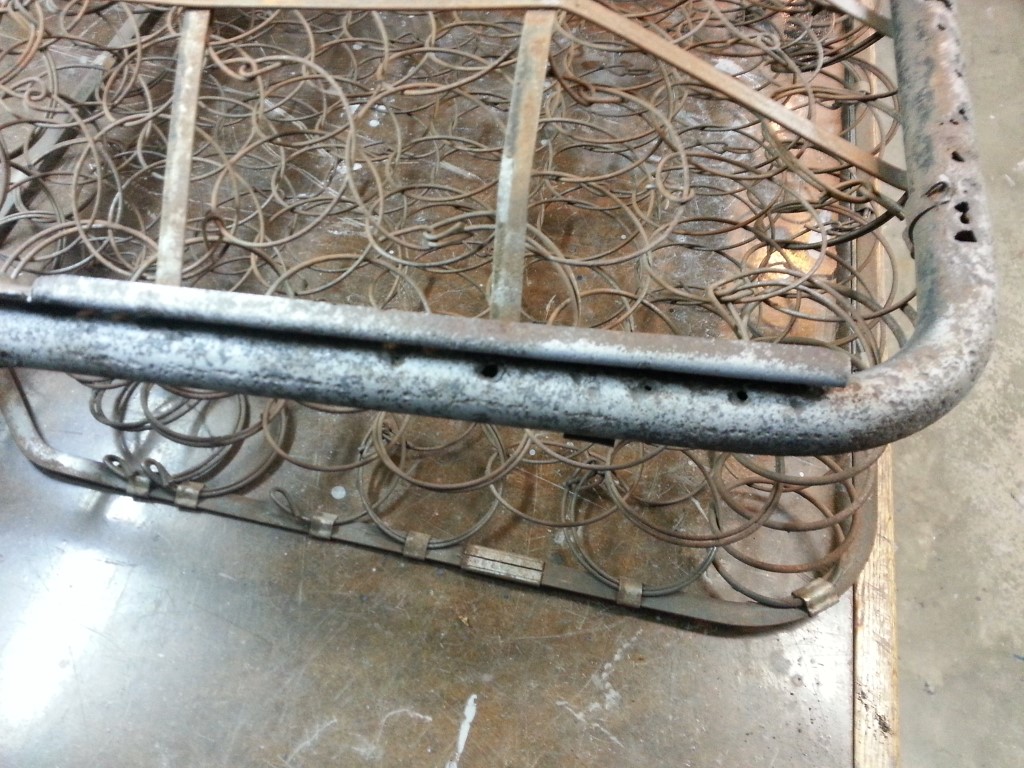
#6 – Holes in the drivers side front lower seat frame were welded shut. I forgot to take pictures after the welds were ground down, but it turned out very nicely.
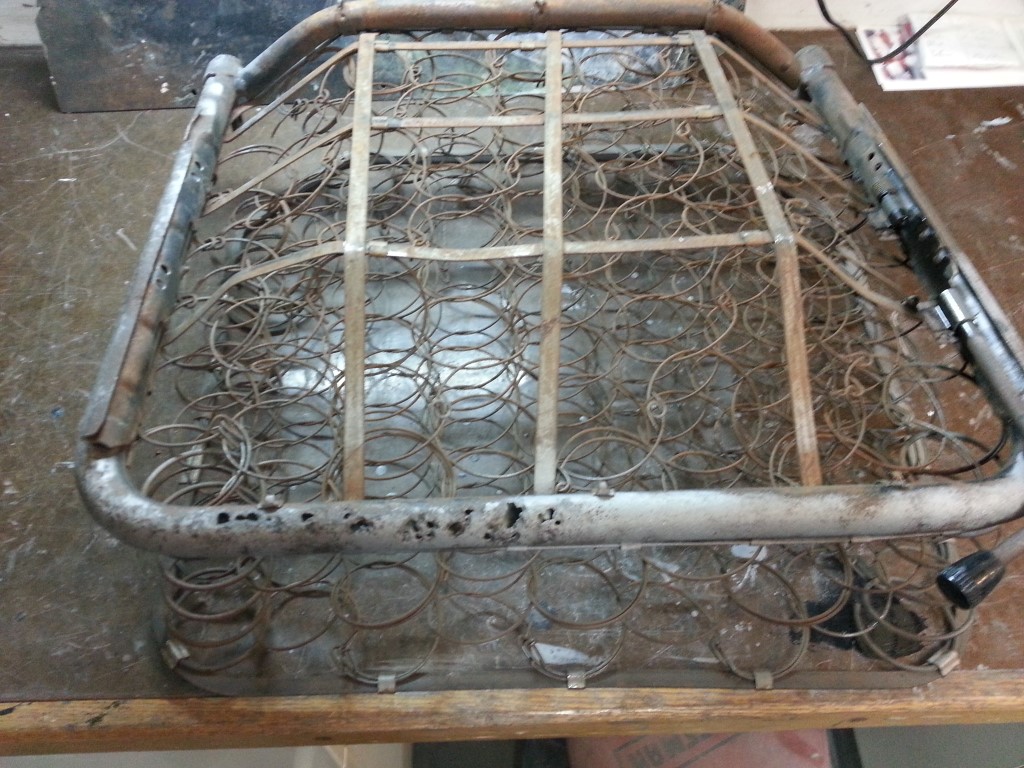
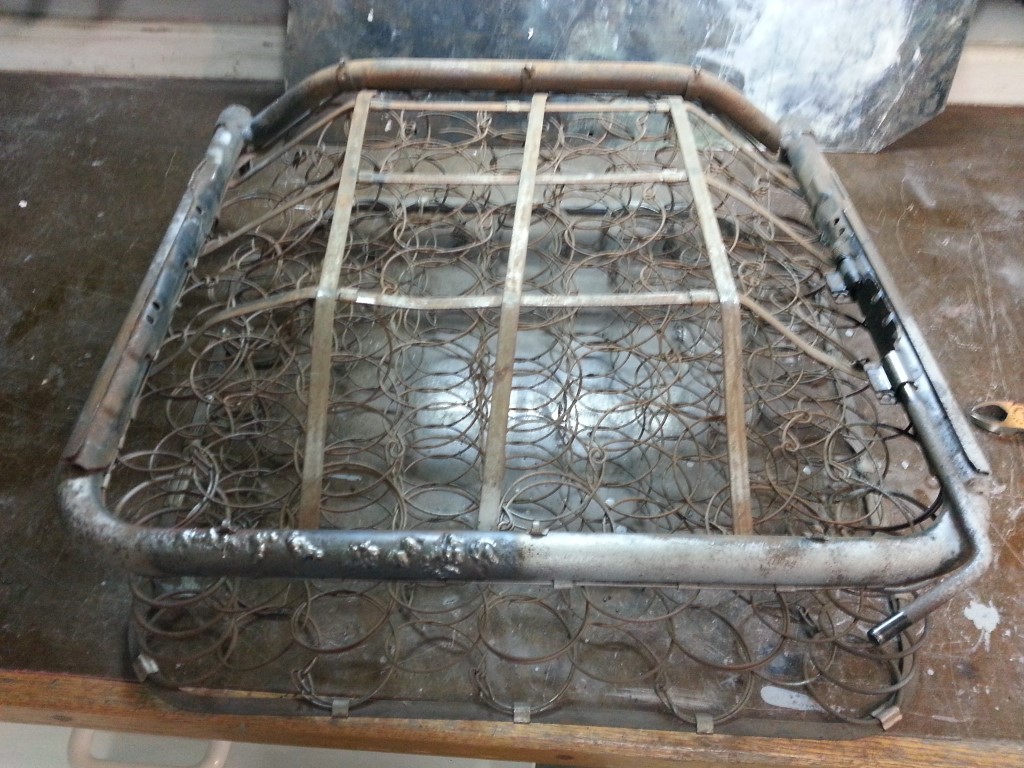

The search continues for the elusive passenger side front lower seat frame. This seat is specific to the optional ‘walk-through’ configuration that this bus has. Although the ‘walk-through’ option was heavily advertised it was expensive, so the minority of buses were built this way. This problem is compounded that through the years, especially during the 1970’s custom van craze, many of the walk-throughs had their bulkheads cut (mine included, but fixed) to install swiveling seats. When the swiveling seats were installed in all these buses the original seats were lost forever, though I’m not sure why they kept the passenger side seat back without the base.
High Build Primer
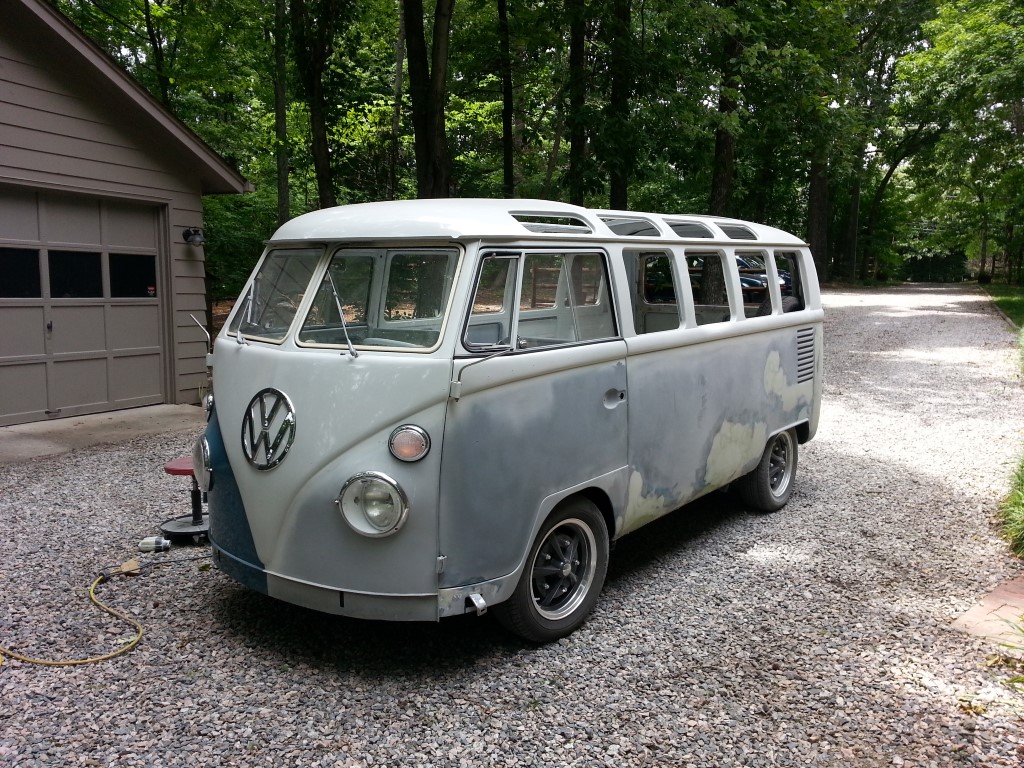
The bus and many small parts got a coat of high build primer tonight and last night. I was even able to get started with block sanding. The bus has very long flat panels so I’m primarily using a flat sanding block that’s about 18″ long, this is doing a great job of knocking down high spots that I’m not currently able to see or feel, but that would easily show up on the shiny top coat. The sanded surface can be ‘read’ while sanding: low spots stay shiny since they’re not touched by the sandpaper, and high spots are the first to have their texture disappear since they make first contact with the paper. Several more iterations of priming/sanding will be needed to get it as smooth as glass.
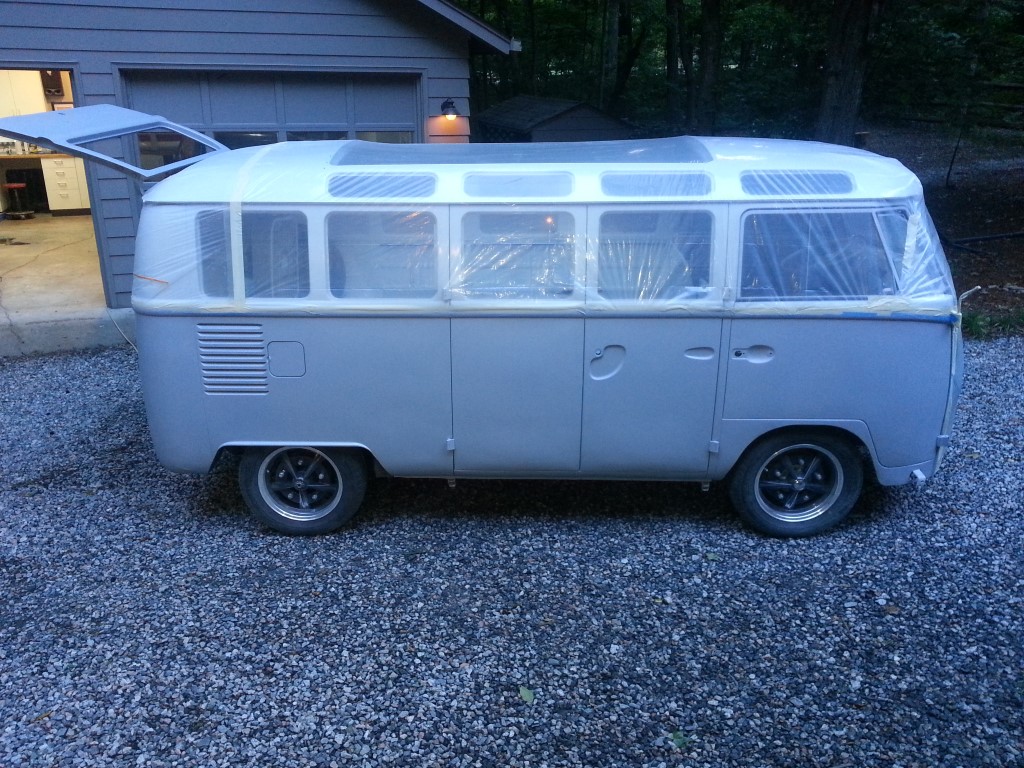

Lower Bodywork
This weekend I worked on the bodywork in areas that will be painted blue. It looks like a lot of filler by area, but by volume and thickness it’s not much; just a skim coat to smooth out areas were metal repairs were done and parking lot dents. The top is now mostly masked in preparation for the endless loop of priming & sanding that will soon occur.coats of high-build primer that will soon be painted on the bottom. Once that’s complete it will be time for blue paint followed by reassembly.
Rear Lowered
In the video it’s readily apparent that the back is higher than the front. This is because I had flipped the front spindles but not yet adjusted the rear suspension. Tonight and last night I fixed this by re-indexing the torsion bar spring plates one notch lower. I didn’t get any pictures but it is much better looking now; it’s within a degree or so of being level. The rear is still very slightly higher than the front; this should be corrected by the weight of the parts that are yet to be installed (windows, interior). Even if this is not the case I prefer this to having the front slightly higher, which looks odd; nearly all modern cars are biased towards having the rear higher when unloaded.
First Drive
Tonight I finished installing the accelerator linkage. With this in place it allowed for the bus to move under its own power for the first time; I drove it up and down the driveway many times without any real issues. This will allow me to move it in and out of the garage to work on the remaining bodywork in the driveway; saving lots of clean-up time.
Running Better
I replaced the spark plugs tonight and it’s running on all 4 cylinders now. A few parts are on the way that will improve the ignition further and allow the timing to be set for easier starting and better running.
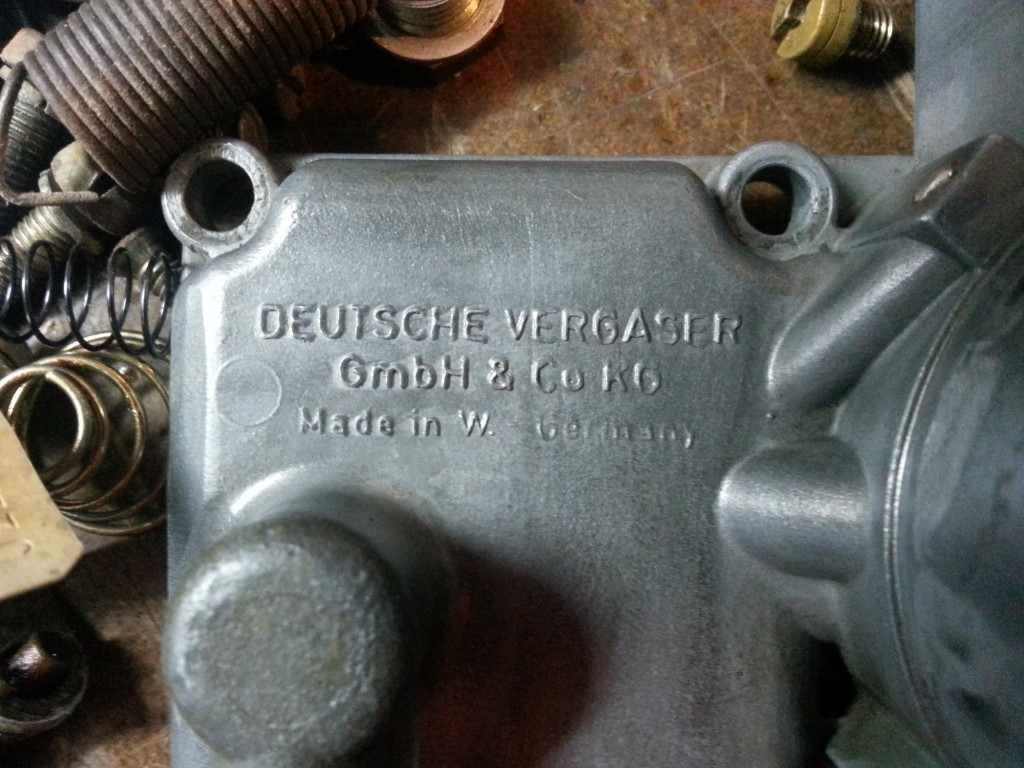
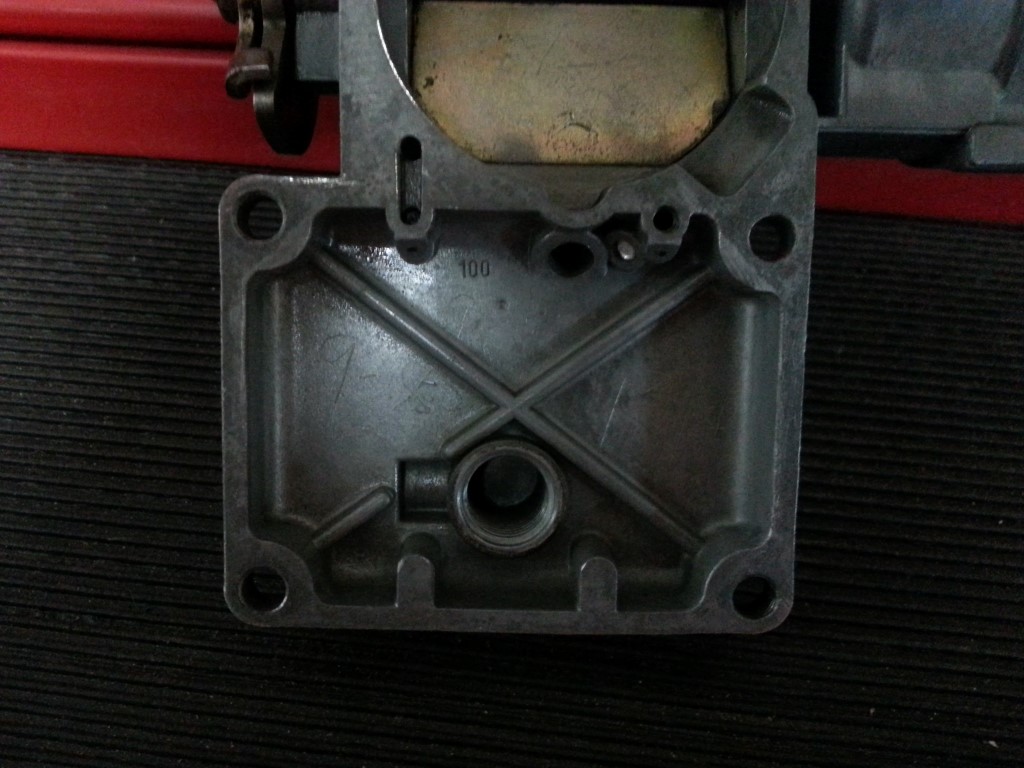
It Runs!
I was able to start it using starter fluid, but it wouldn’t stay running. It was apparent that no fuel was flowing through the carb, not surprising since it hadn’t run in ~30yrs. I was able to find a rebuild kit locally and rebuilt the carb. While rebuilding, I found “9-80 RH” scratched into the inside of the carb body. I’m guessing this means it was last rebuilt by “RH” in September of 1980; which makes sense since it was last registered in 1983. After the rebuild I was able to get it running on 3 cylinders; next week I’ll replace the spark plugs and a few ignition components which should fix this.

Lights
The last few nights have been spent installing the electrical harness and getting all of the electrical parts working. The lights (high/low headlights,blinkers,hazards), wipers, clock, ignition, and starter are all working.


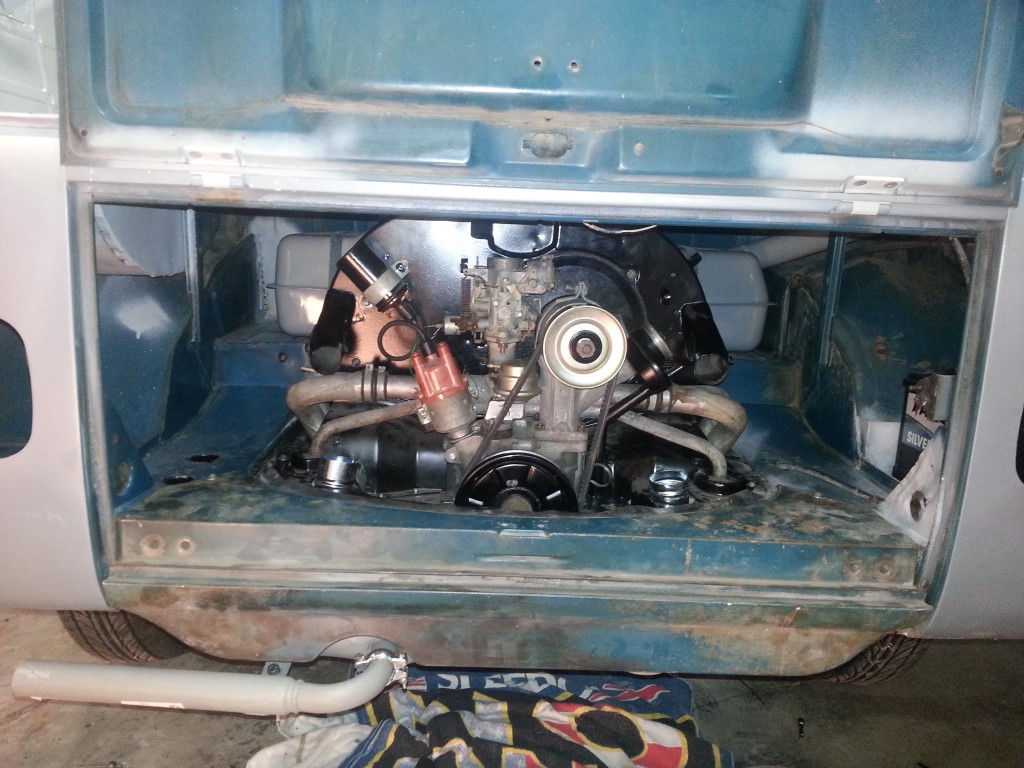
Engine & Battery Installed
Tonight I finished installing the baffles, reassembling, and reinstalling the engine. I also picked up and installed a battery since I’m getting close to hooking up and testing the electrics. Now that the engine is in I was also able to test and adjust the clutch linkage; this is working great, the only driver control that remains is the throttle cable. Remaining to-do prior to starting:
– Install heat exchangers, muffler, and rear apron
– Install alternator/fan/belt
– Connect and test electrical harness
– Connect fuel lines, fill tank, and leak test
– Connect throttle linkage