

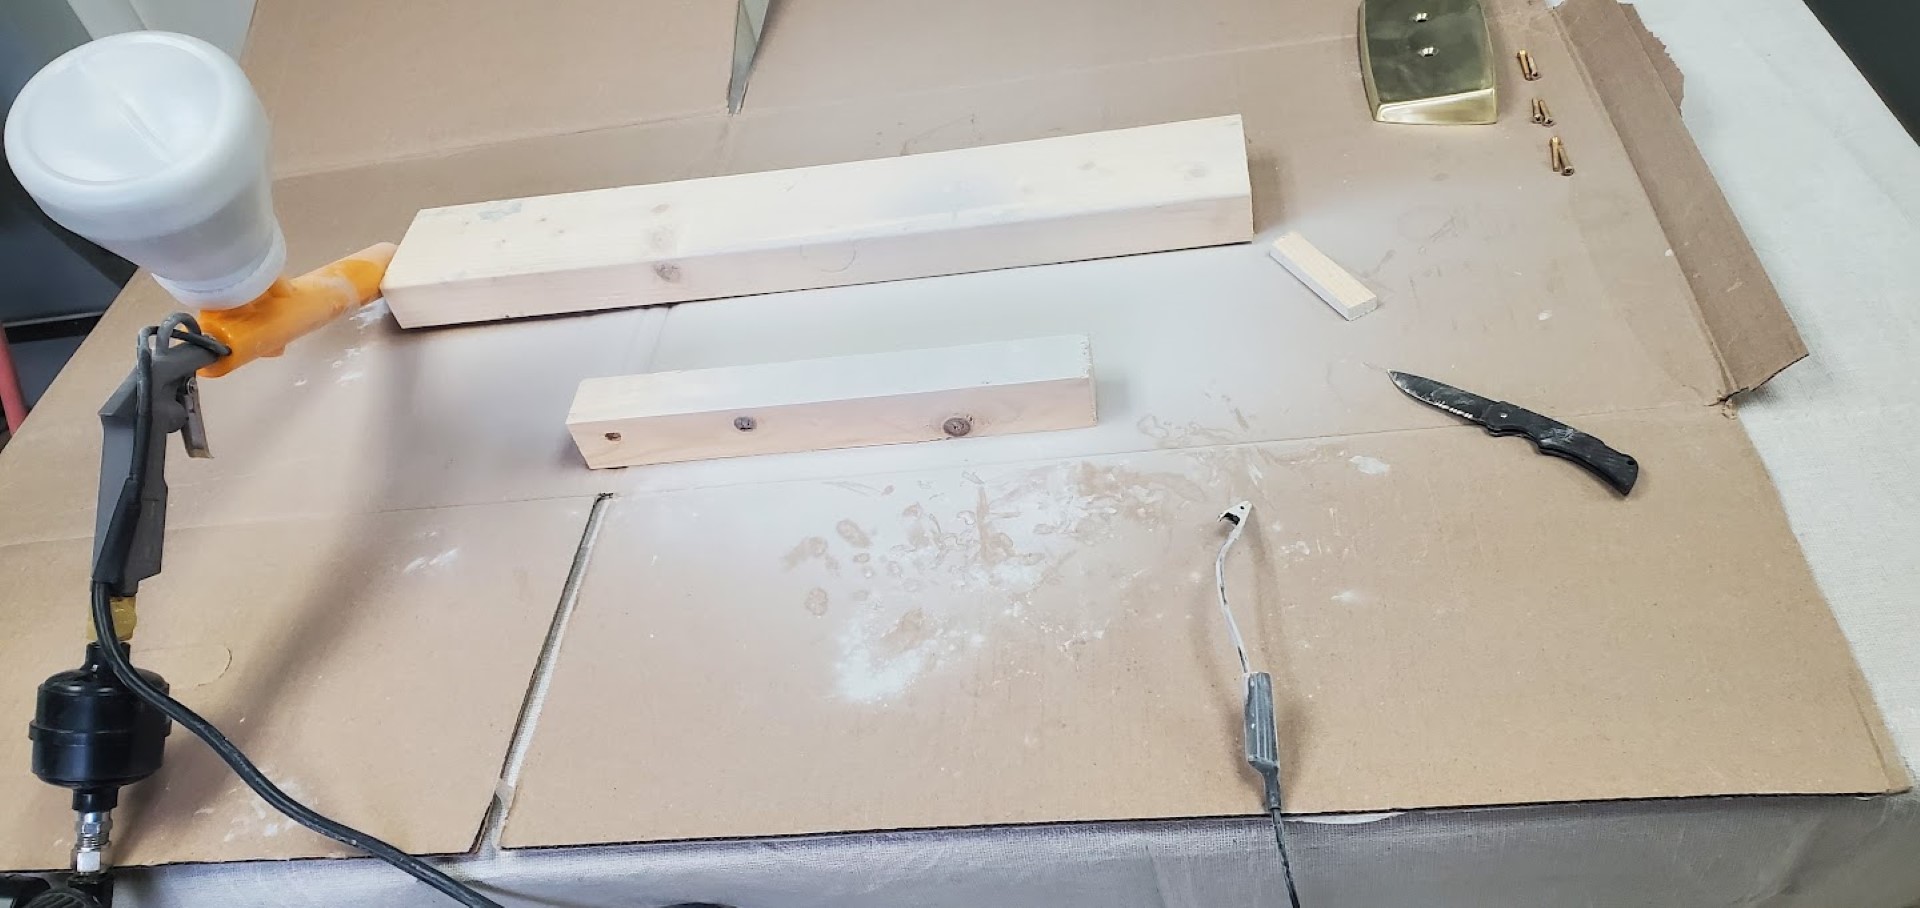
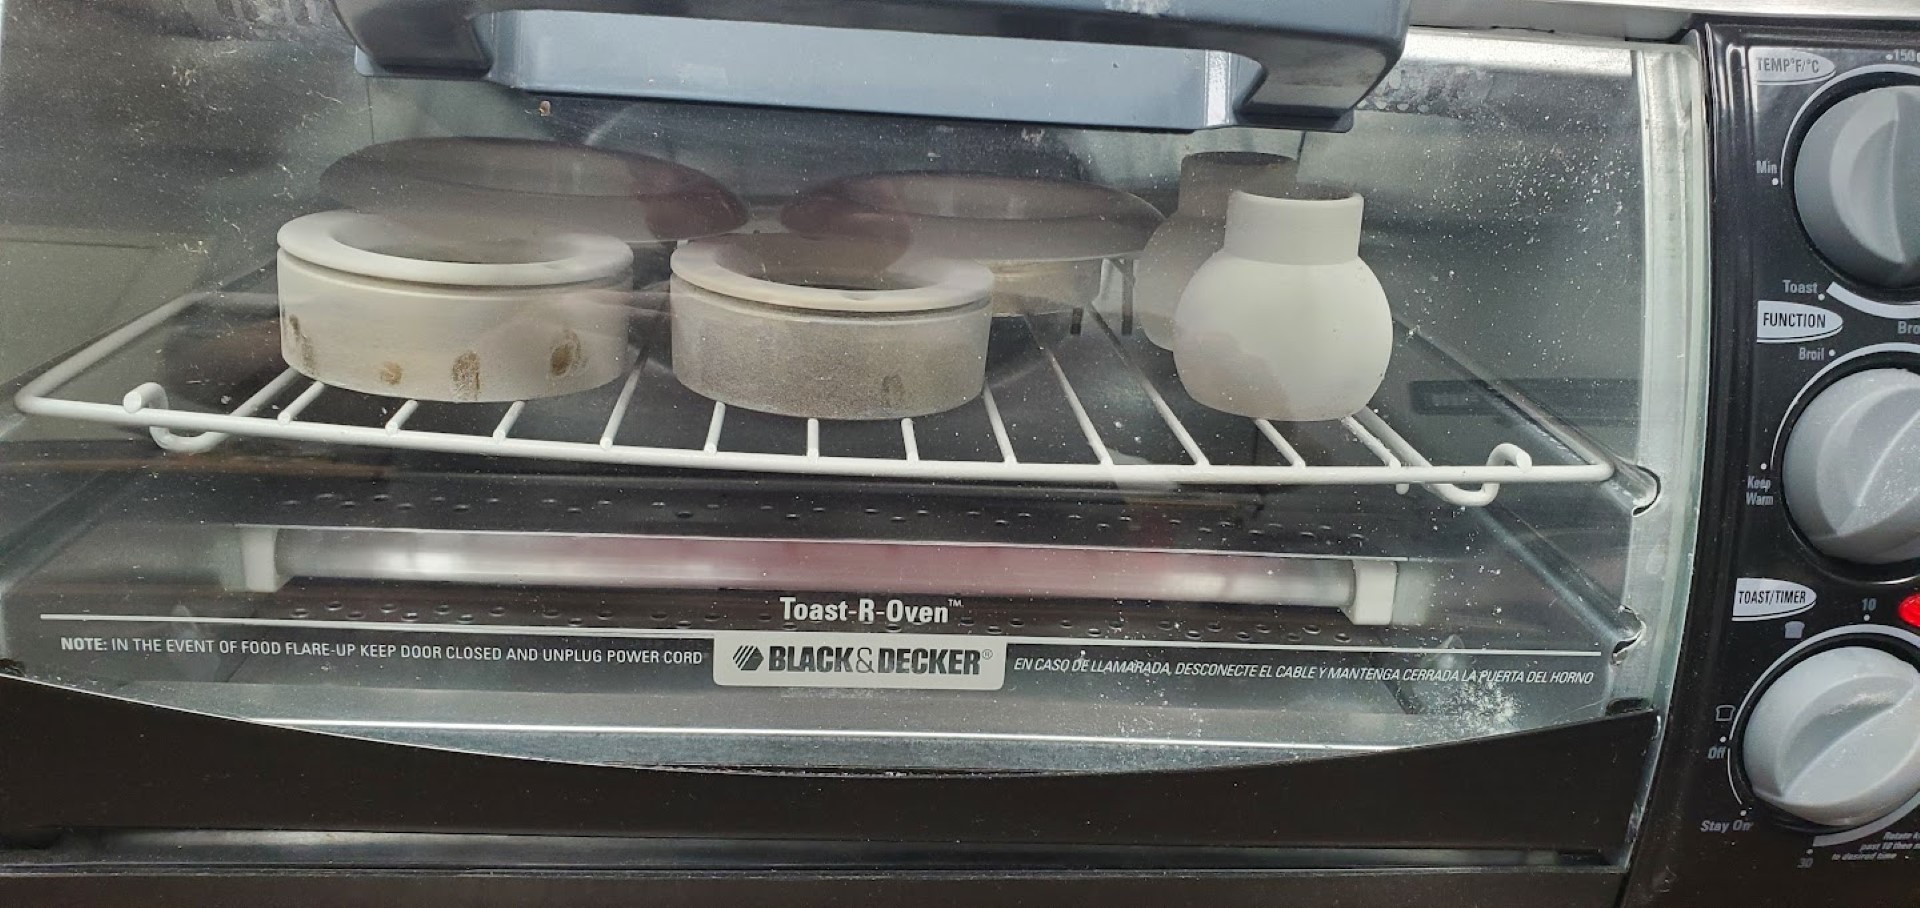
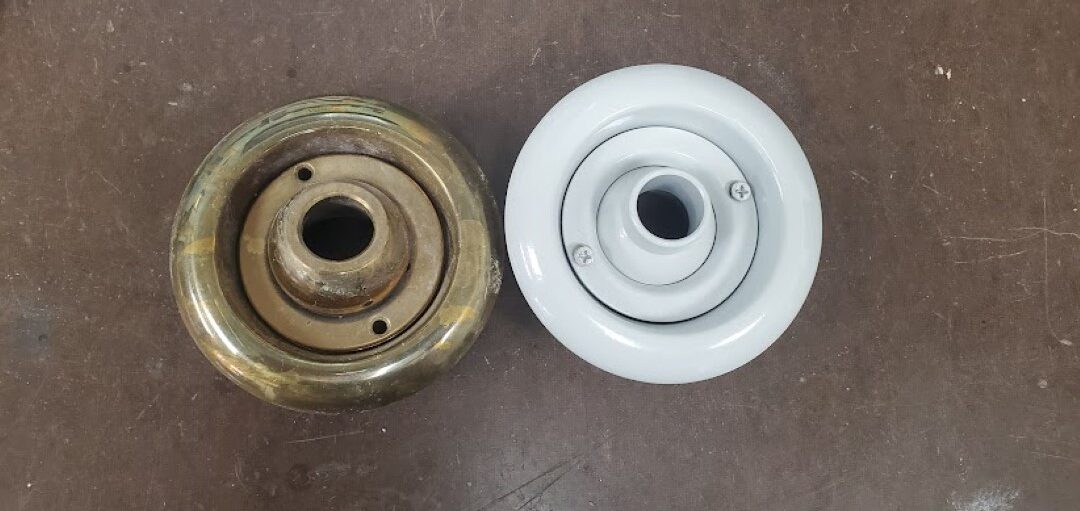
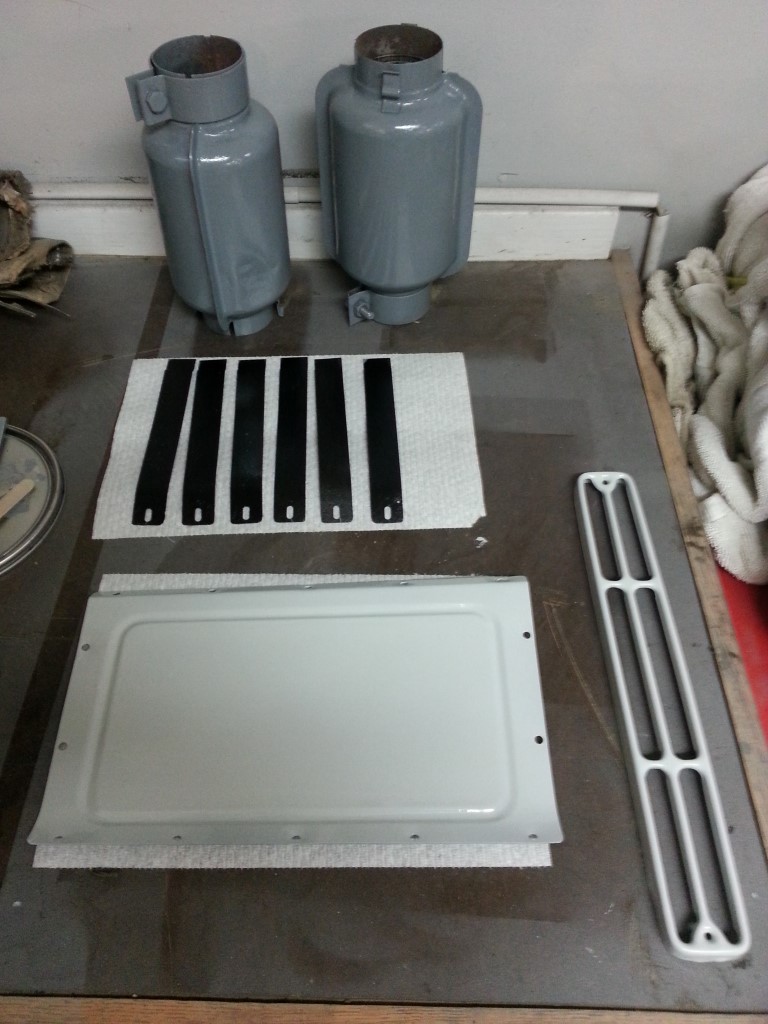
Jacuzzi Hardware Powdercoat
The jacuzzi tub the house came with is big, grey, and (according to a scan of the manual I found) able to pre-fill via a phone call to its land-line modem* – if only land lines still existed. Mechanically though it’s fully sound and there’s no reason to replace it. Doing so would be a major expense even before factoring in the chaos it would create – one wall of the bathroom would need to come out, at a minimum. Much better for now to just freshen up the appearance.
A big part of the objectionable appearance was that the brass hardware (even if polished rather than corroded) doesn’t fit with either of the last two remodels the bathroom has undergone; one from previous owner, one from us. The hardware isn’t available anymore in any color, and paint would quickly scratch off, so this was a great excuse to try powder coating. I picked up a $5 toaster oven, power coat gun, and grey powder coat. Results look great and it seems like it will be plenty durable.
*Replacing/Interfacing to this with an ESP/Arduino/Raspi may be a rainy day project.
Wet-Sanding & Polishing
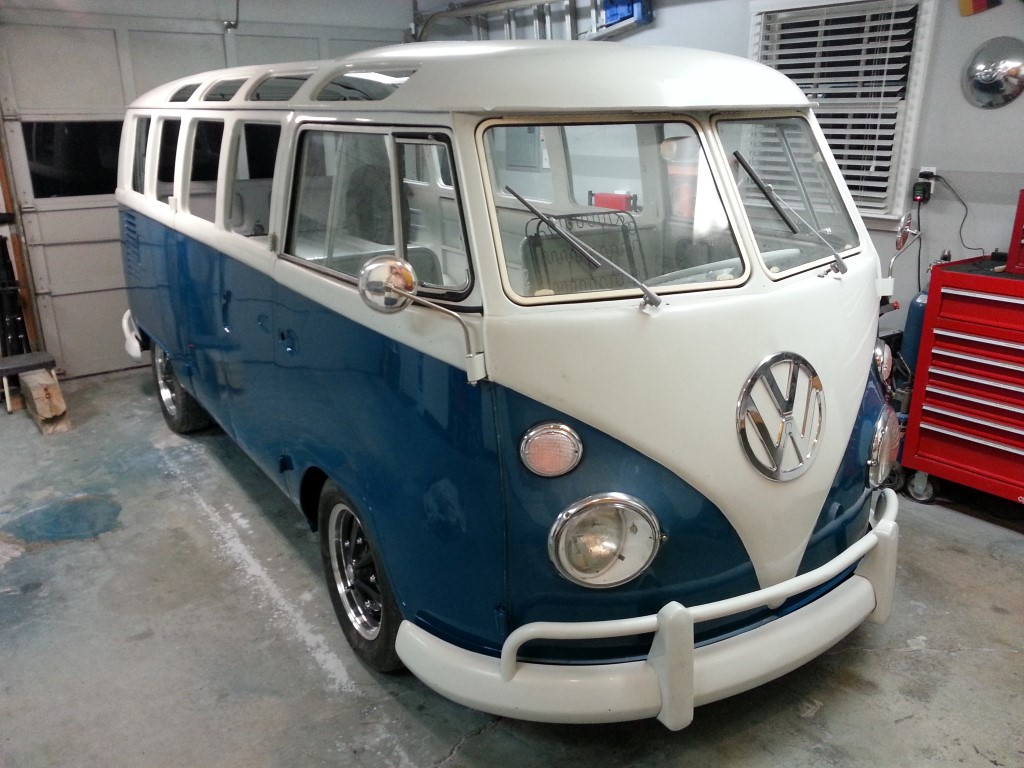
Today I worked on wet-sanding and polishing; starting with the blue areas. The paint straight from the gun leaves a finish that is shiny, but has the texture of an orange peel. The goal of wet sanding is to level off all the peaks of this orange peel texture so that the paint is flat. First 500grit is used, then 800grit, then 1500grit; the panels are kept wet and rinsed frequently to avoid dust build-up that could scratch the paint. It’s critical that the surface is not sanded below the lowest low spot of the orange peel texture, otherwise primer could be exposed and repainting would be required. Luckily the low spots, being untouched by the sanding block, are visible fairly readily as slightly darker spots. After the sanding is completed the paint is flat, but dull looking from the very fine sand scratches. Polishing with rubbing compound and a rotary buffer brings the shine back. The passenger side of the bus is mostly complete; I’ll likely get the driver side complete by the bus’s first long trip, but I’m unsure about the front/back/white areas.


Engine Compartment Painted
Since the engine is out I repainted the engine compartment this weekend; didn’t get pictures of the finished product but I’m sure it will be in-view in some other picture at some point.
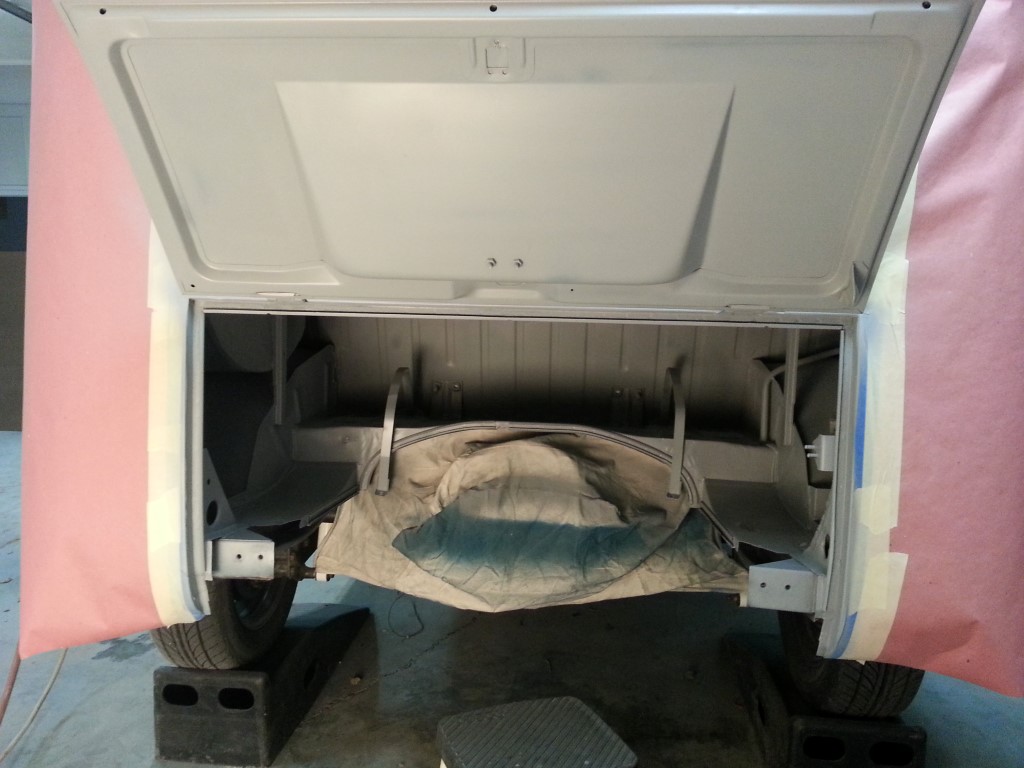
Hatch Painted
Today was a miscellaneous day: the brake lights and horn were connected, I finally painted the rear hatch and installed the rear windshield, I washed several months worth of dust/grime off of it, I made a few more interior panels, and I began looking into the stalling problem.
See Blau!
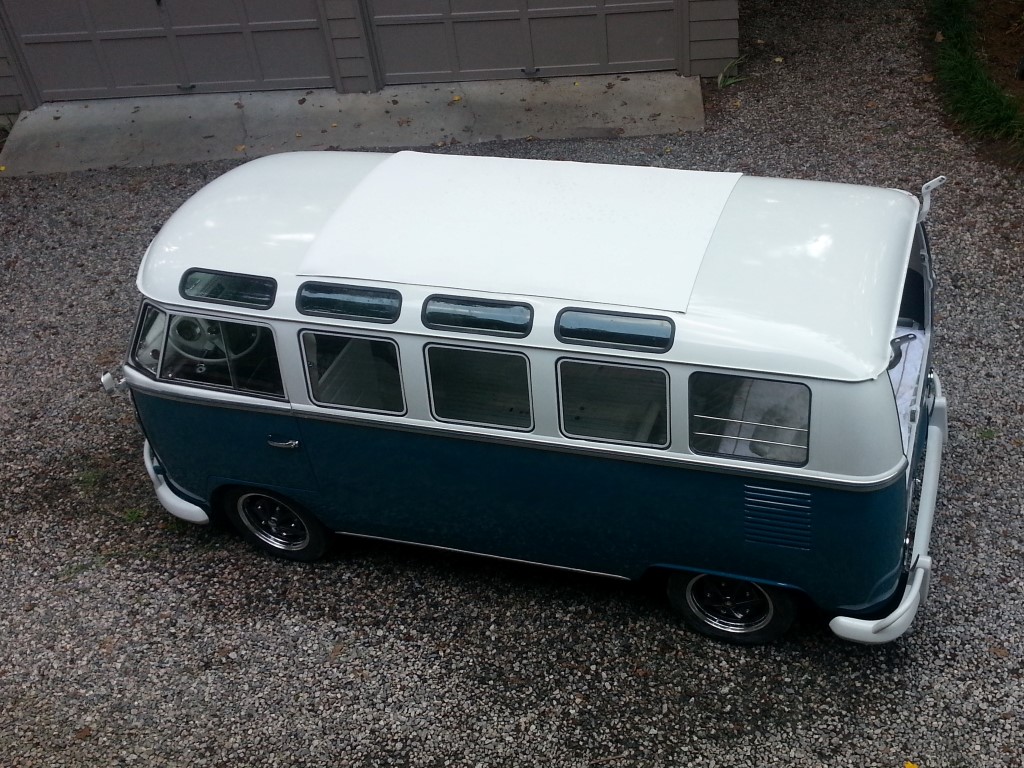
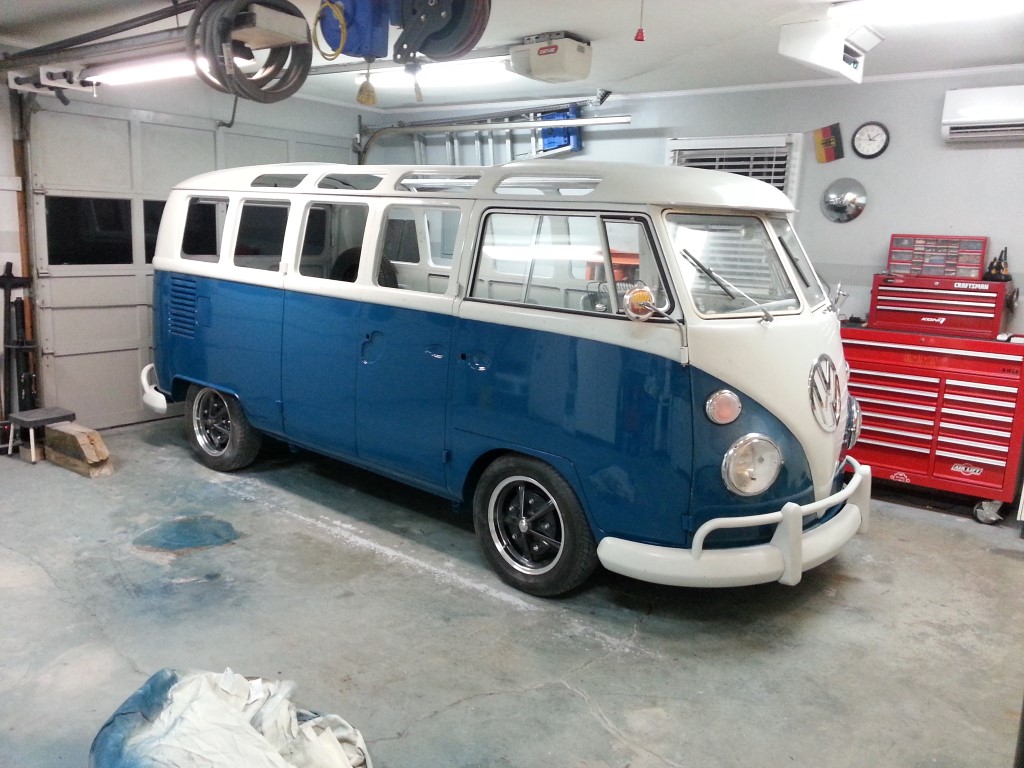
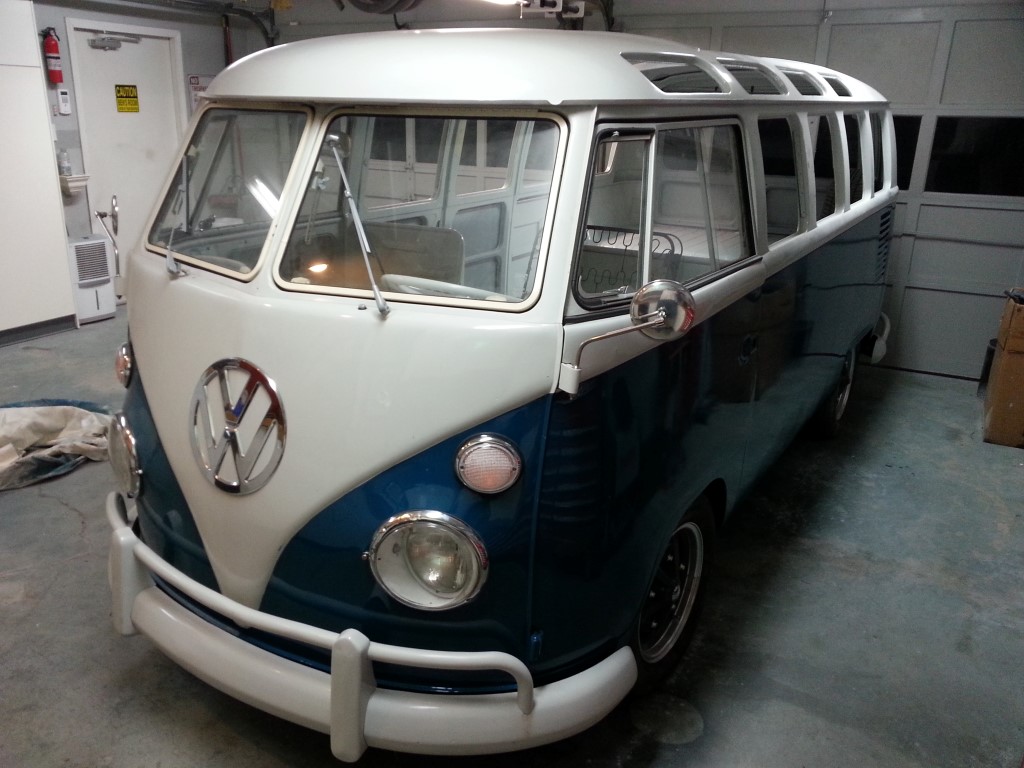
All of the hours of sanding on the lower body finally paid off today. Thunderstorms in the area all day prevented me from painting outside; so I moved everything in the garage to the back wall, covered with drop cloths, and painted inside. The only casualty was the garage floor which is being resurfaced in the near future anyways. This worked out better anyhow since the color coat stayed sticky for a long time (compared to primer), if it were painted outside any passing bugs/dust would have stuck. Overall it came out well, you can easily see reflections in the pictures, but it will require wet-sanding & polishing to get rid of the orange peel texture.
After the paint was complete there was no longer anything stopping me from mounting the bumpers and lights, so I got them on right away. It’s nice that these parts are finally going on the bus since they had been taking up a lot of storage/counter space.

Sealer
The last round of sanding only broke through the primer lightly in a few spots, so tonight I added one more coat of primer that will be wetsanded with 400grit; blue paint should go on this weekend!
More High Build Primer
No photos since the bus doesn’t look any different. After several rounds of priming/sanding it is becoming much flatter though and should be ready for blue paint soon.
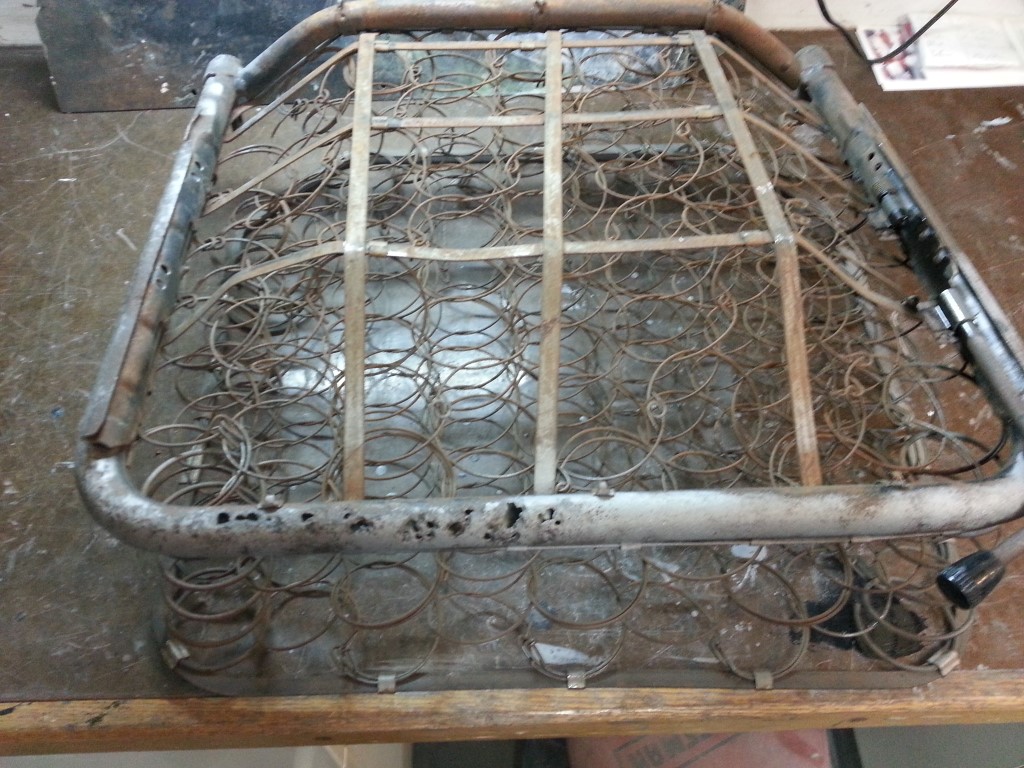
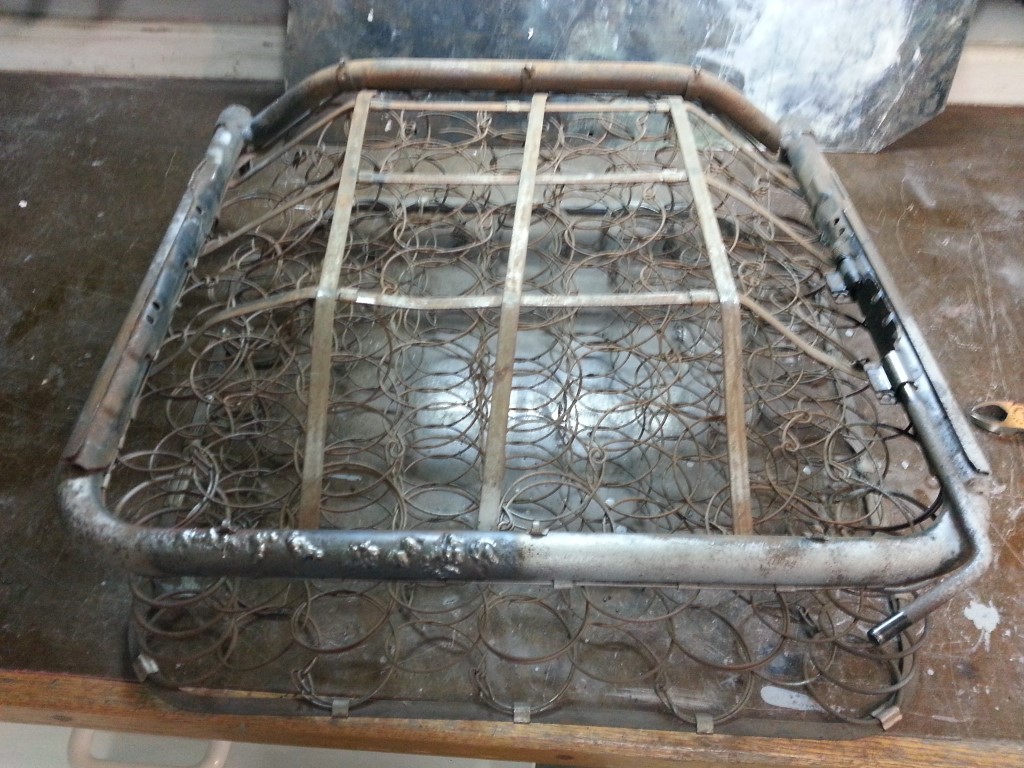
Miscellaneous Parts Painted
The seat frames as well as various other parts were painted tonight.

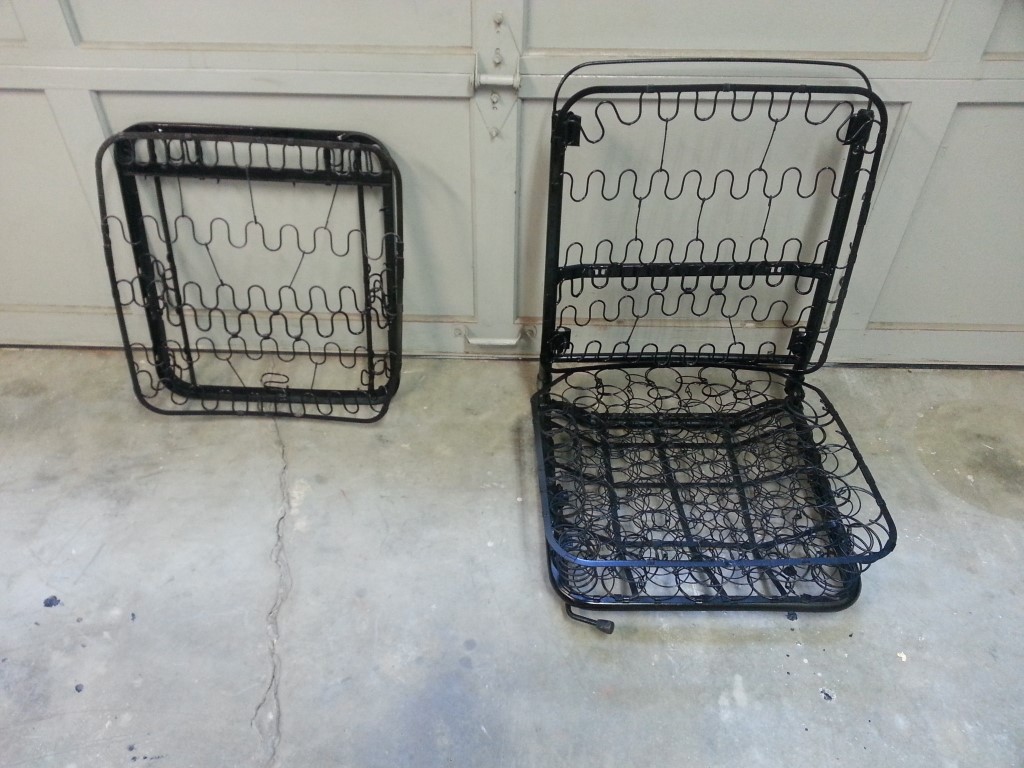
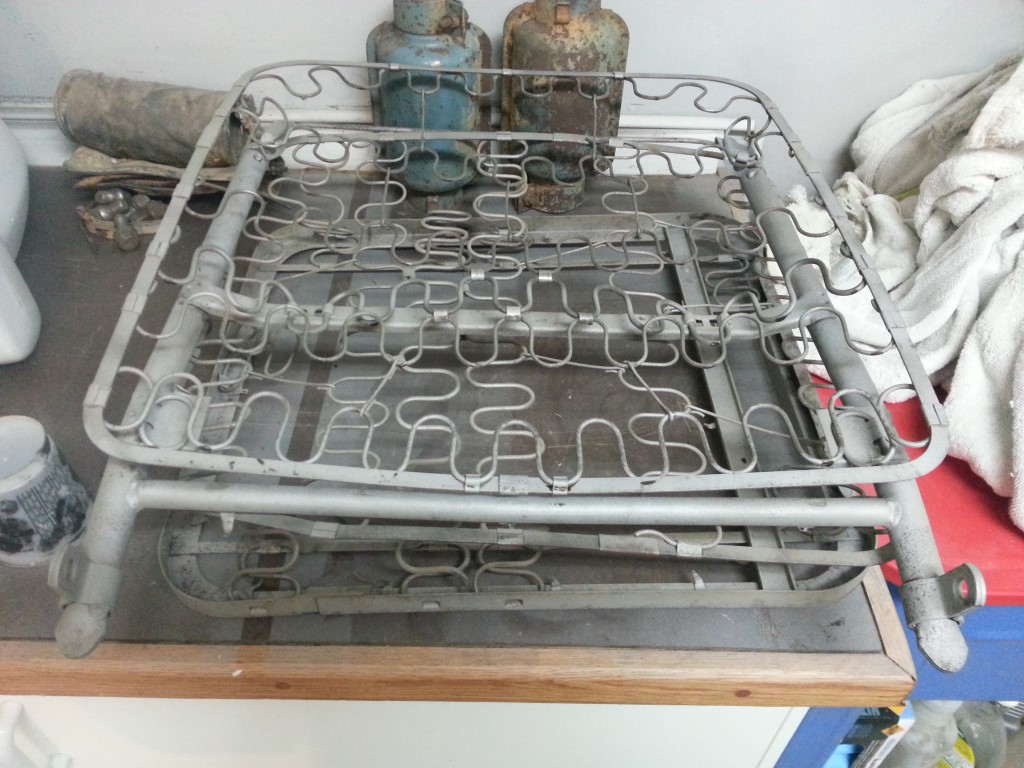
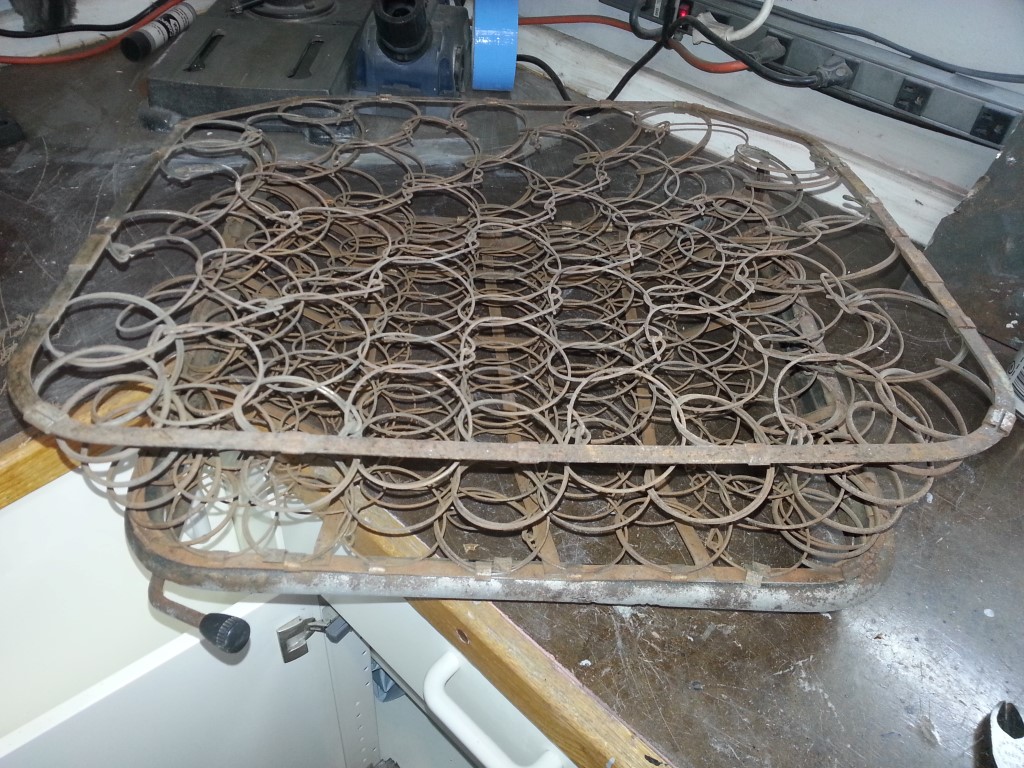
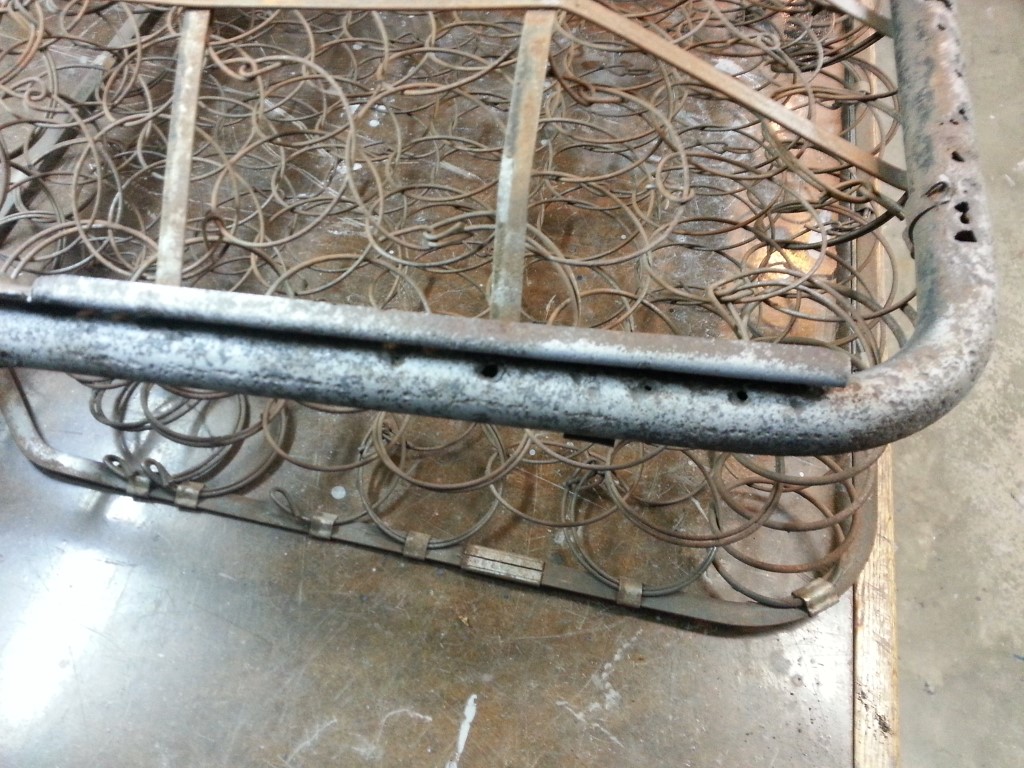
Seat Frames Blasted
Tonight the seat frame repair welds were ground down and the frames were media blasted in preparation for paint.
Weekend Progress
Lots of activity this weekend:
#1 – Another coat of high build primer was applied and block sanded. Block sanding is very time consuming but I’m starting to see very good results. The pattern of colors that the primer/filler makes after sanding started off looking like a topographic map of the Himalayas; with each coat I can see it’s flattening out substantially.
#2 – The pop-out frames were glazed, sanded, and re-primed.
#3 – The black parts in the latest round of small parts (mostly sunroof parts) were painted black.
#4 – The low spots on the body got yet another coat of high build primer after #1.
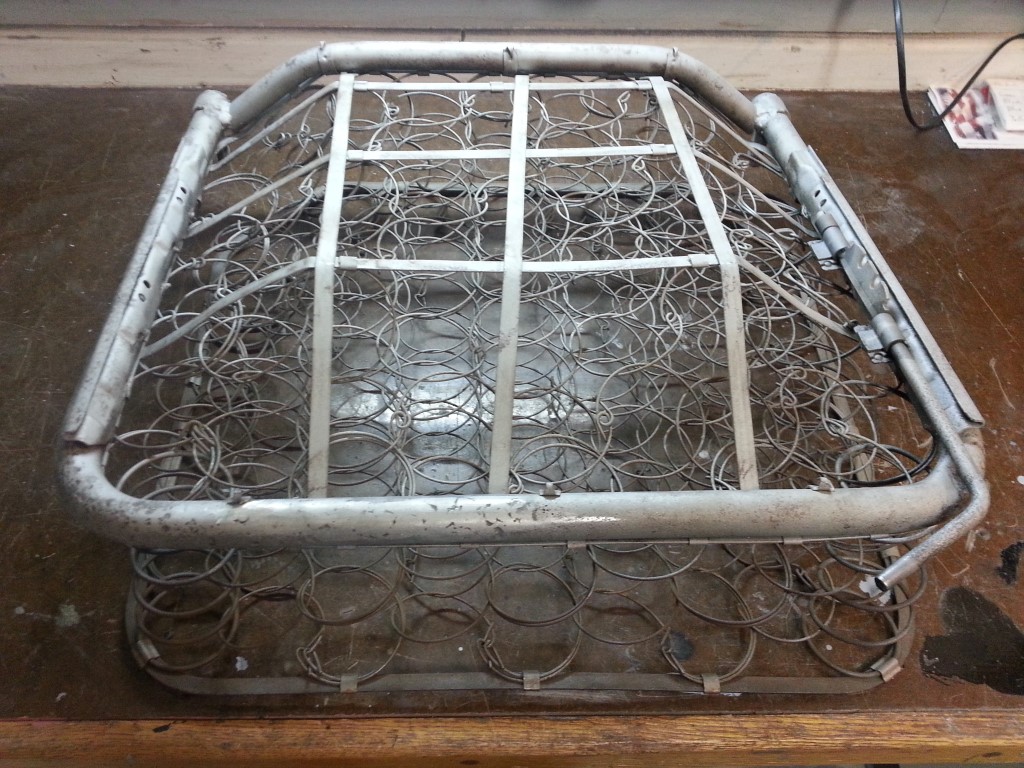
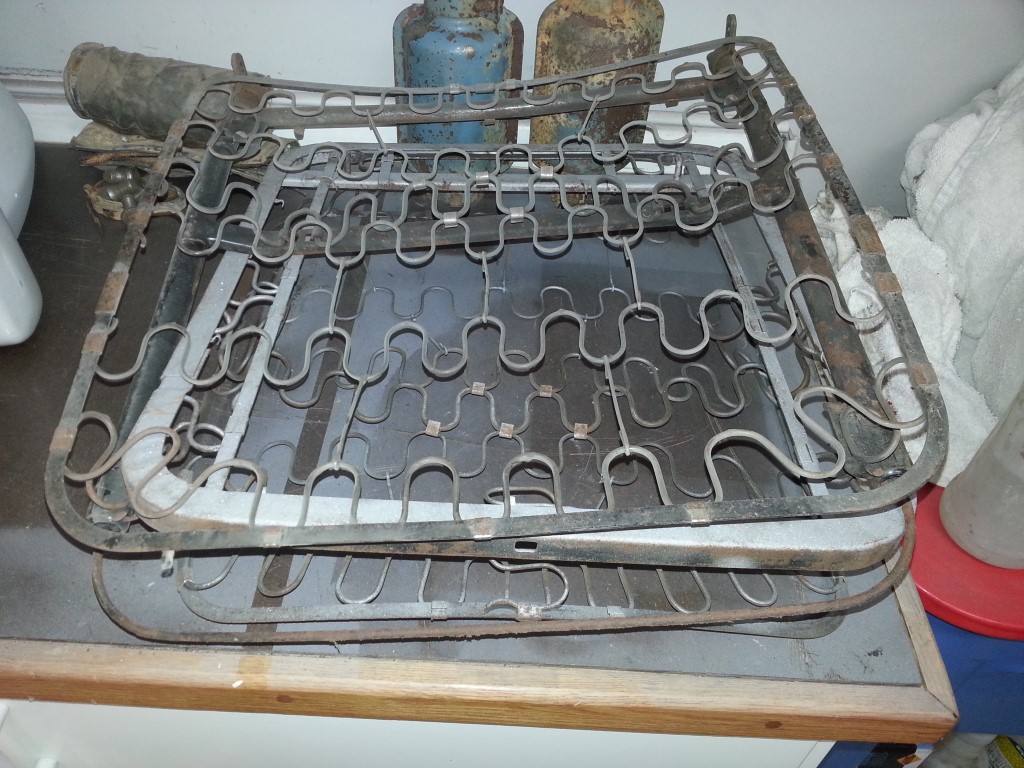
#5 – The seat frames were partially sandblasted, but the effort was cut short since the blaster kept clogging. I rebuilt the blaster and it should perform much better on the next rain-free blasting opportunity.
#6 – Holes in the drivers side front lower seat frame were welded shut. I forgot to take pictures after the welds were ground down, but it turned out very nicely.

The search continues for the elusive passenger side front lower seat frame. This seat is specific to the optional ‘walk-through’ configuration that this bus has. Although the ‘walk-through’ option was heavily advertised it was expensive, so the minority of buses were built this way. This problem is compounded that through the years, especially during the 1970’s custom van craze, many of the walk-throughs had their bulkheads cut (mine included, but fixed) to install swiveling seats. When the swiveling seats were installed in all these buses the original seats were lost forever, though I’m not sure why they kept the passenger side seat back without the base.
