-
Recent Posts
Recent Comments
Category Archives: Uncategorized
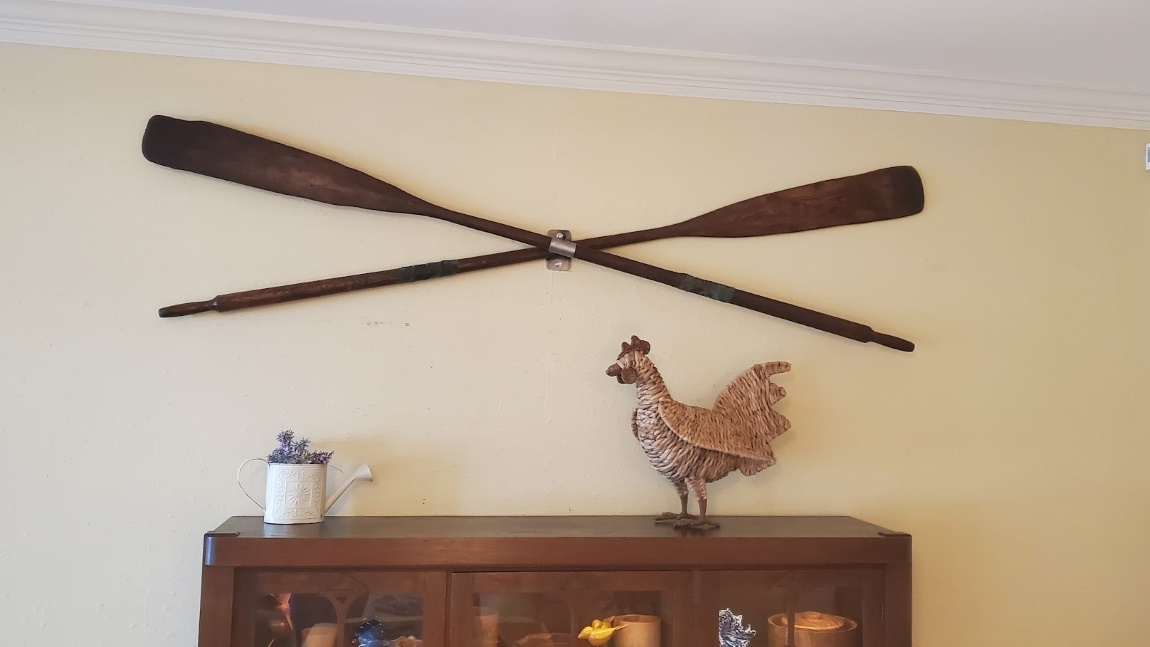
Crossed Oar Wall Mount
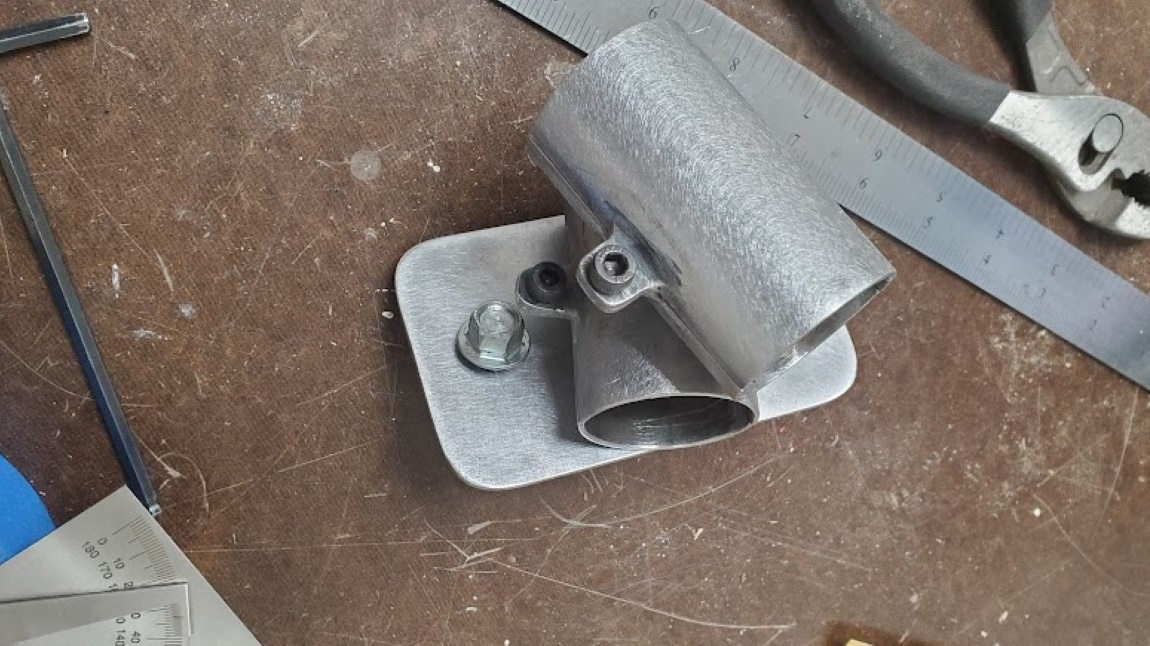
Quick project to mount some oars on a wall for decoration. It looks like the ‘normal’ way of doing this involves leather straps, brackets, spacers, etc. It gets messy relatively quickly and seemed like a lot to align/mount on the wall.I also wanted to leave the oars unmodified, so to avoid all these problems I made a custom steel mount. I first made a mock-up in CAD.
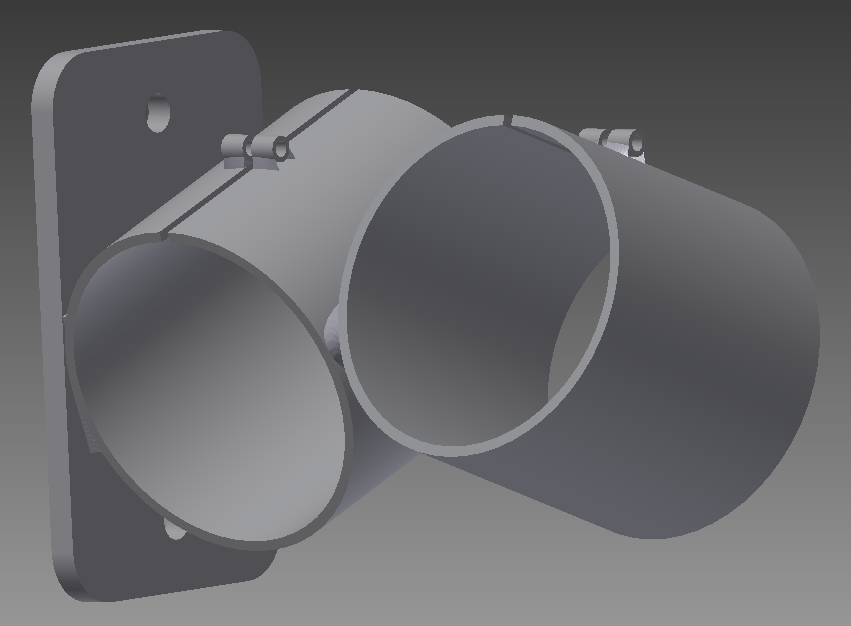
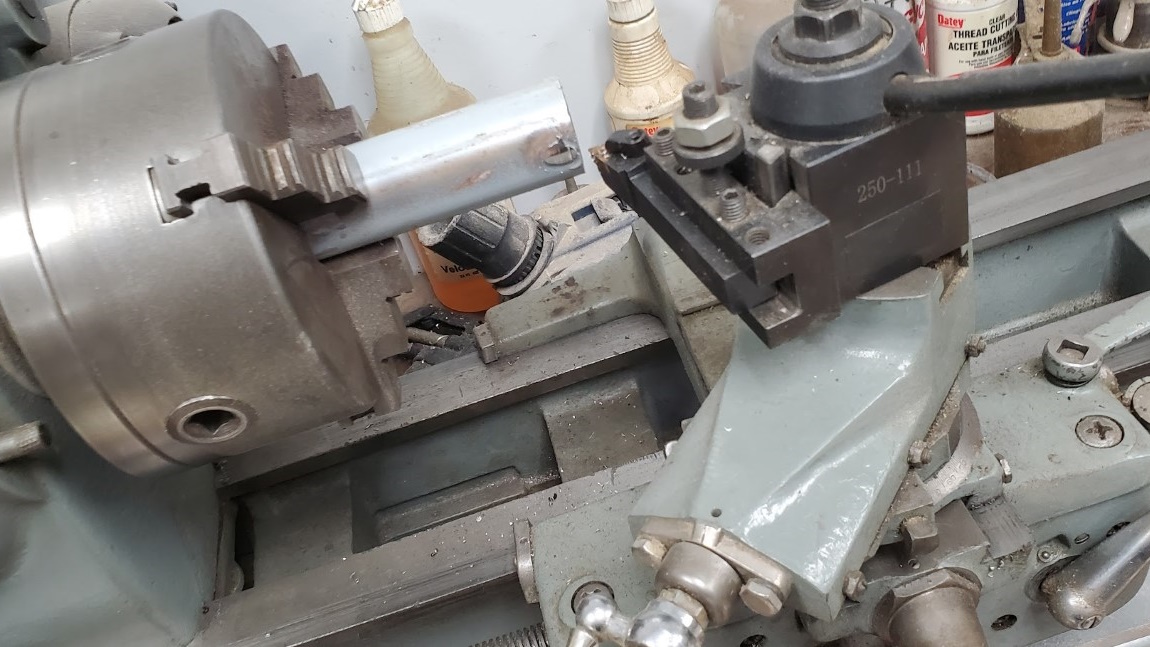
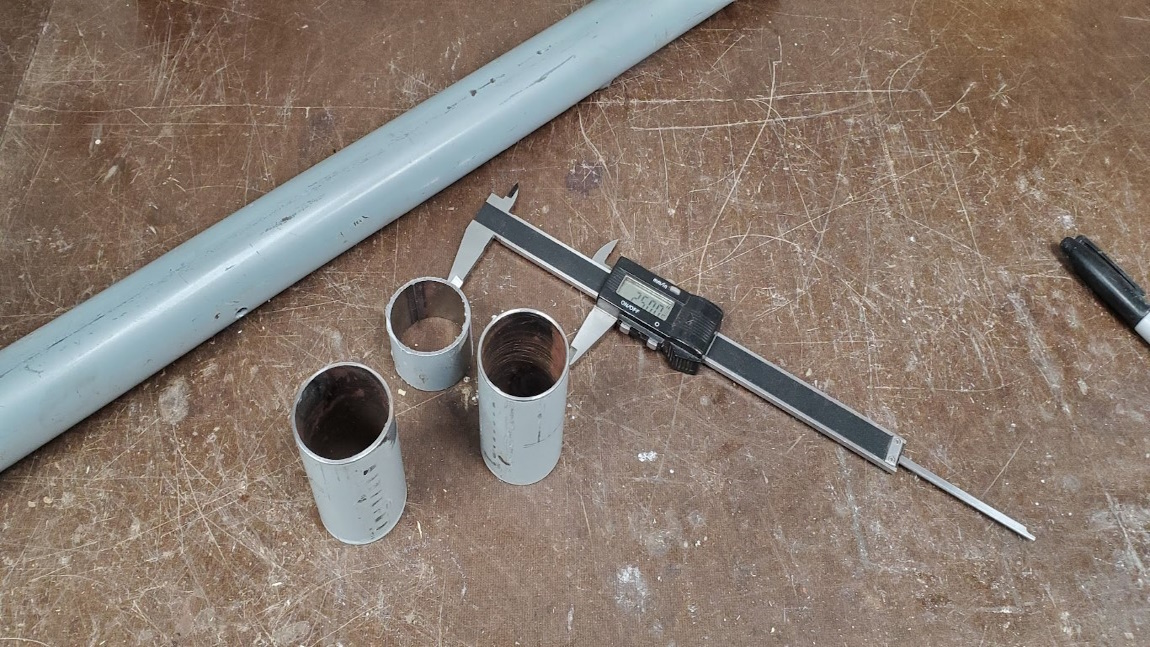
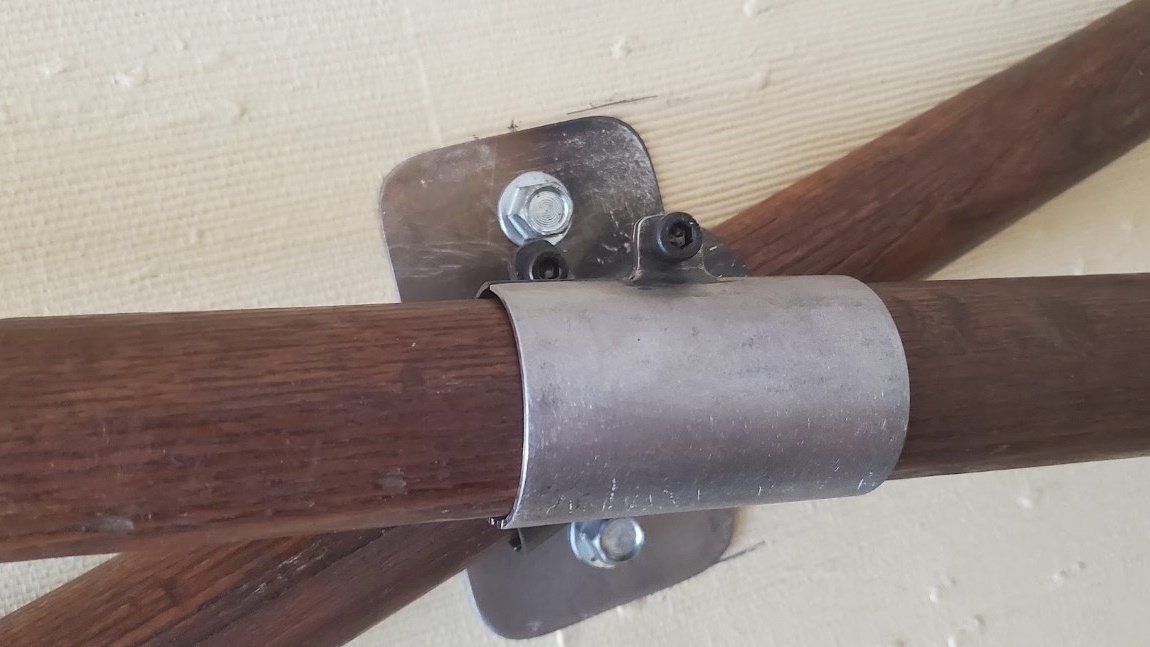
Next I found some steel tubing on the scrap pile that was the right size, cut it to length, and then cut a slot and welded on some tabs for a pinch bolt. The plan was to slide the tube over the handle side of the oar to the middle then tighten the bolt to clamp the oar in place. This didn’t work, because even though it’s not readily visible, the oars have a ~1/4″ taper from the handle end to the center. I had measured the center when sizing the tube, so it wouldn’t fit over the handle. I didn’t want the tube any bigger because it would look odd/oversized in place, so I began making a hinge that would allow the tube to flip open for installation. This effort failed, the tiny bit wandered in the long rod; hinge alignment wasn’t going to work. I then realized that the pinch bolt alone was strong enough to hold the tube halves together and abandoned the hinge idea – if it did need the strength, a bolt on either side would be much simpler.
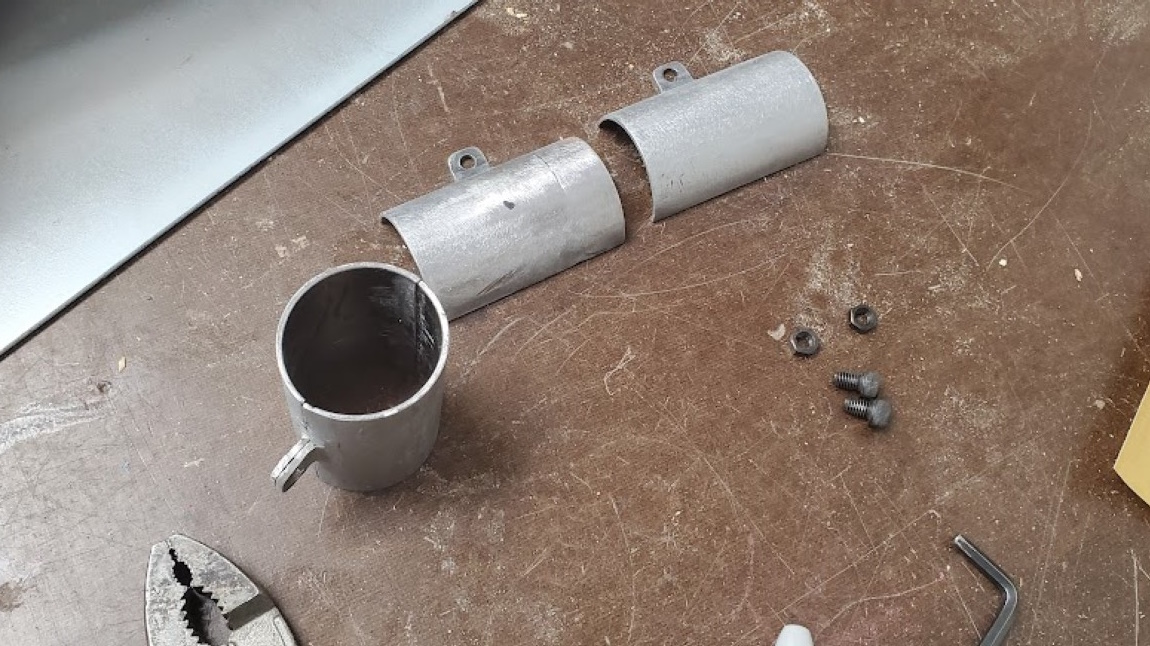
I then made a mounting plate and drilled a hole in its center and the center of 3 of the 4 tube halves. This hole allowed everything to be bolted together temporarily and aligned prior to welding. It was then welded together, cleaned, and tested. The base was lag bolted into a stud.
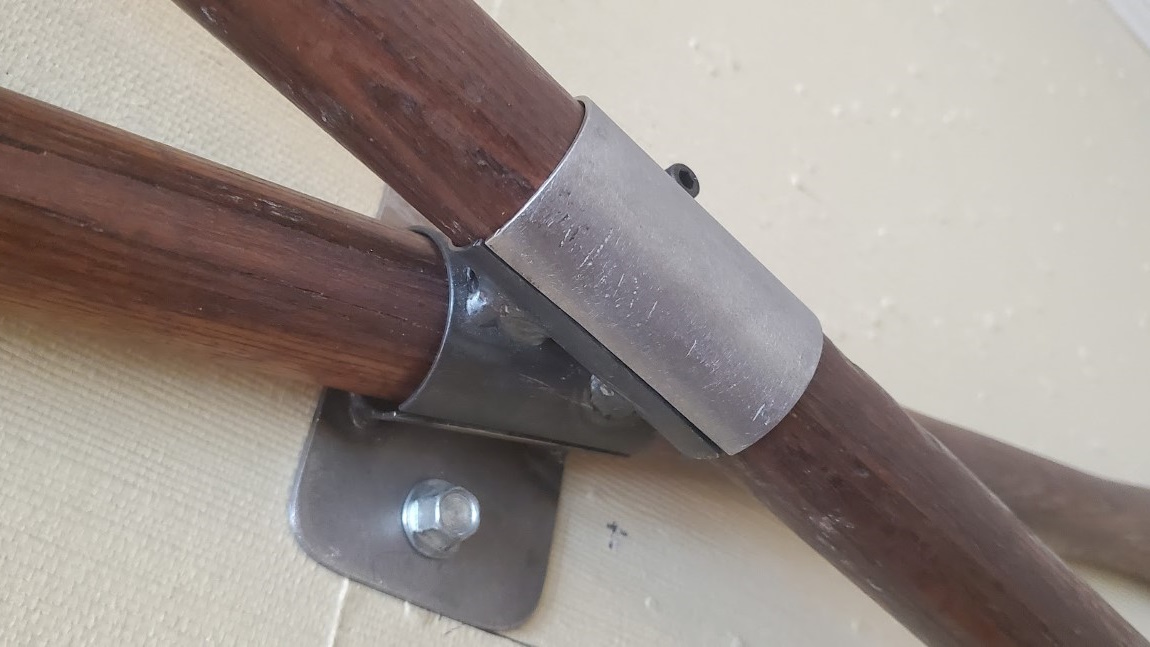
All that’s left is to take it down and finish the mount – I will likely use a metal black solution and oil for a natural metal look. The inside of the tube shells will also get a layer of felt to hold the oars securely (The tube size left just enough gap to account for this)
E-Ink Bank Calendar
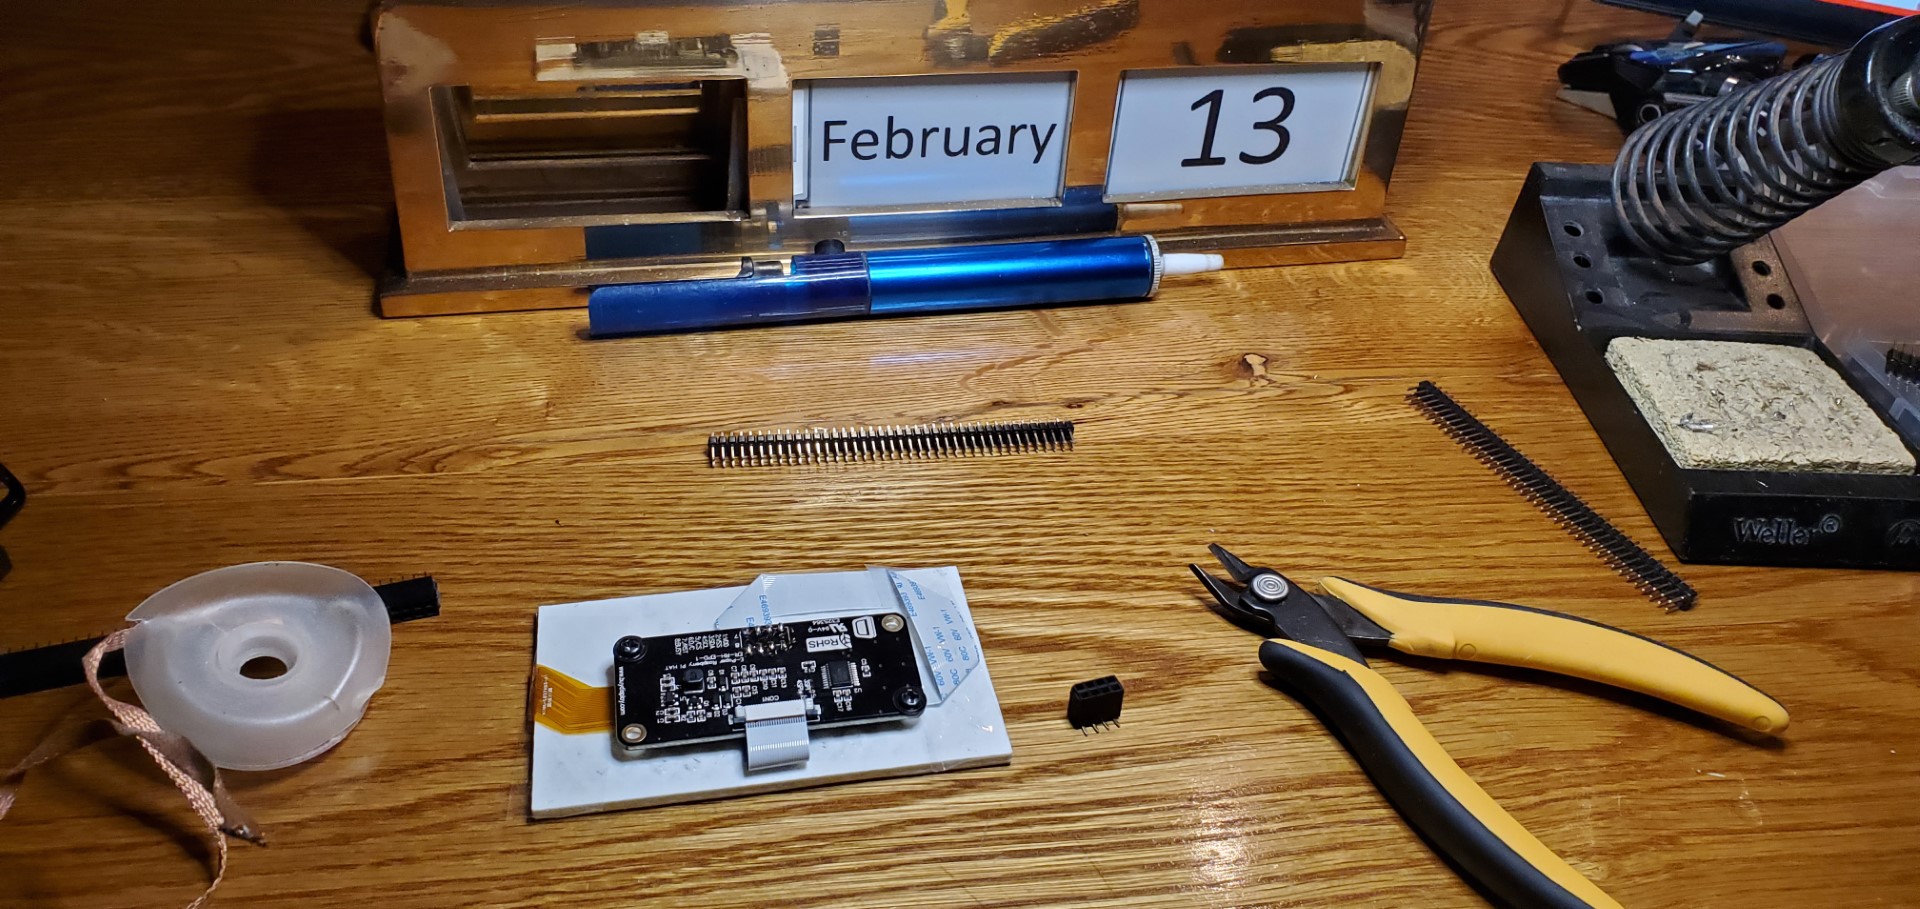
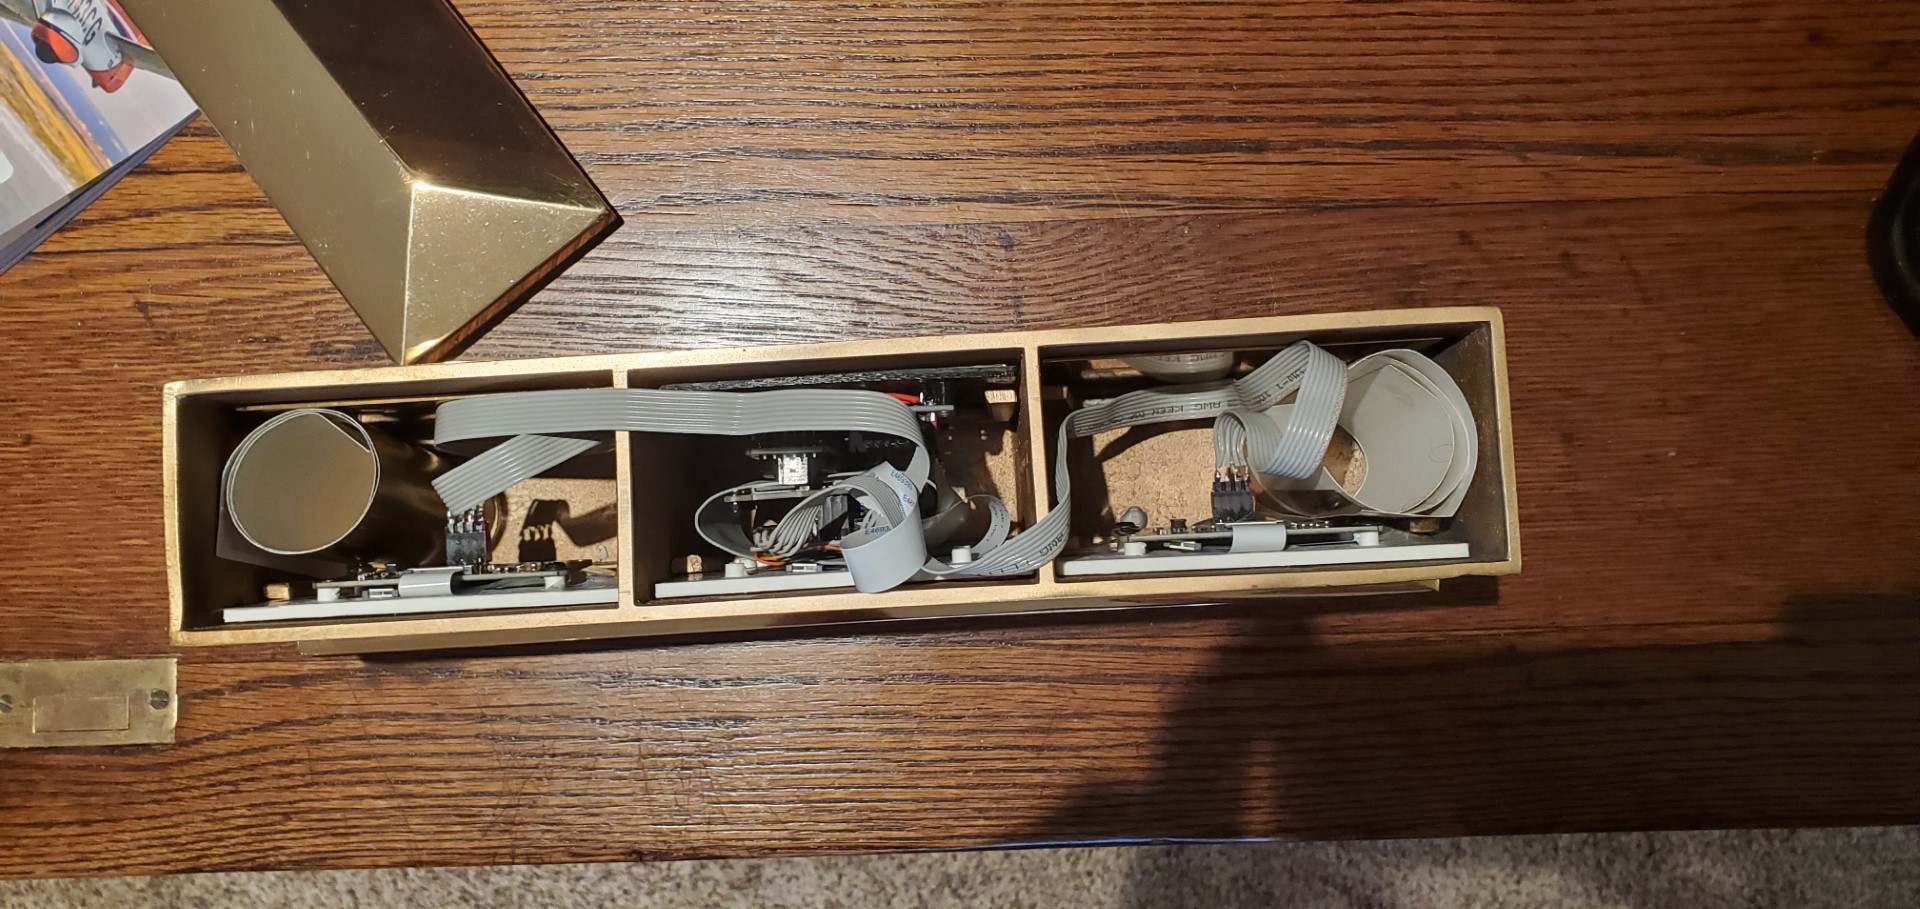
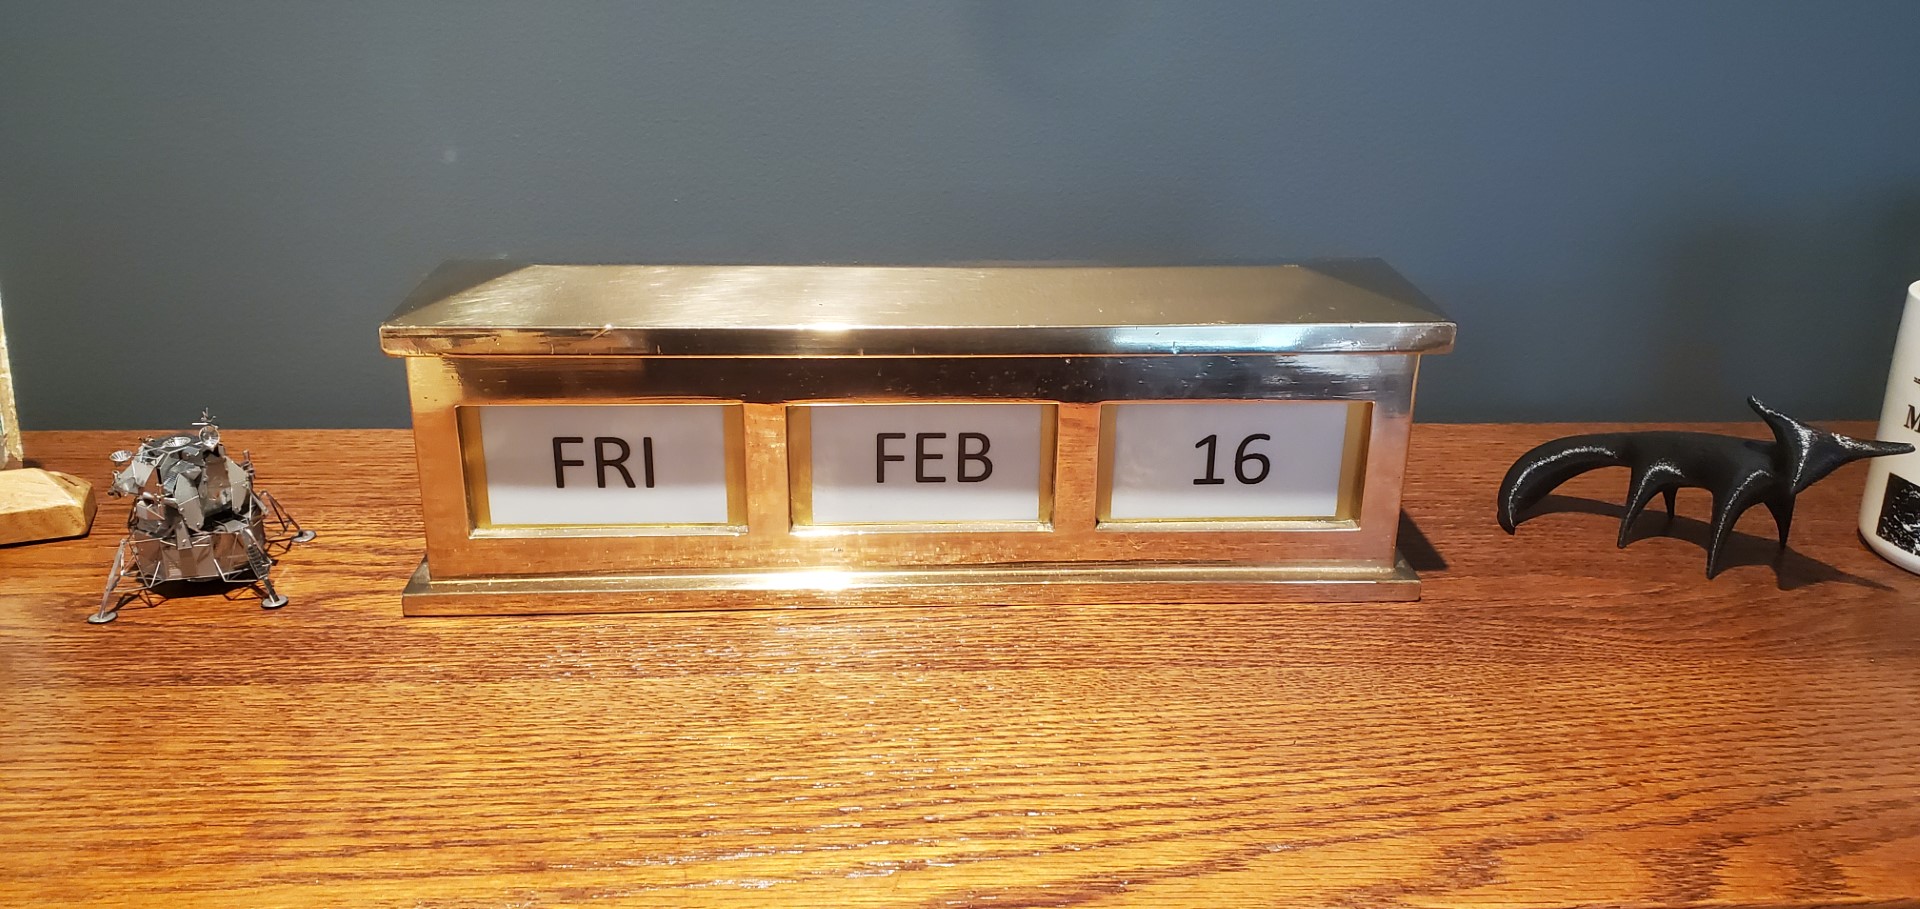
I was recently given a brass calendar frame that normally holds a collection of small cards corresponding to the date. The top lifts off and the cards are re-arranged to display the day’s date. I decided to automate it with the following:
- Arduino Pro Mini, ATmega328P microcontroller board (1x) Main controller for the system, runs the code integrates everything else.
- DS3231 Realtime Clock module (1x). This keeps track of the time/date. It has its own small battery to stay running while main system power is off.
- 3.7″ Epaper displays(3x).
- Epaper connector board (2x) – mainly just a breakout board for the epaper display’s ribbon cable, but it also handles signal buffering and making a few weird voltages that the epaper display needs.
- Epaper interface board (1x) – same as the connector board, but also has onboard SPI RAM and MicroSD card slot.
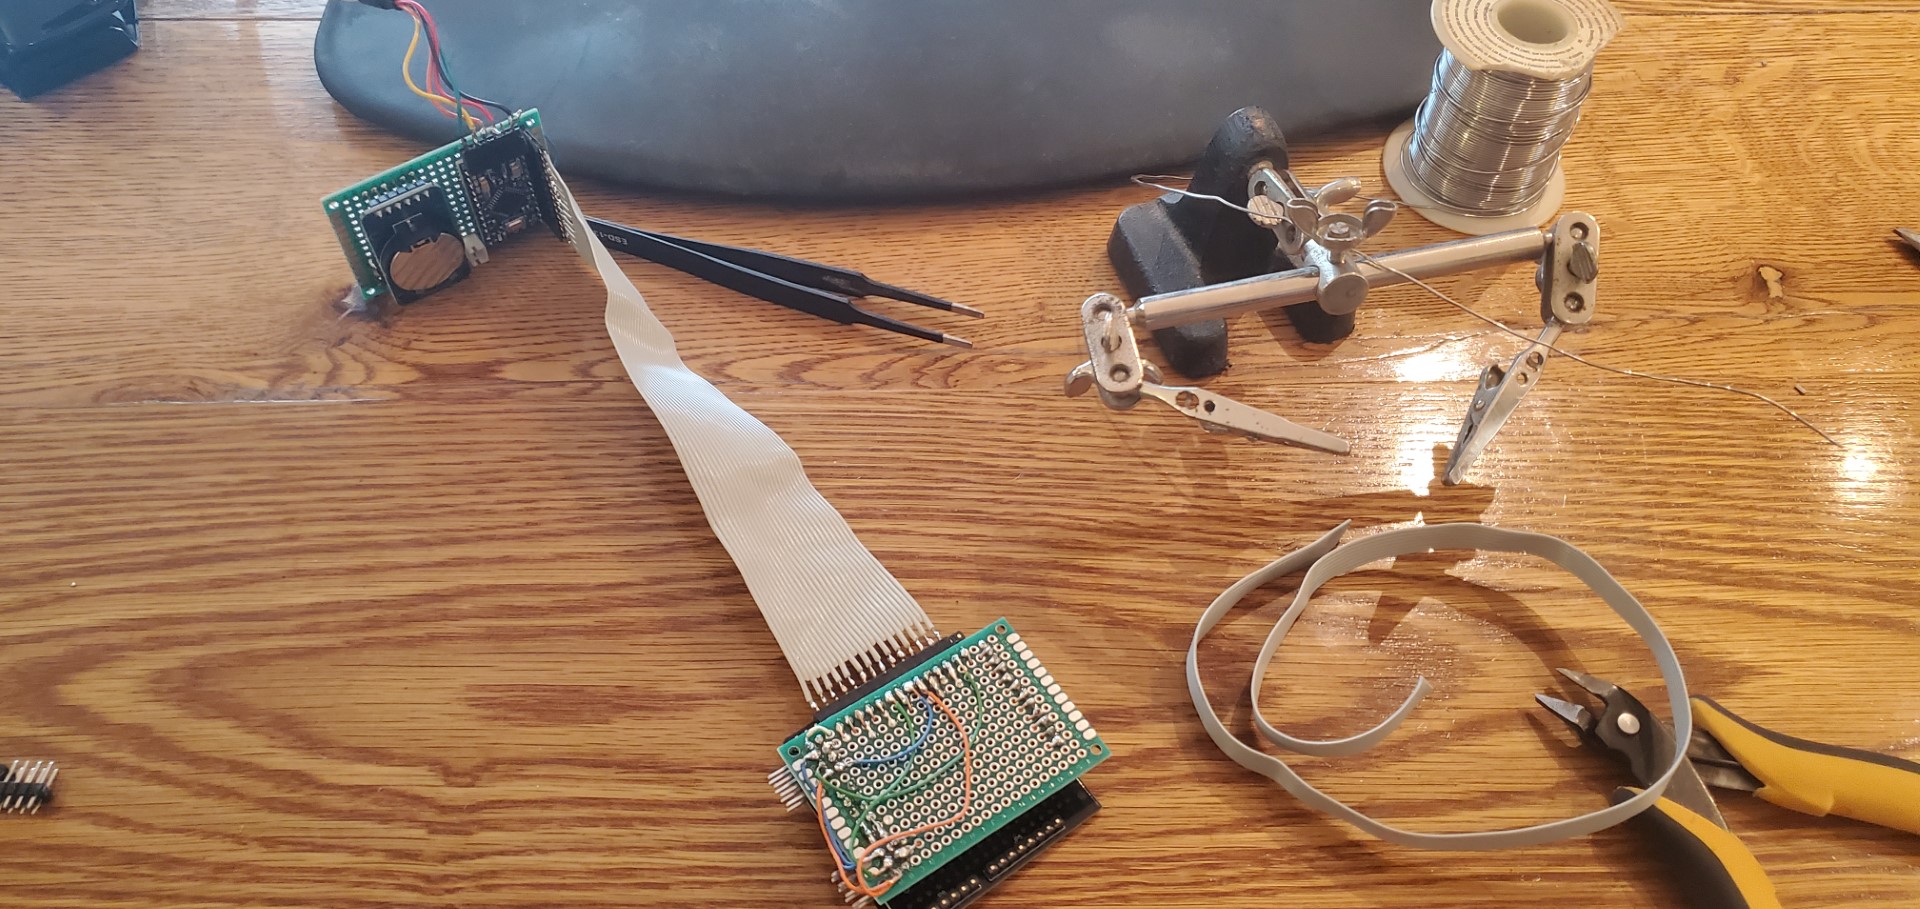
I’ve designed many various electronic circuits/devices, but this is the first I can recall where the power budget matters a lot. The power usage would always be low with these devices, but I wanted to avoid a scenario where it’d need a wall wart plug – the goal is for it to run a reasonably long time, a year or so, on a rechargeable battery. The magic of the e-paper displays (other than having the image very close to the surface, looking more like real paper than a display) is that they can be completely powered off and still retain their image; that’s a huge head-start to low power usage. This left the micro-controller as the main risk for power consumption, however with careful use of interrupts I think I’ve optimized this. The sequence, which happens every night at midnight, is:
- DS3231 asserts its alarm pin
- The alarm pin is connected to an interrupt on the ATmega328P which has been configured to wake the microcontroller and begin code execution.
- The microcontroller communicates with the DS3231 over I2C to read the new date and resets the alarm for the next midnight.
- The microcontroller reads the SD card to lookup graphics corresponding the 1st display based on date, this is read into RAM and then shifted to the epaper display. This repeats for each display. (The controller inside each display goes through its own routine for the physical screen update that causes the screens to flash Black/white several times)
- The microcontroller goes back to sleep mode, no code execution and extremely low (almost no) power usage until next midnight.
With this sequence it’s very nearly off the vast majority of the time, only the small clock battery on the DS3231 module keeps it going; then everything else only wakes up for a few seconds at midnight to update the screens. Time will tell how efficient this is, but it should be as good as theoretically possible. The DS3231 battery is meant to hold the time for ~10yrs, when the main battery is depleted the screens will stop updating but time won’t be lost – proper date will be displayed on the first update after a recharge without any need to set the time/date.
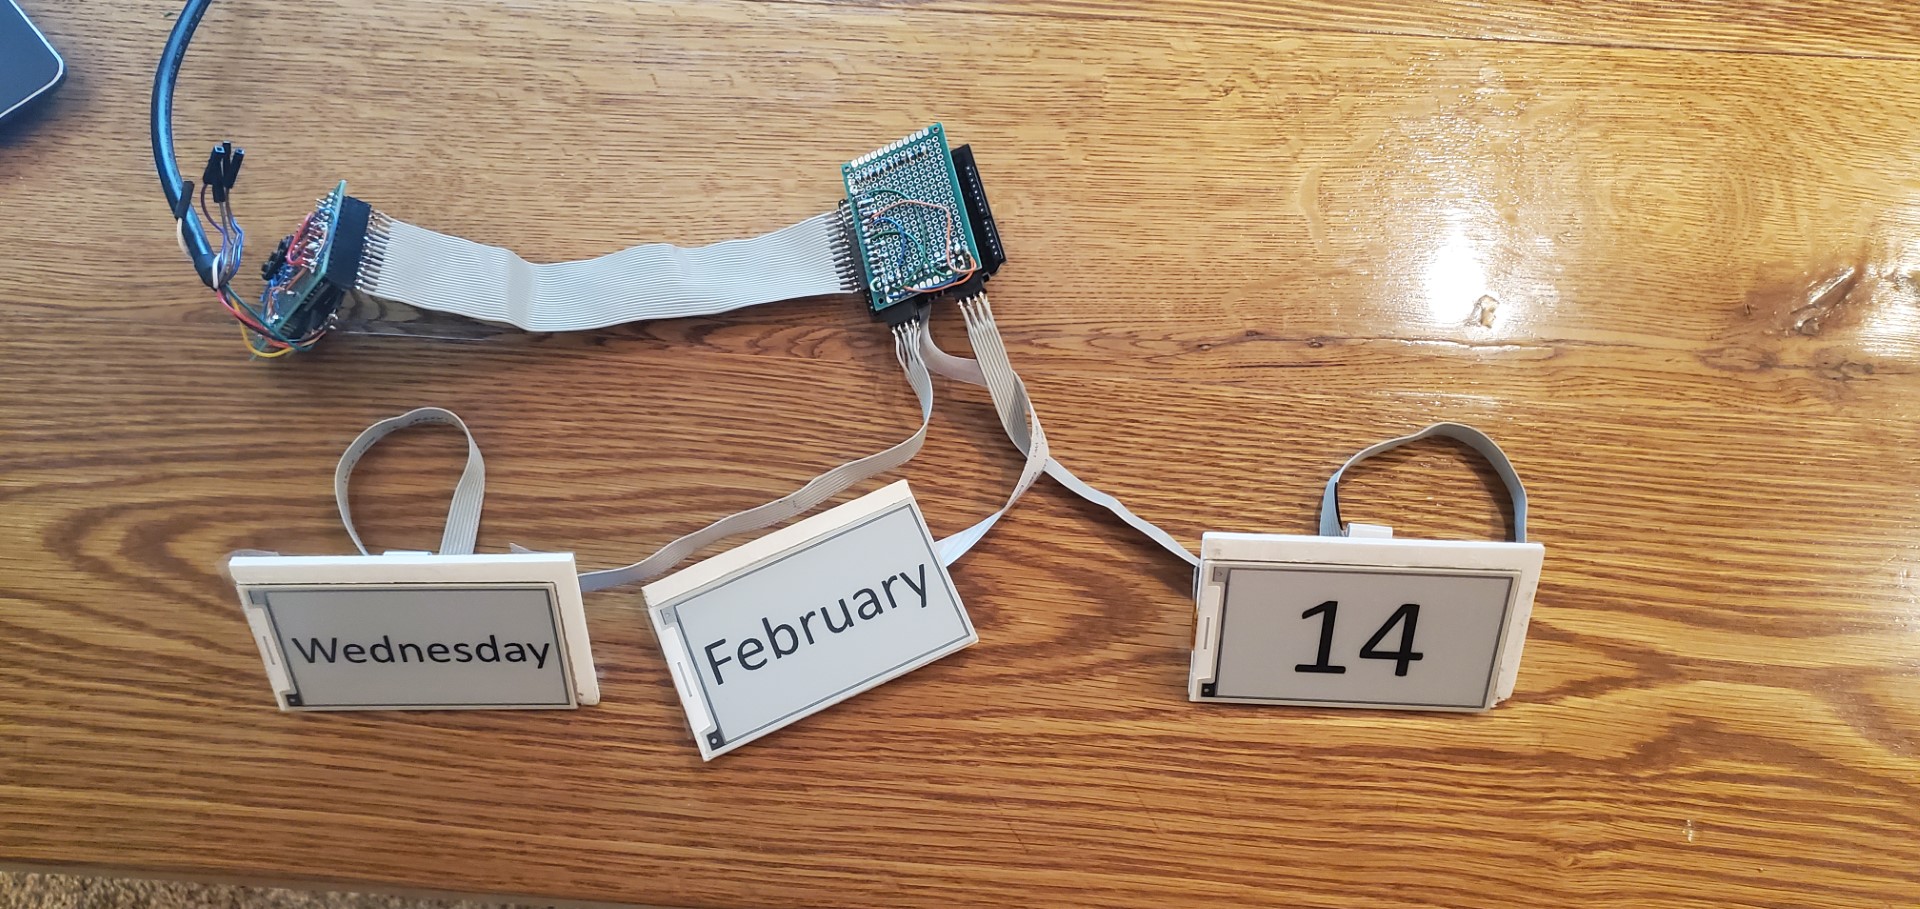
The software for writing to the epaper displays leans heavily on the example provided with the displays, but the example assumed only a single display. Since I had limited IO pins and there was no need to update displays simultaneously I modified the library to accept a display index for each function. With this, I was able to put everything on the same SPI bus and share the SD/RAM between all displays, the library just only asserts the chip select line for the display being updated during the overall update sequence.
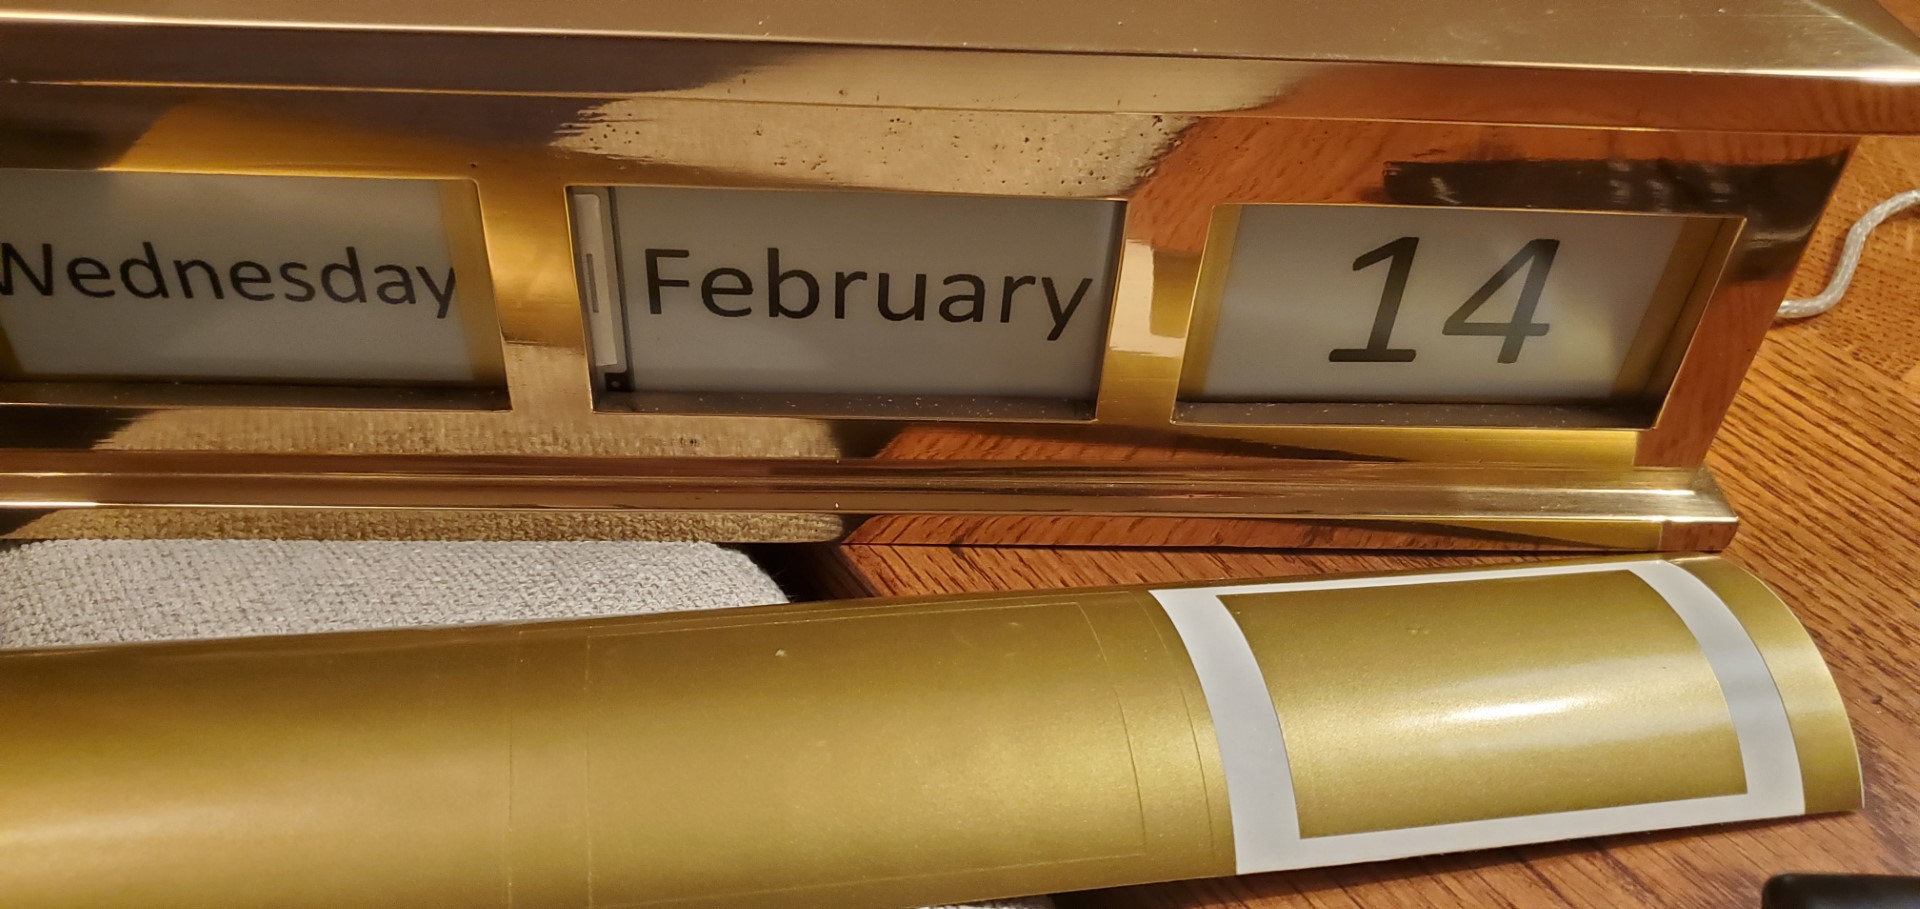
Mechanically, each display is mounted to a 3D-printed plate that pads out the display to the right dimensions, the plate also has screw bosses where the connector boards are mounted. Although the display sizes were very close to the right size, it was unavoidable that some non-displayable area of the panels showed through the front of the calendar frame. To make this look better I made some vinyl frames in a metallic brass/gold color to cover these margins.
(Note: Dates don’t necessarily correlate with actual time/progress since the date was adjusted many times during testing. I also tried several different fonts/styles before deciding on the “FRI FEB 16” format.)

| CPU PIN | Function | Connection |
| 0 | Serial Prog | Prog cable |
| 1 | Serial Prog | Prog cable |
| 2 | ClkInterrupt | RTC |
| 3 | RAM CS | Epaper #1 |
| 4 | EPD2 CS | Epaper #2 |
| 5 | ClkReset | Pushbutton |
| 6 | DateDown | Pushbutton |
| 7 | DateUp | Pushbutton |
| 8 | EPD2 Busy | Epaper #2 |
| 9 | SD CS | Epaper #1 |
| 10 | EPD1 CS | Epaper #1 |
| 11 | MOSI | Epaper all |
| 12 | MISO | Epaper all |
| 13 | LED/CLK | Epaper all |
| 14 | EPD RST | Epaper all |
| 15 | EPD1 Busy | Epaper #1 |
| 16 | EPD DC | Epaper all |
| 17 | EPD3 CS | Epaper #3 |
| 18 | SDA | RTC |
| 19 | SCL | RTC |
| GND | GND/VSS | all |
| VCC | VCC | all |
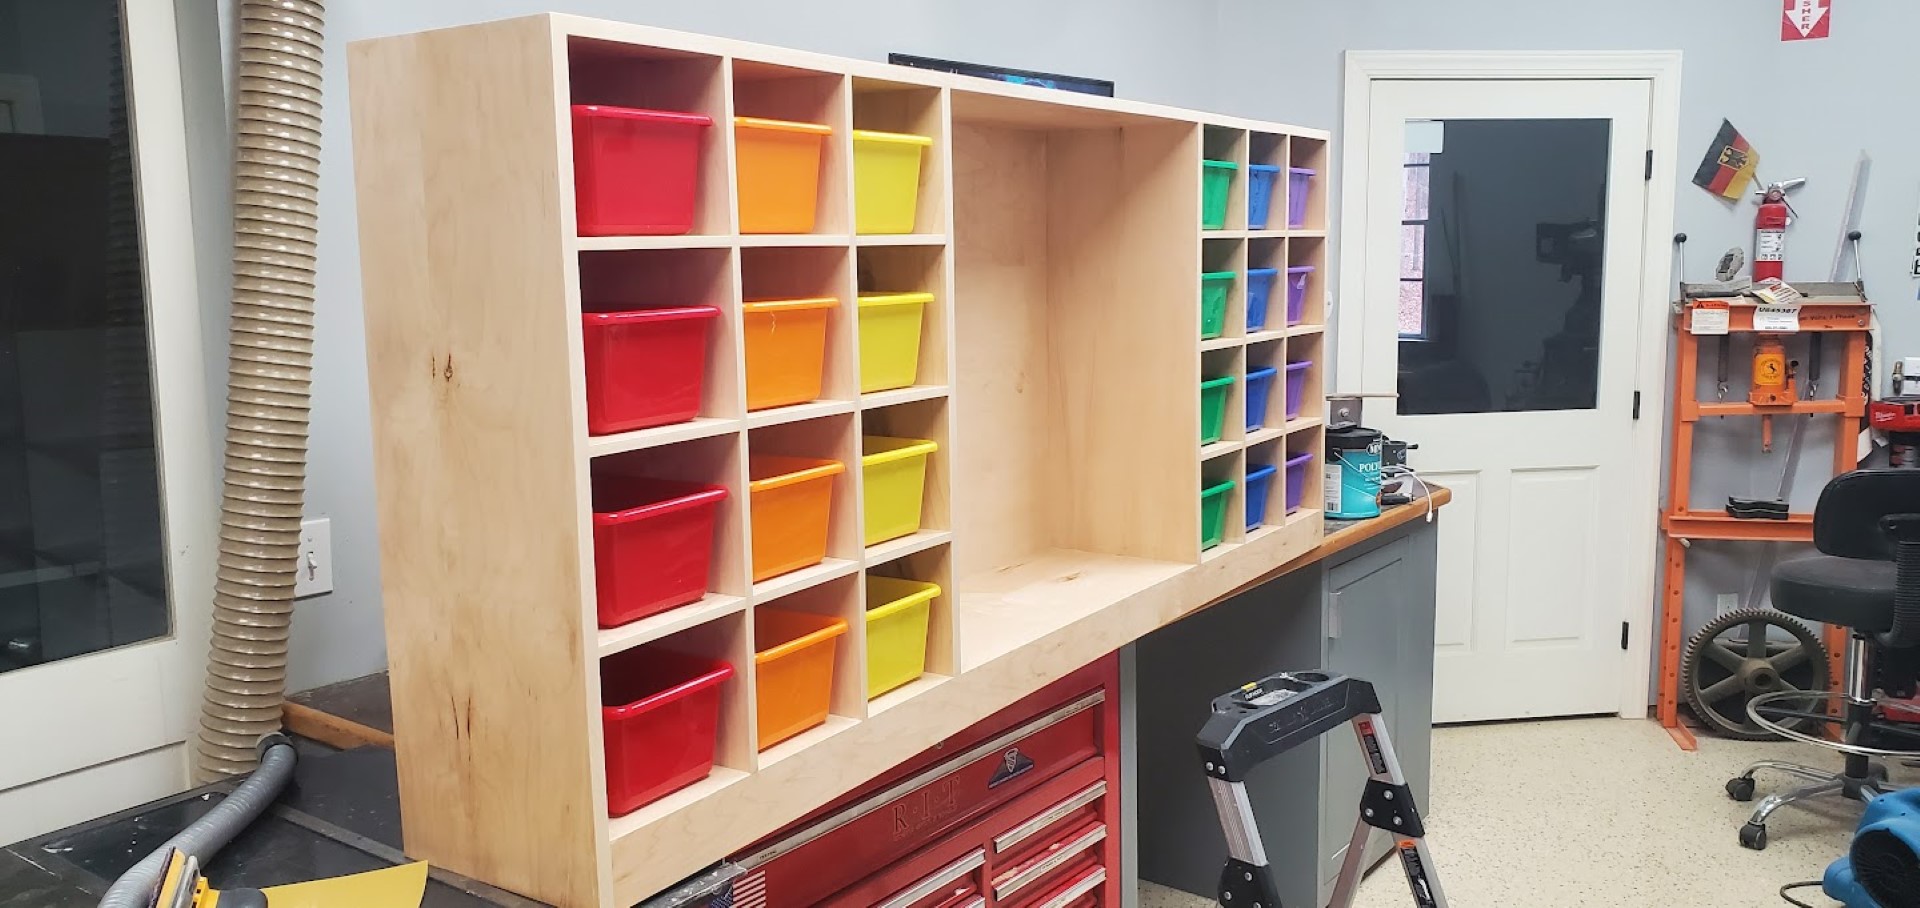
Cubby Hole Toy Organizer
Another quick furniture project, this time a cubby hole toy organizer from maple plywood. The interior is 1/2″ and exterior 3/4″ with a 1/8″ back. Iron-on edge banding was applied/trimmed and then everything got several coats of water-based polyurethane. The holes are made to fit storage bins, the outer columns are slightly wider to accommodate hinges for doors that will be added eventually – the plan is for the doors to be busy boards over all 3 main sections, which may take some time. The center is open for now but may have shelves added.

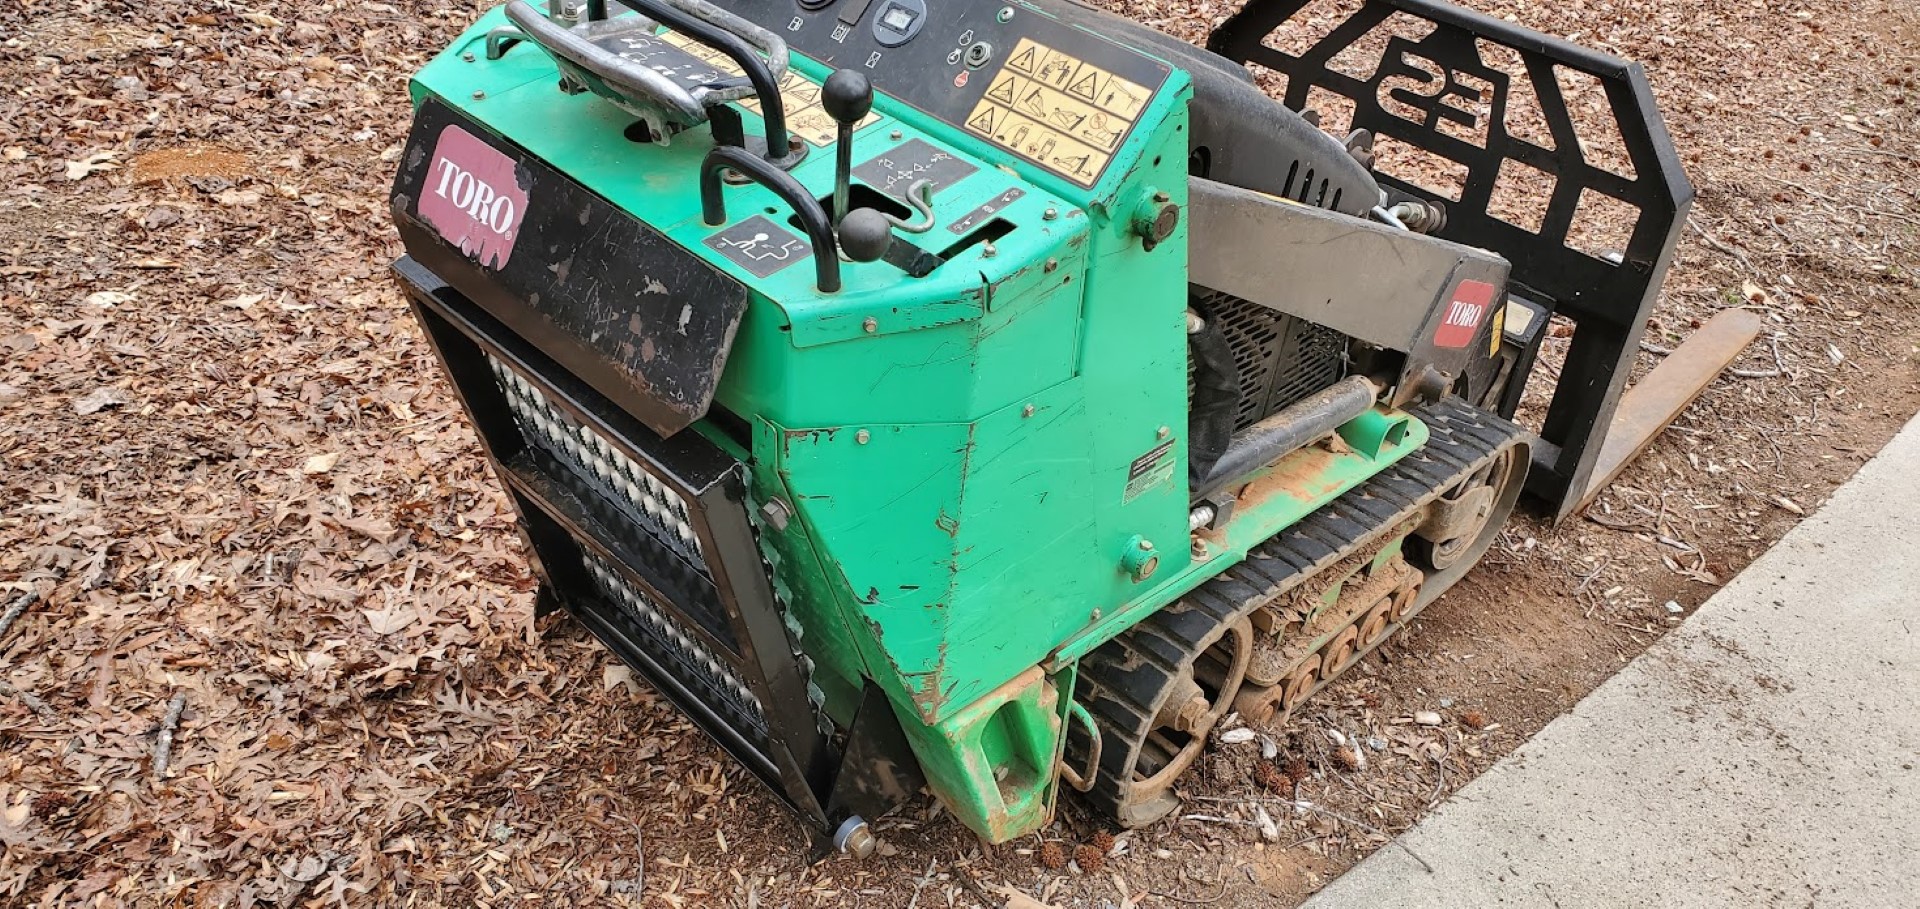
Toro Dingo Platform
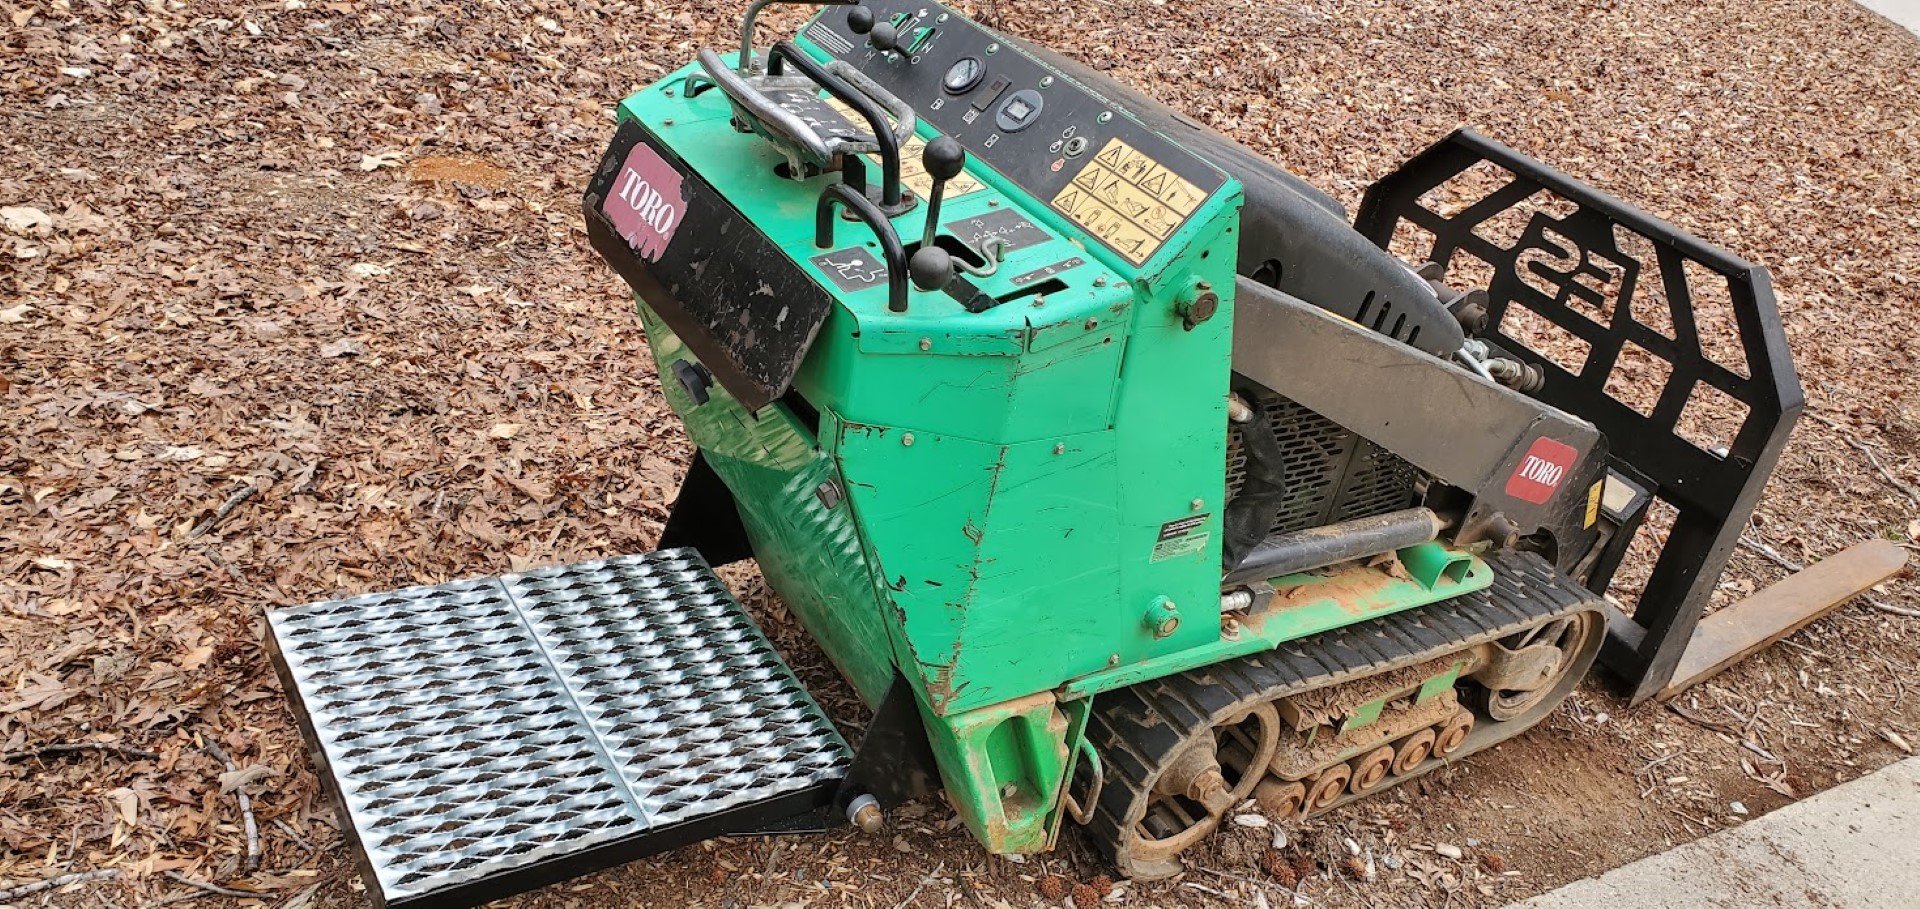
Last spring I won an auction for a Toro Dingo TX427 mini skid steer. Uncharacteristic of my usual equipment purchases, it didn’t need anything other than cleaning and an oil change. It came with the standard bucket, and I also later got a pallet fork attachment and a tooth bar for the bucket. Over the last year it’s been extremely useful with various landscaping tasks, as well as moving around pallets of materials for various projects. Mostly though it’s the perfect tool for dealing with downed trees and getting logs to the sawmill or burn pile.
One limitation that became apparent is the machine’s limited counterweight – the back begins to lift well before the hydraulic pressure relief trips. An optional feature from Toro addressed this problem by adding an operator platform, but mine lacked this option. I’d kept an eye out for used Toro platforms, but they weren’t often available and were overpriced – especially after considering shipping. A simplified aftermarket version was available closer to when the machines were new, but these had stopped production.
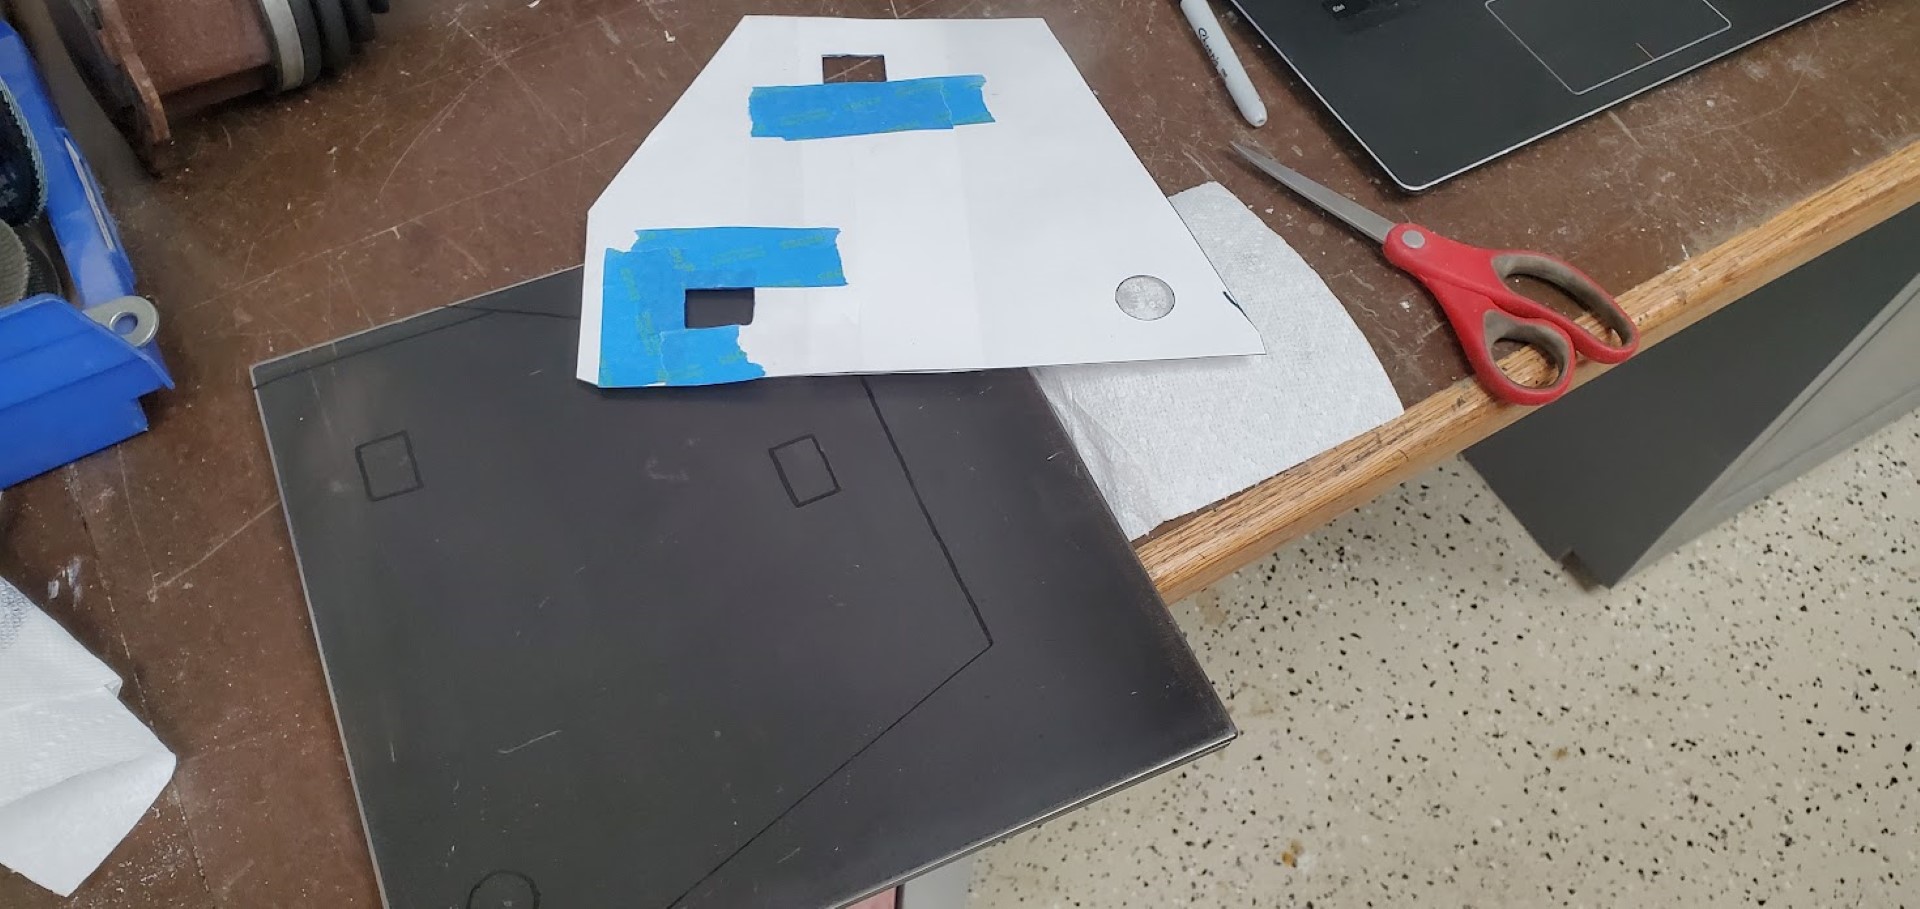
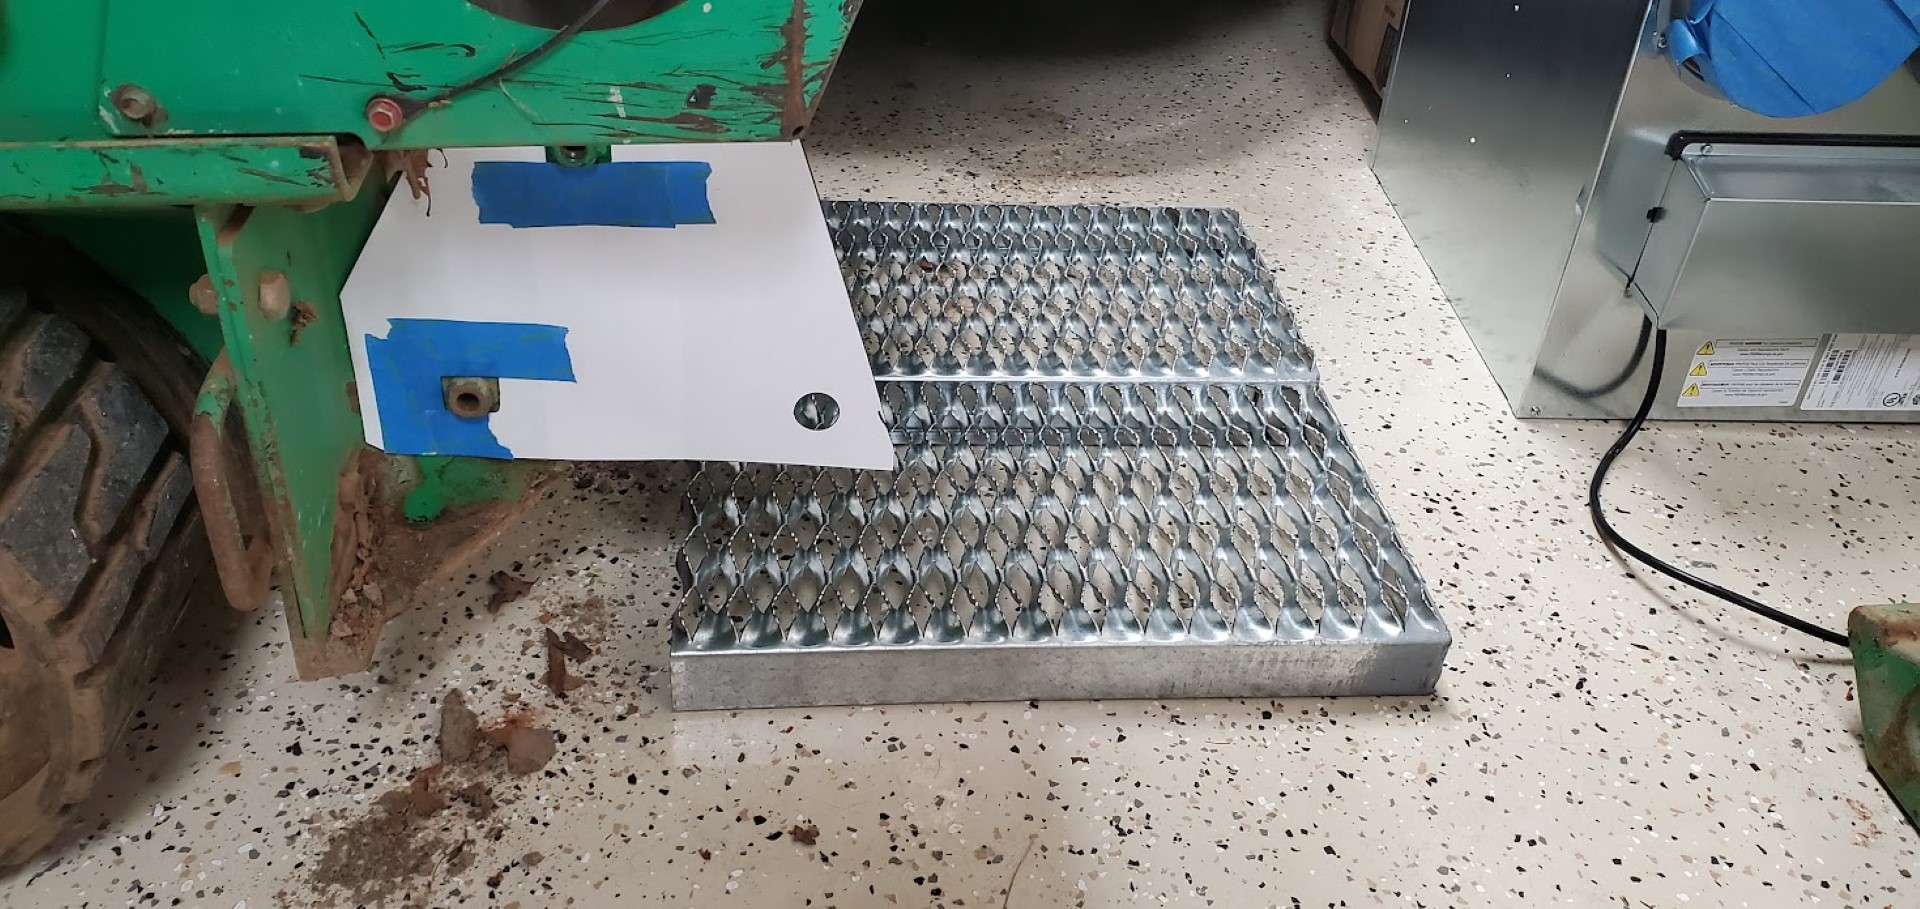
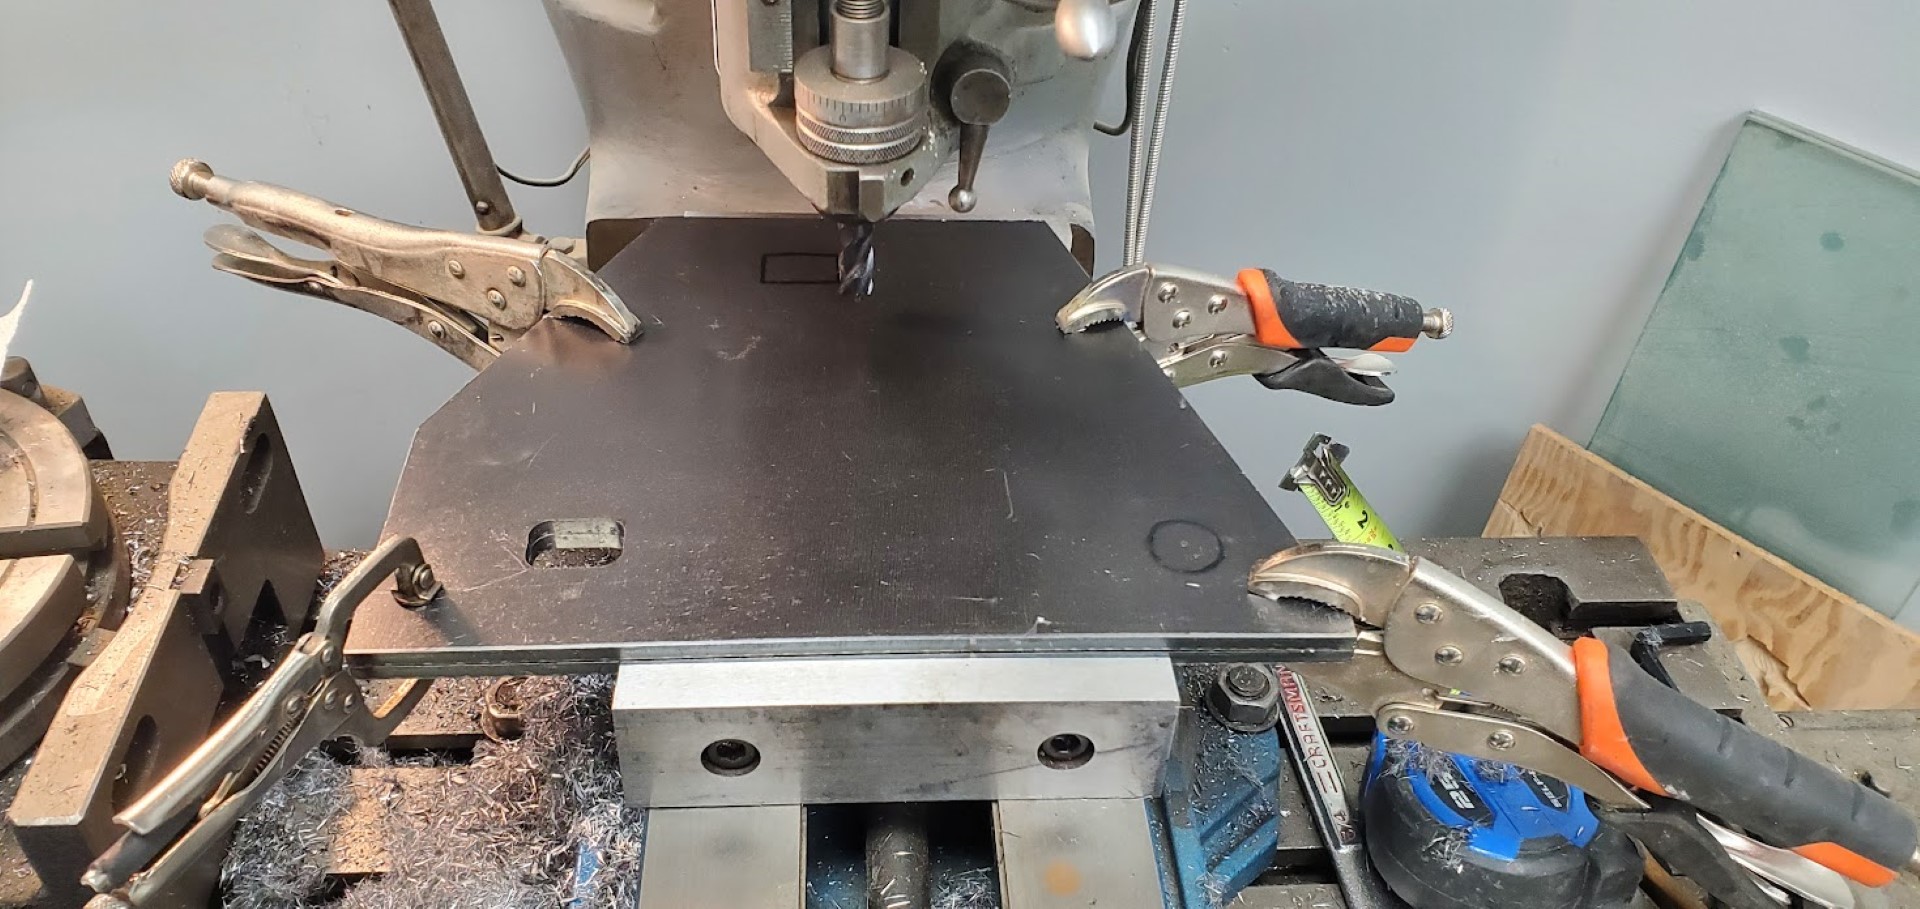
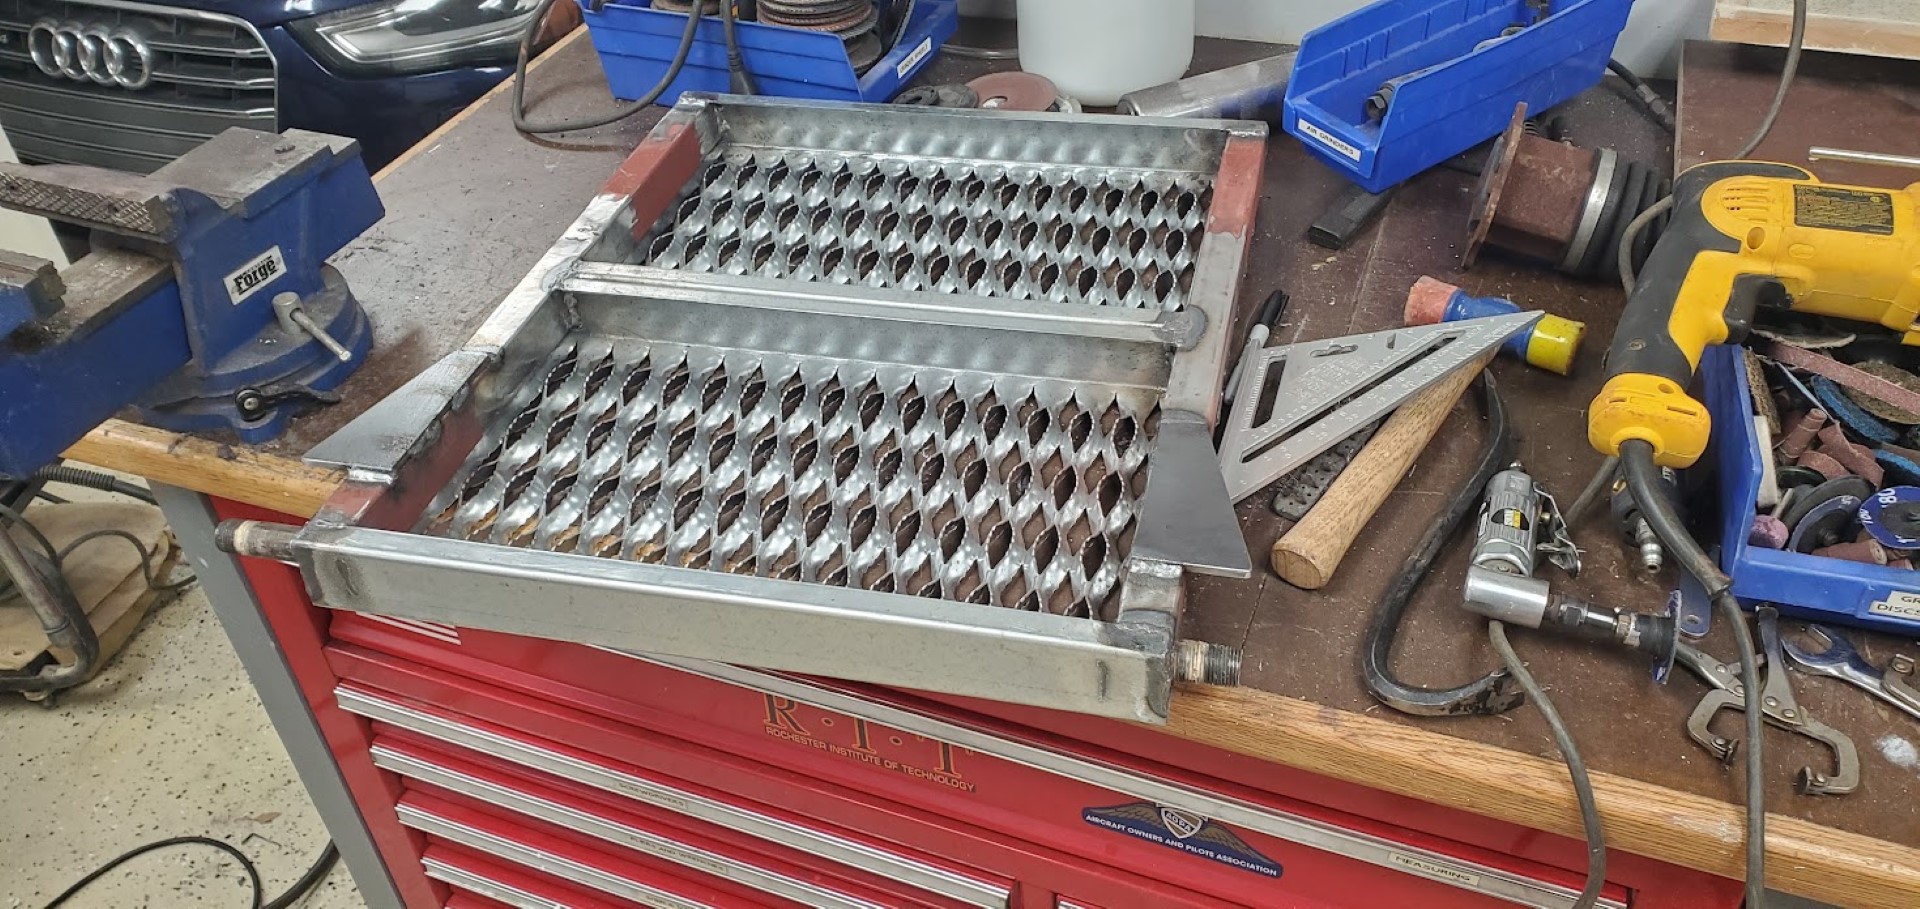
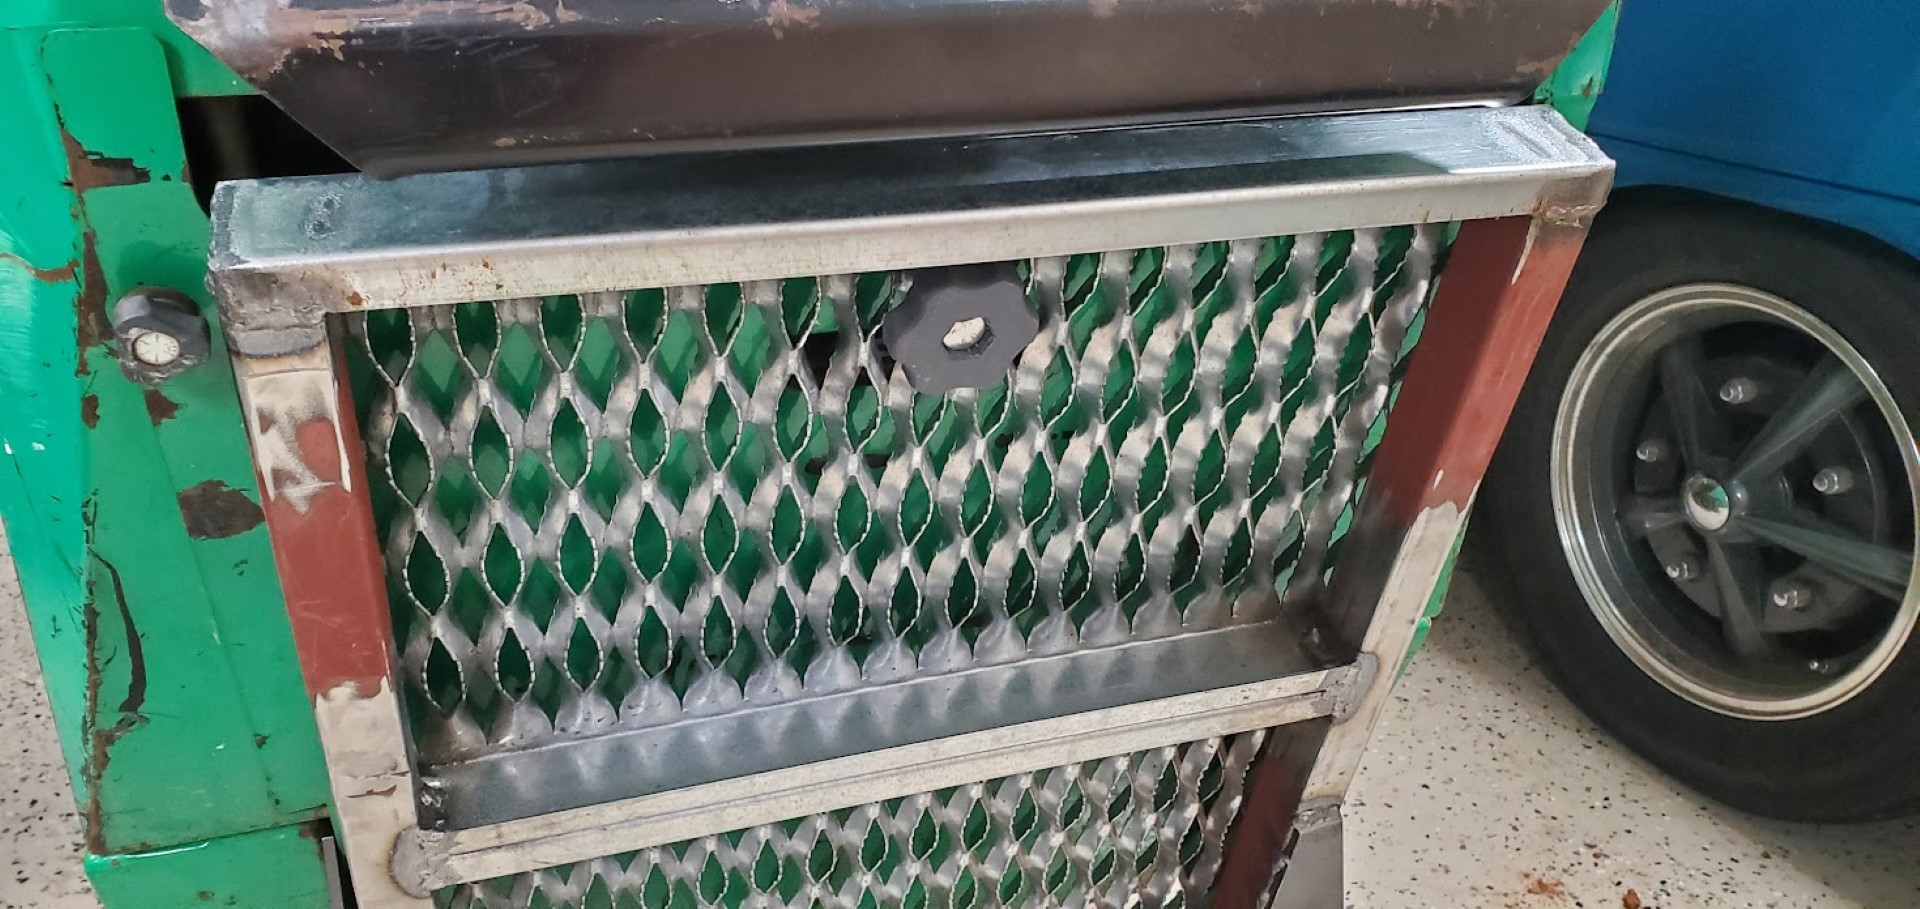
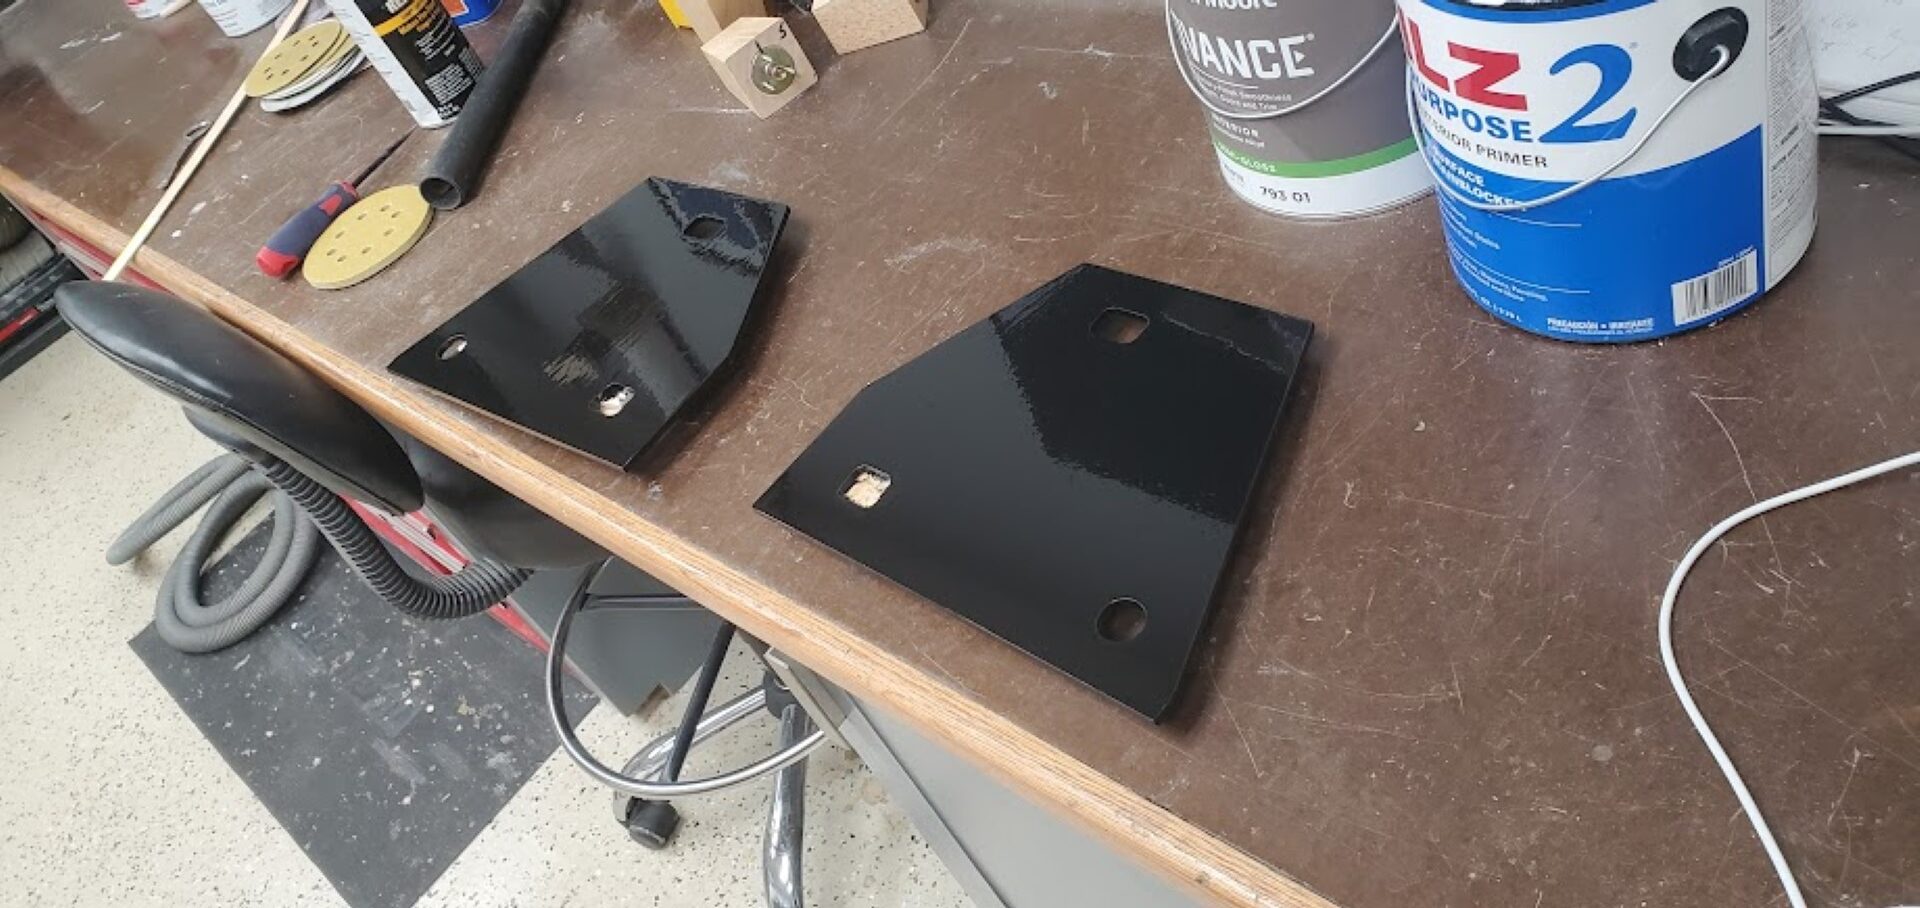
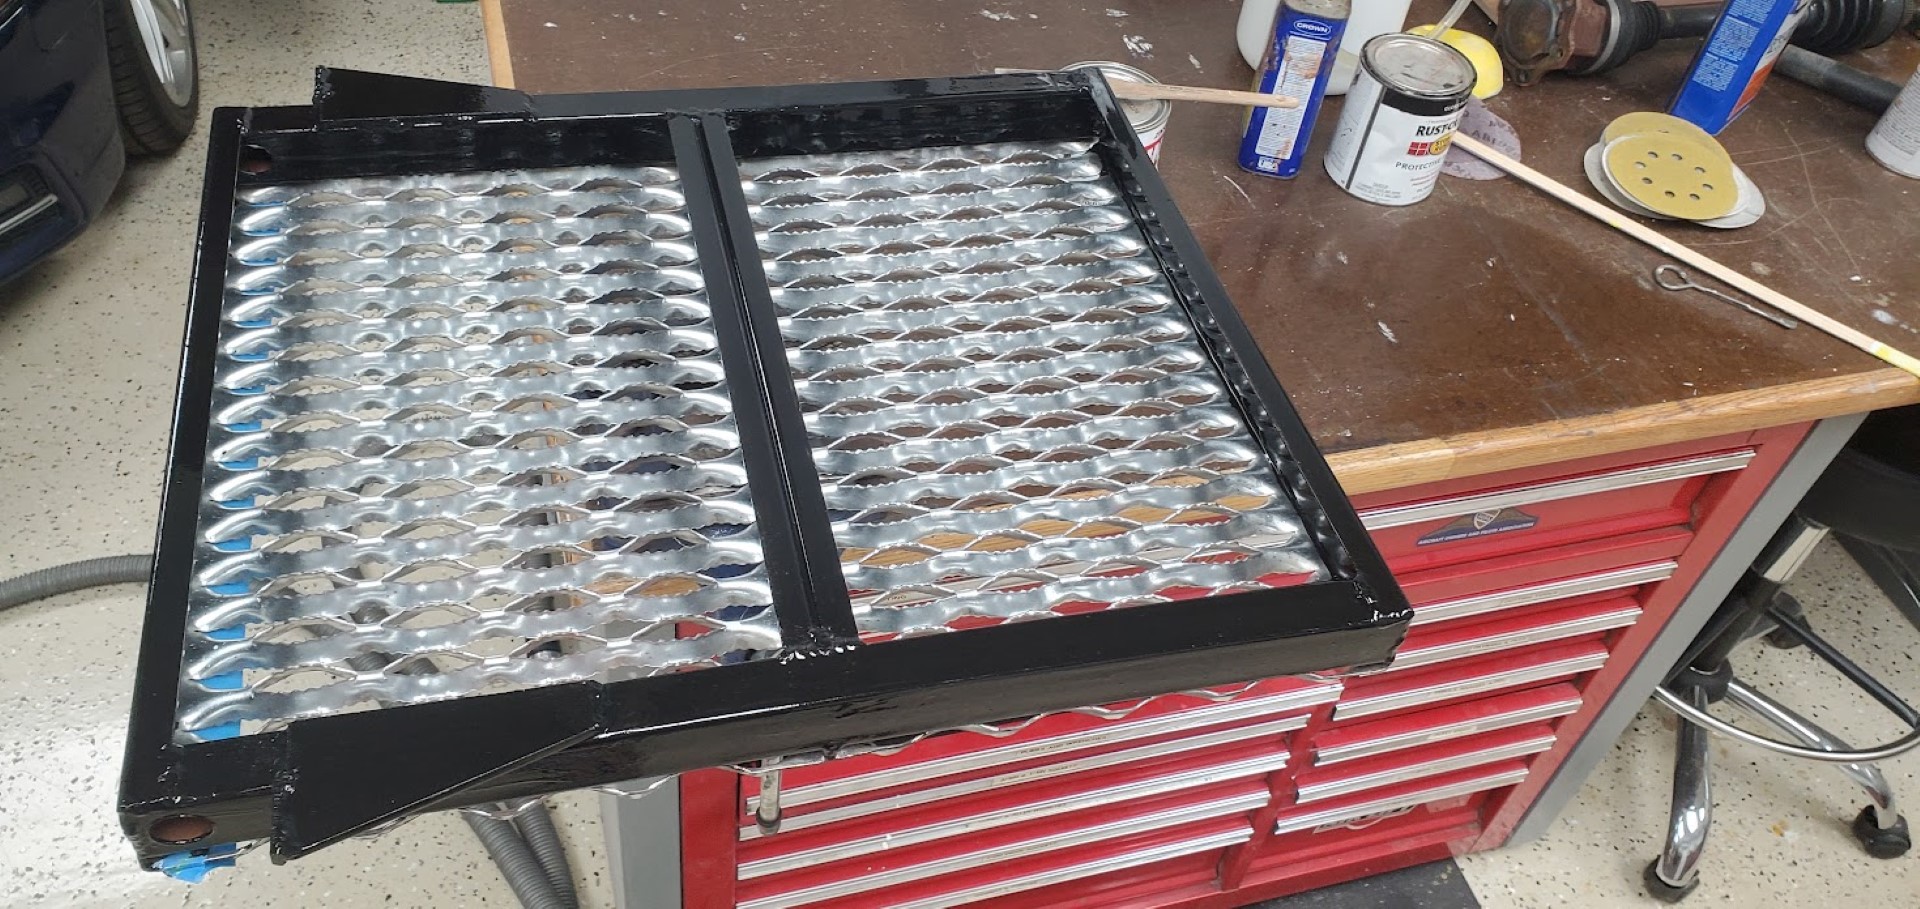
With that considered I decided to build my own platform based on pictures of the aftermarket version. It consists mainly of an expanded metal stair tread cut in half and welded back together into a square. Two square tubes reinforce the stair tread, and then it all hinges on a length of black iron pipe that runs through brackets sandwiched between the frame and the existing counterweights. Stops were then welded on each side of the platform to hold it level when deployed. When folded up against the back of the machine, a bolt (with 3d printed knob handle) holds it all in place. It’s flat enough when folder to not be in the way for operating while standing on the ground.

Bookcase
Quick bookcase build project. First time using this technique, it’s just plywood with dados cut at each intersection. The main trick to this was planning out all dimensions in CAD first then making sure every cut was as accurate as possible, then everything went together like a puzzle and made solid glue joints. It took many rounds of filling, priming, and sanding to hide the plywood texture. After paint was complete I added off-the-self legs.

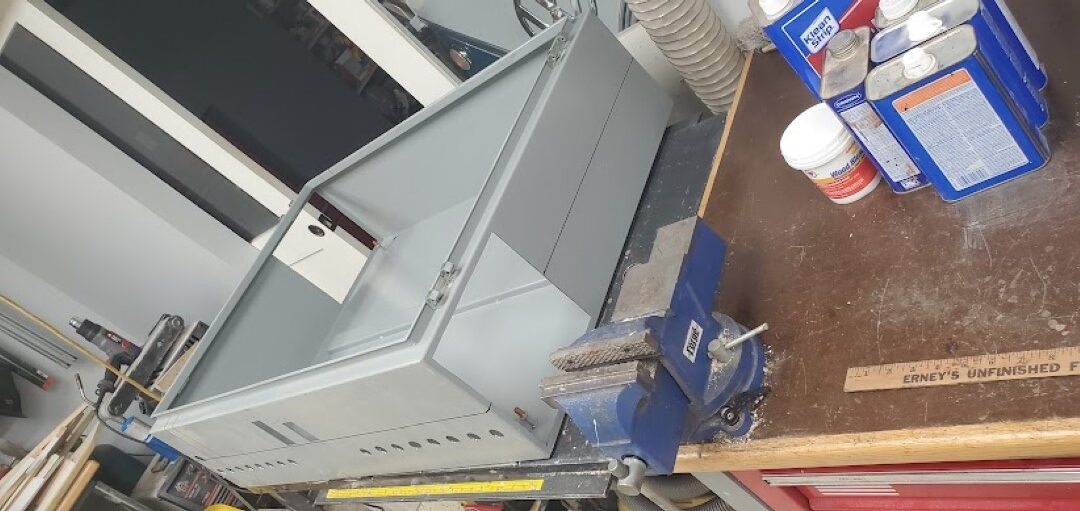
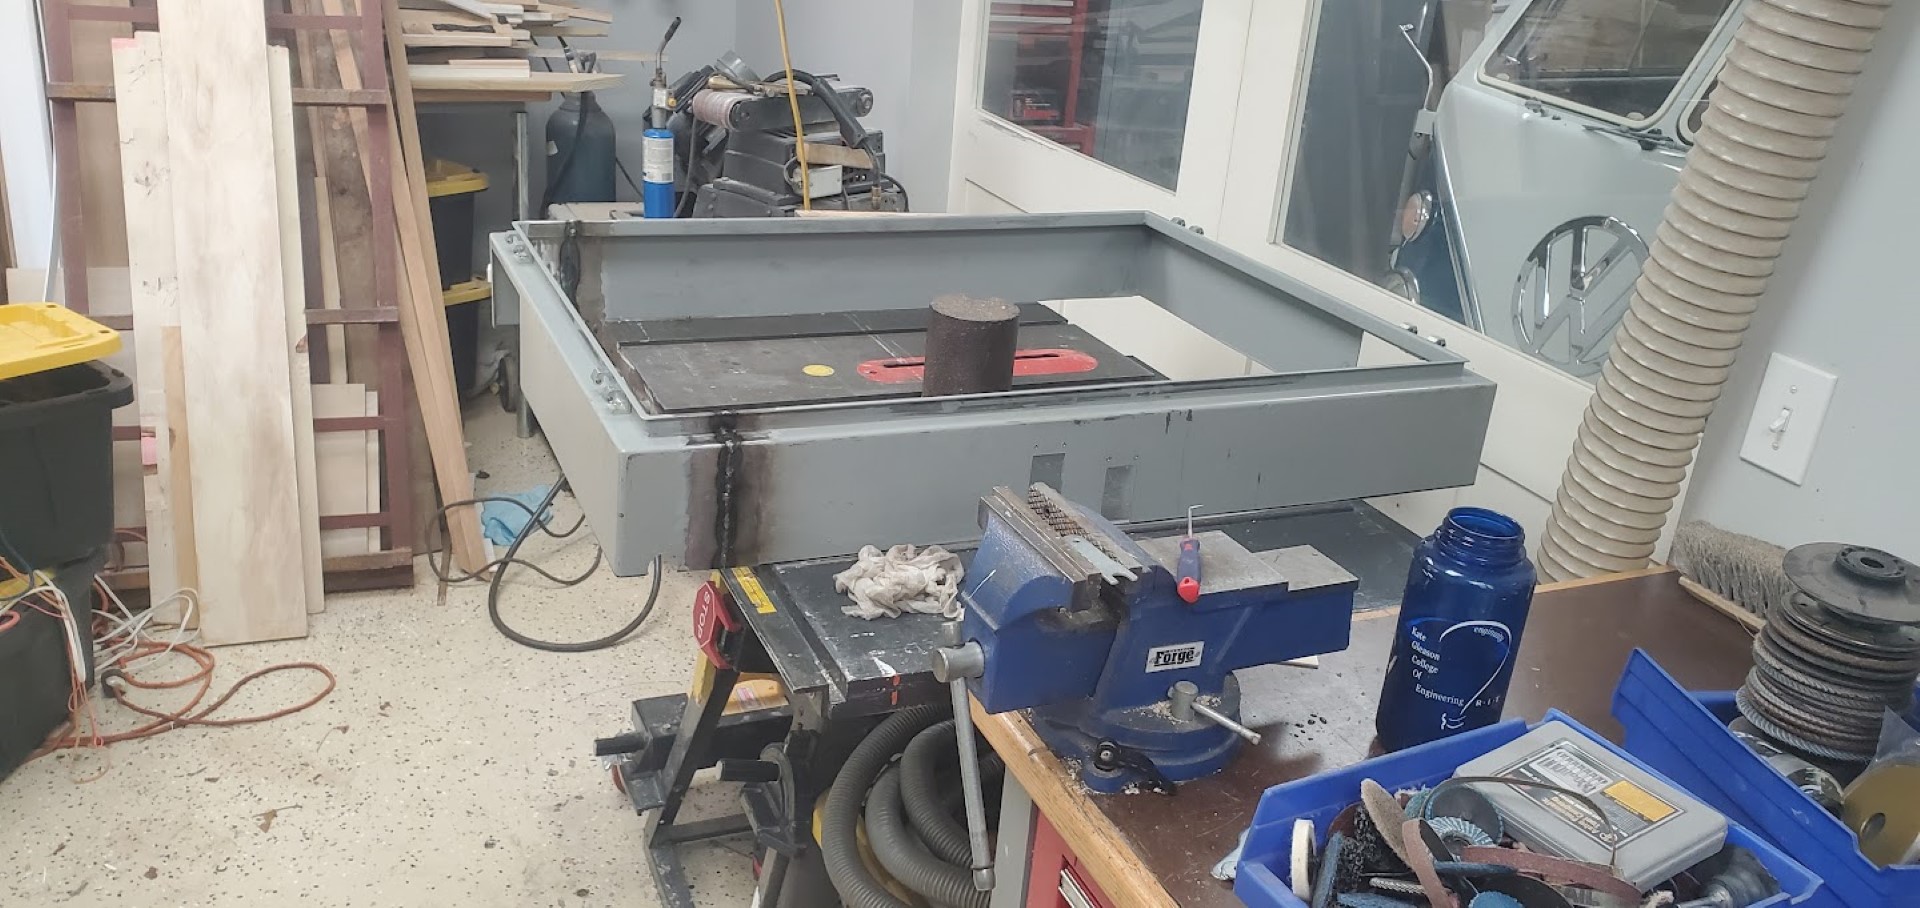
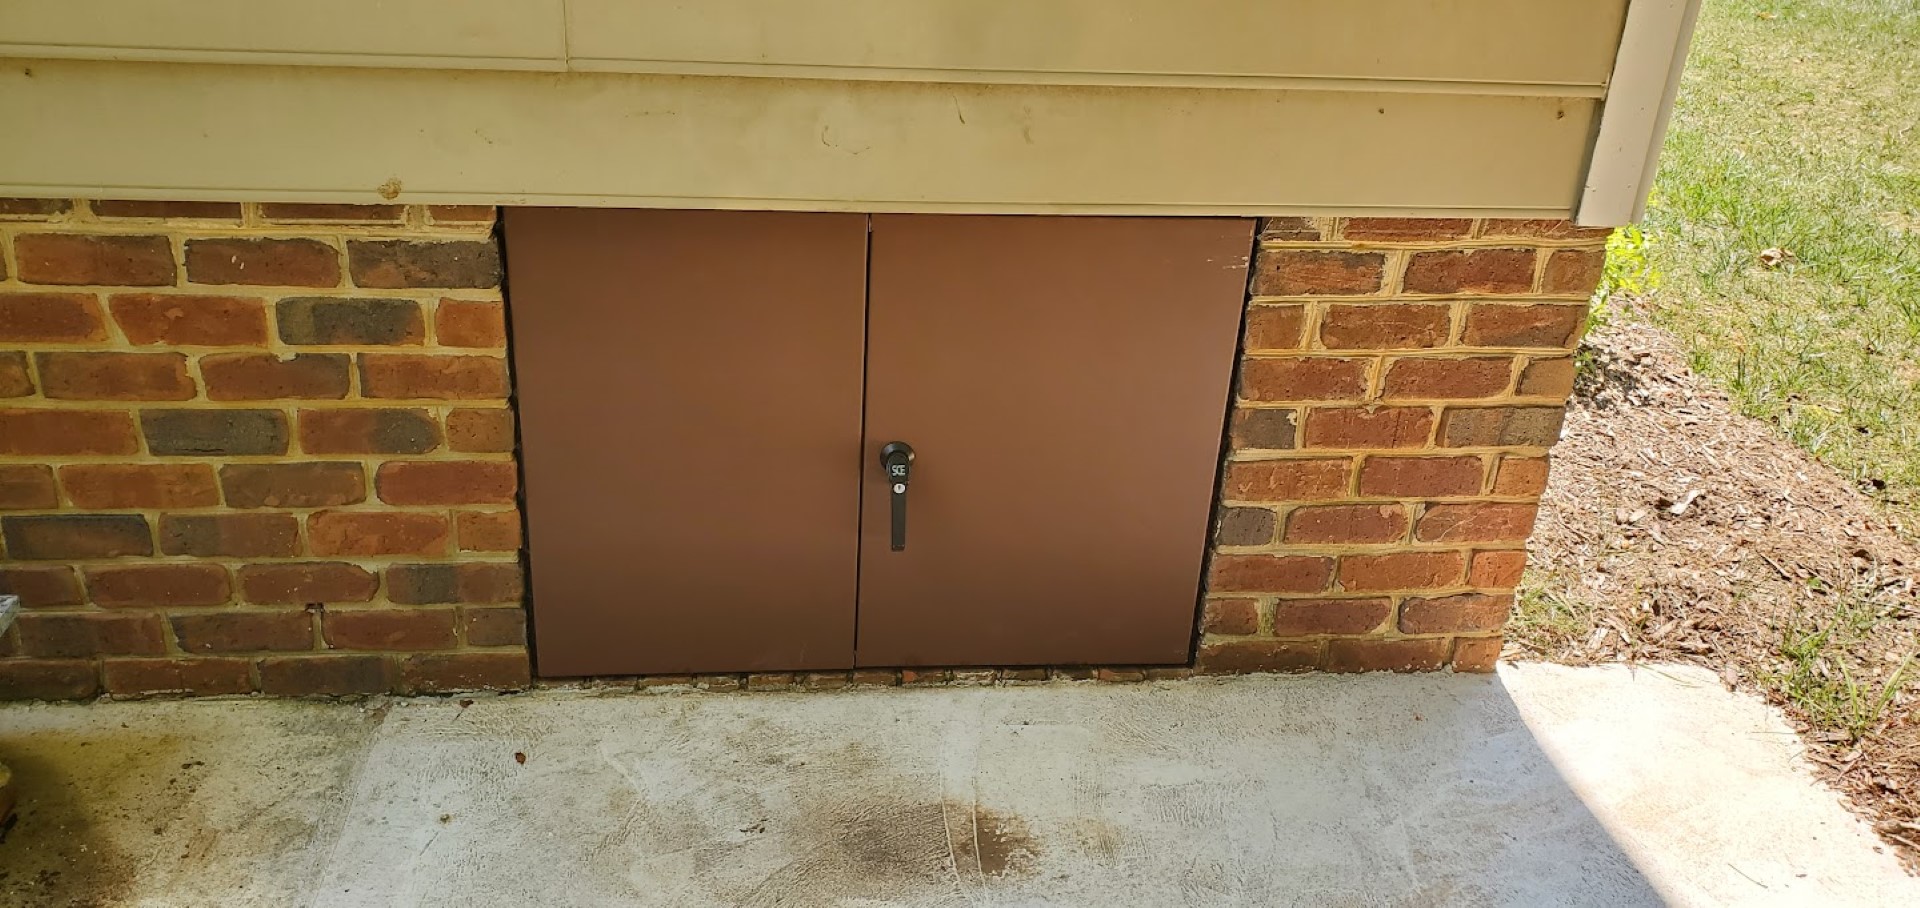
Crawlspace Door
One side of the house had a site-built wooden door. This always bugged me since it’s the only place on the house where wood extended below the wall’s sill plate – everywhere else it was masonry or metal only. This door was vulnerable to rot/termites and also didn’t seal well (mouse risk), so I have been keeping an eye out for a better replacement – with the concrete/drainage being finished in the area this door is the last part of the overall project to remodel the area.
I found a used electrical control panel online that was the correct height, but slightly too wide. Since this was the closest match I had seen and since it was local I picked it up. I first cut the back out of it to the correct depth, then cut a section out of the panel and one of the doors before welding it back together. The door got some minor filler before everything was sanded and painted. The door was then caulked in place and new weatherstripping installed.
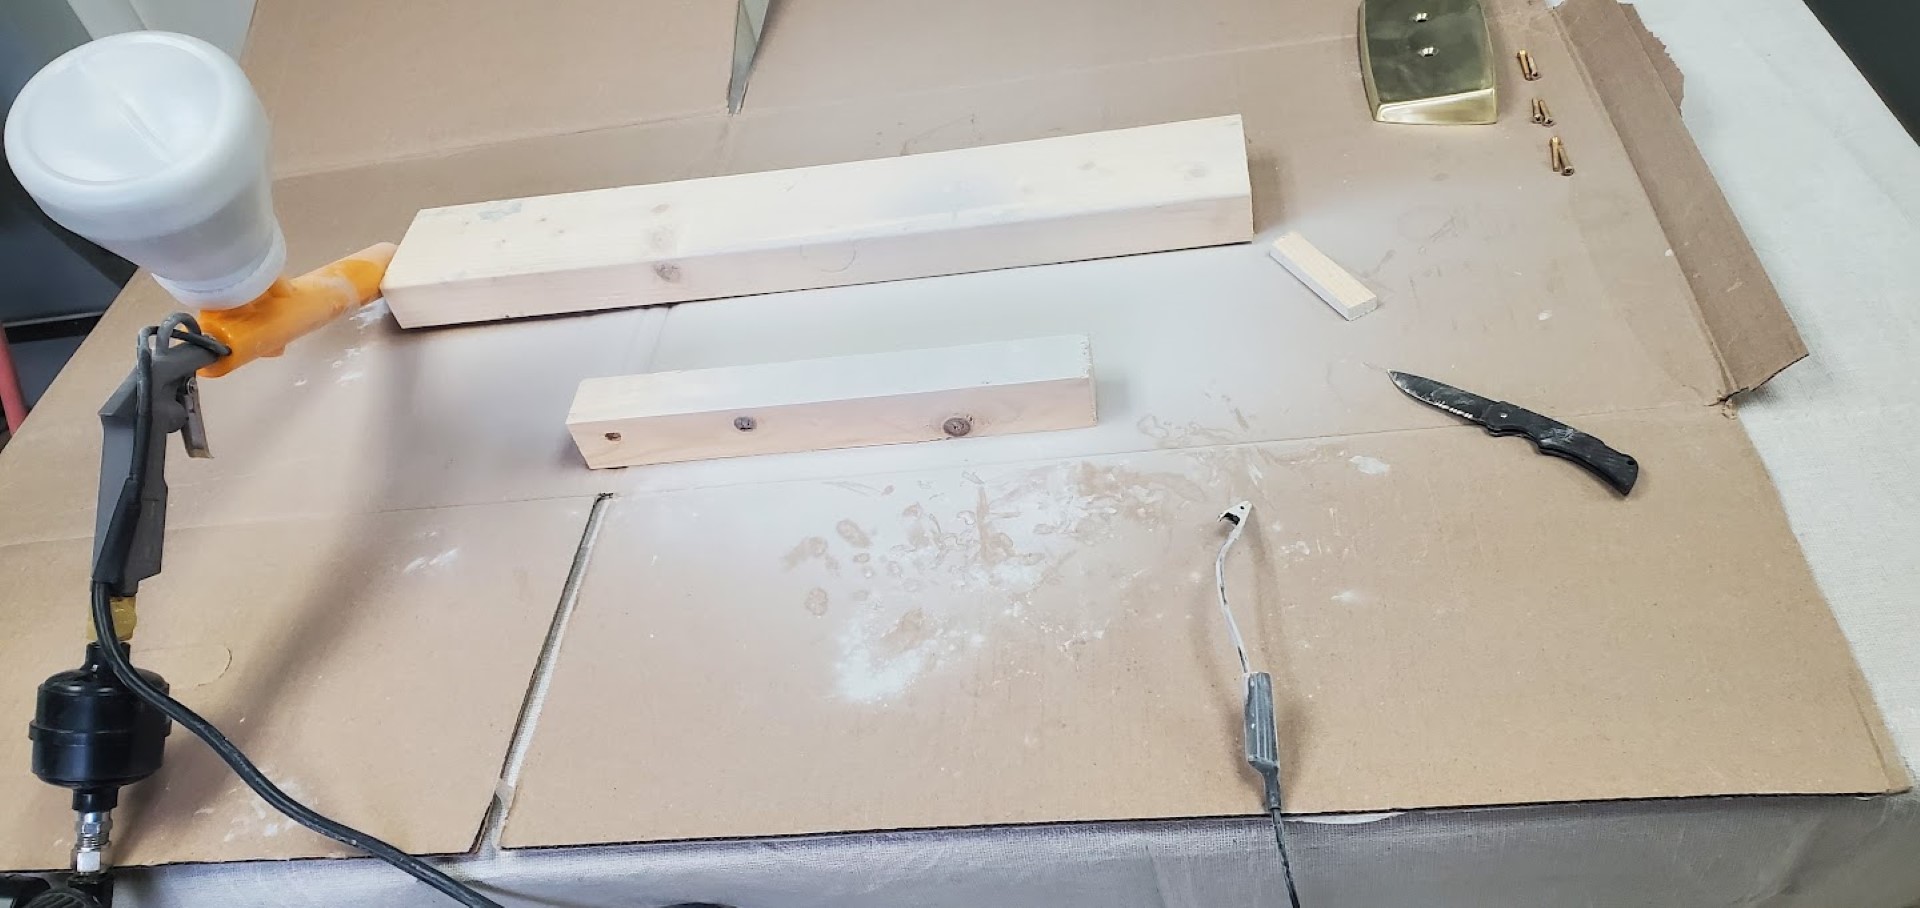
Jacuzzi Hardware Powdercoat
The jacuzzi tub the house came with is big, grey, and (according to a scan of the manual I found) able to pre-fill via a phone call to its land-line modem* – if only land lines still existed. Mechanically though it’s fully sound and there’s no reason to replace it. Doing so would be a major expense even before factoring in the chaos it would create – one wall of the bathroom would need to come out, at a minimum. Much better for now to just freshen up the appearance.
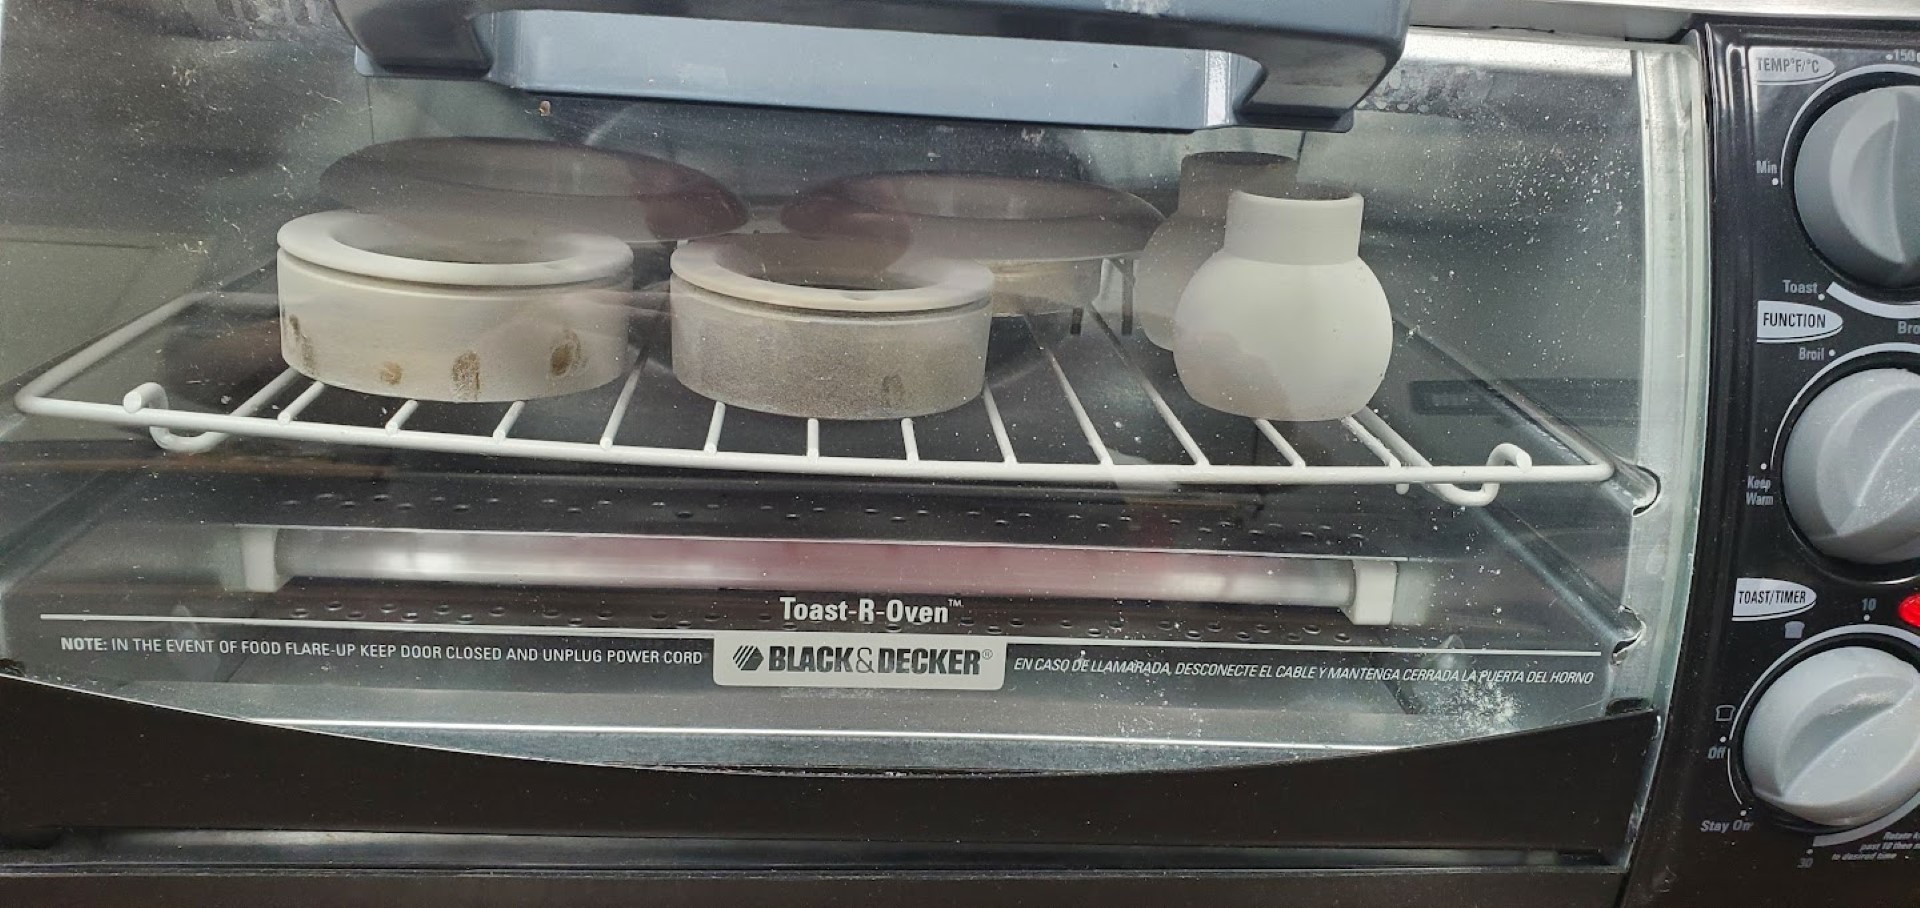
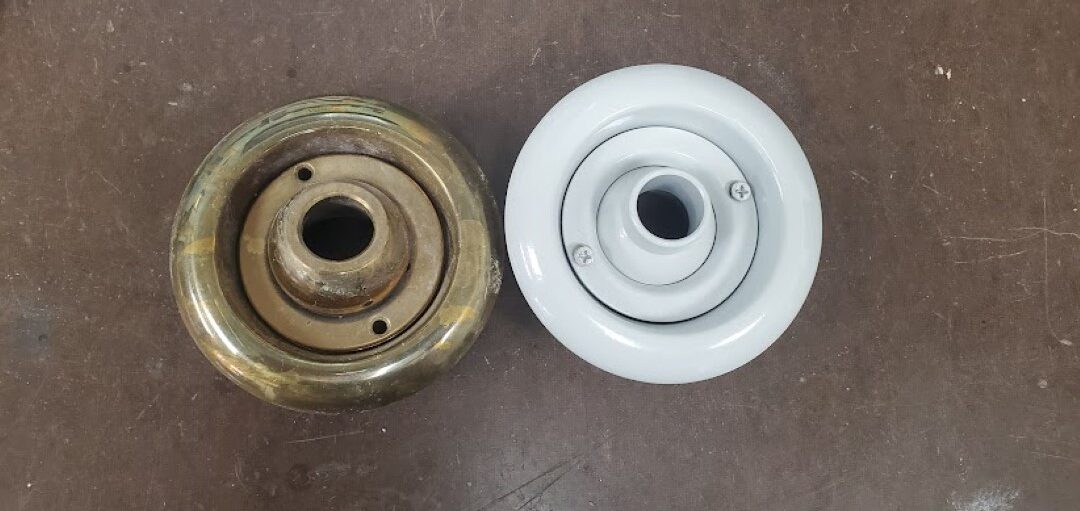
A big part of the objectionable appearance was that the brass hardware (even if polished rather than corroded) doesn’t fit with either of the last two remodels the bathroom has undergone; one from previous owner, one from us. The hardware isn’t available anymore in any color, and paint would quickly scratch off, so this was a great excuse to try powder coating. I picked up a $5 toaster oven, power coat gun, and grey powder coat. Results look great and it seems like it will be plenty durable.
*Replacing/Interfacing to this with an ESP/Arduino/Raspi may be a rainy day project.
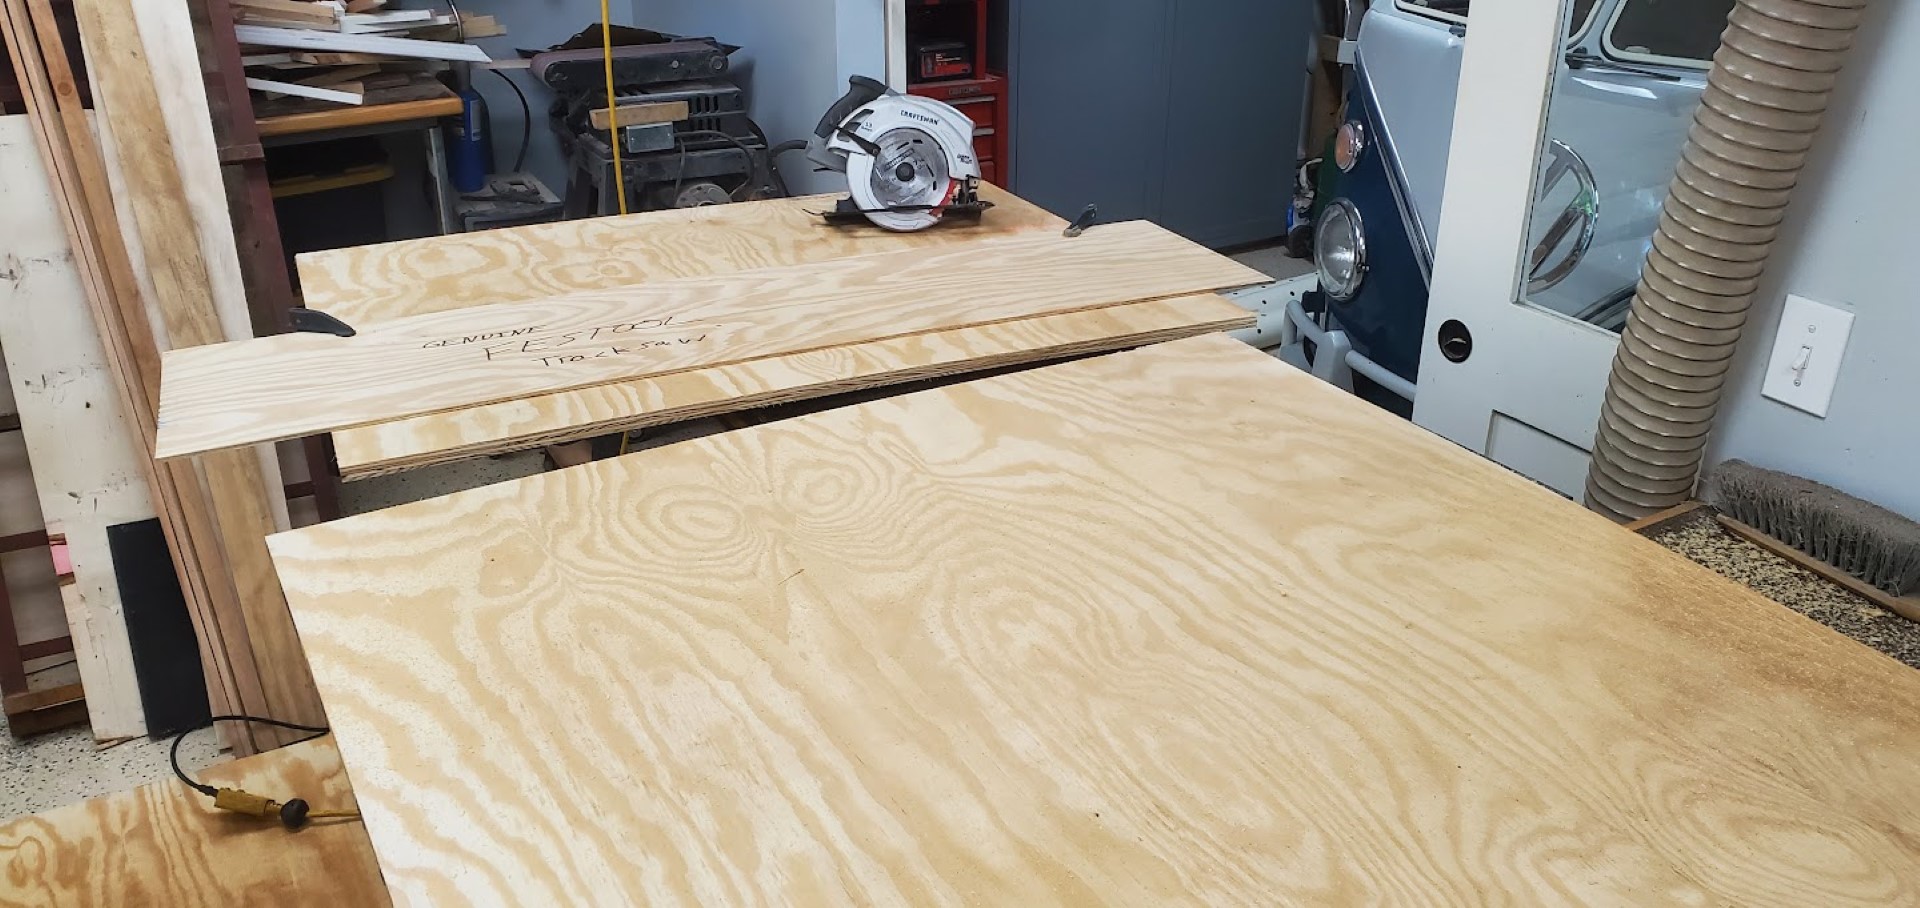
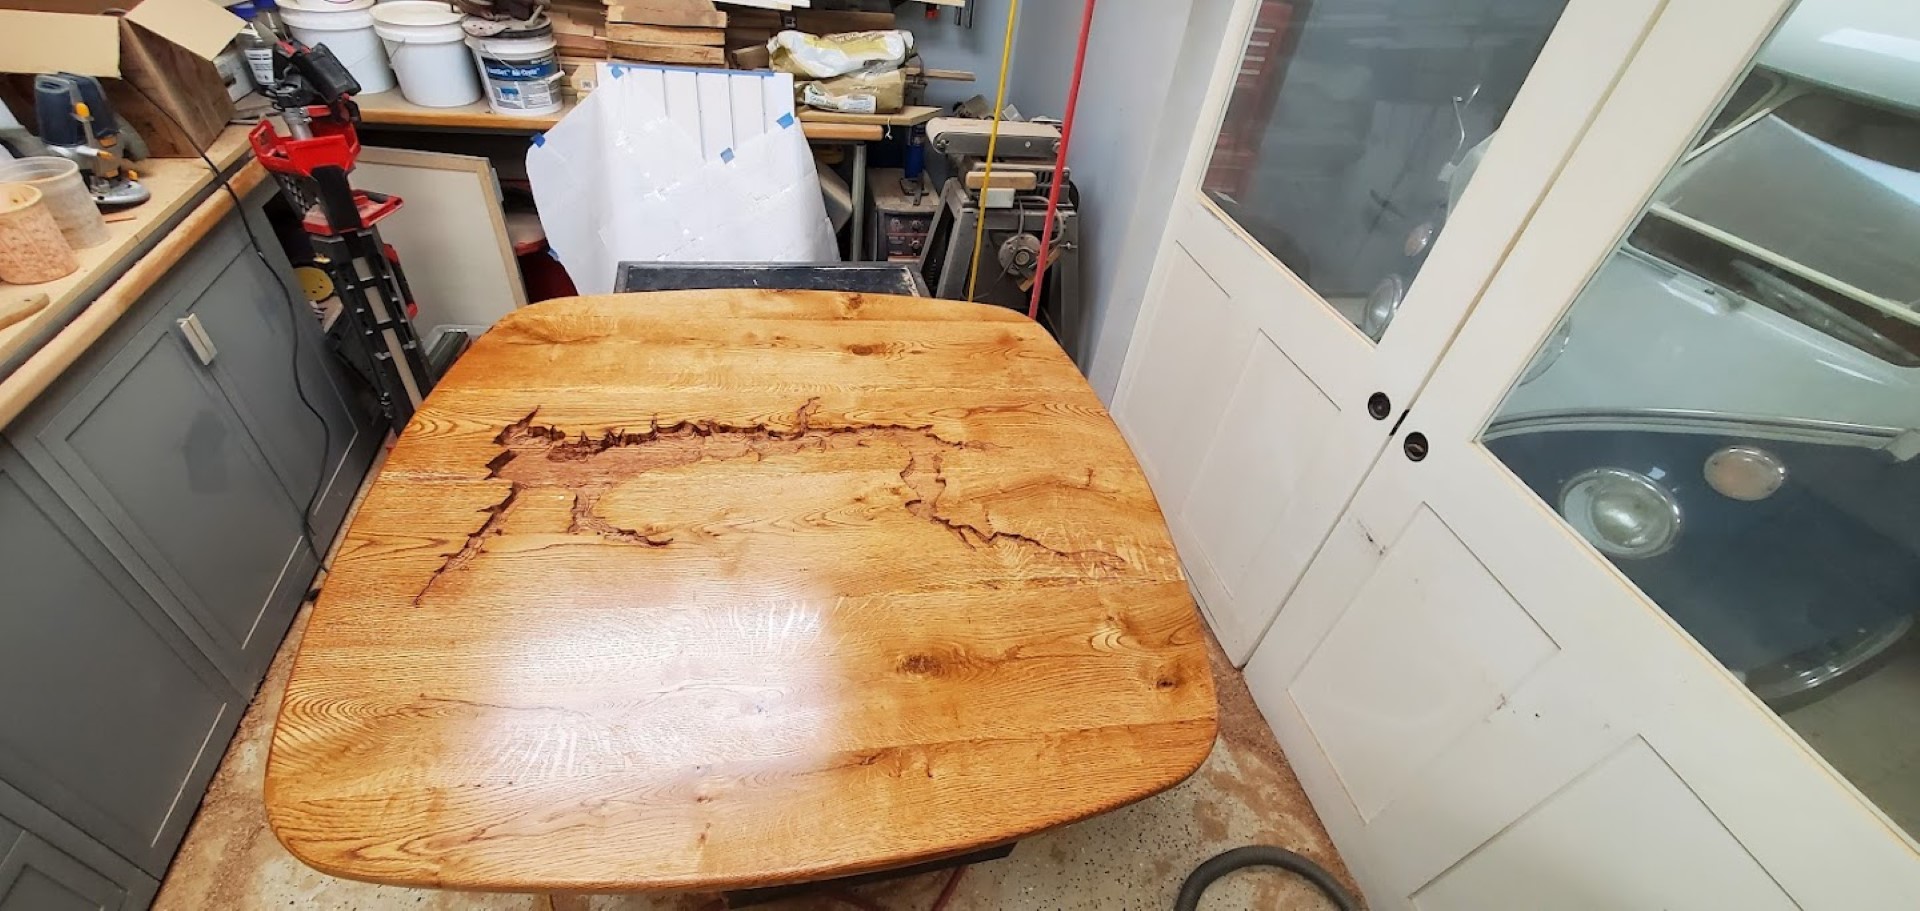
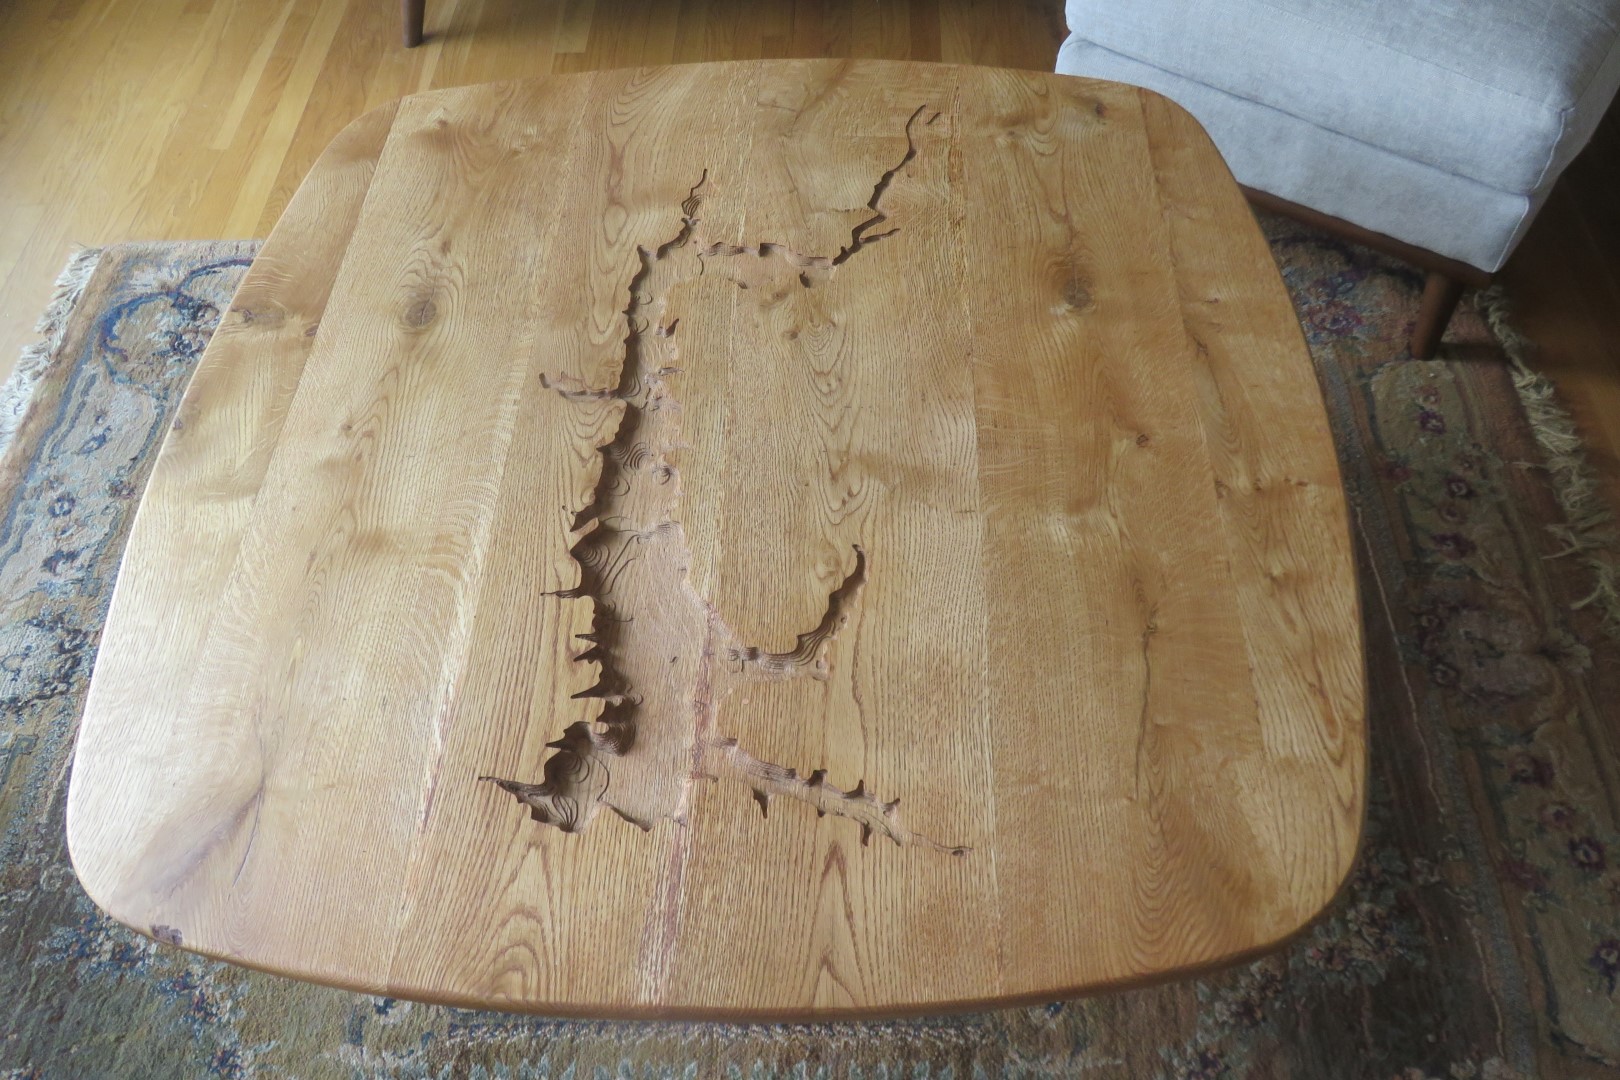
CNC Lake Coffee Table
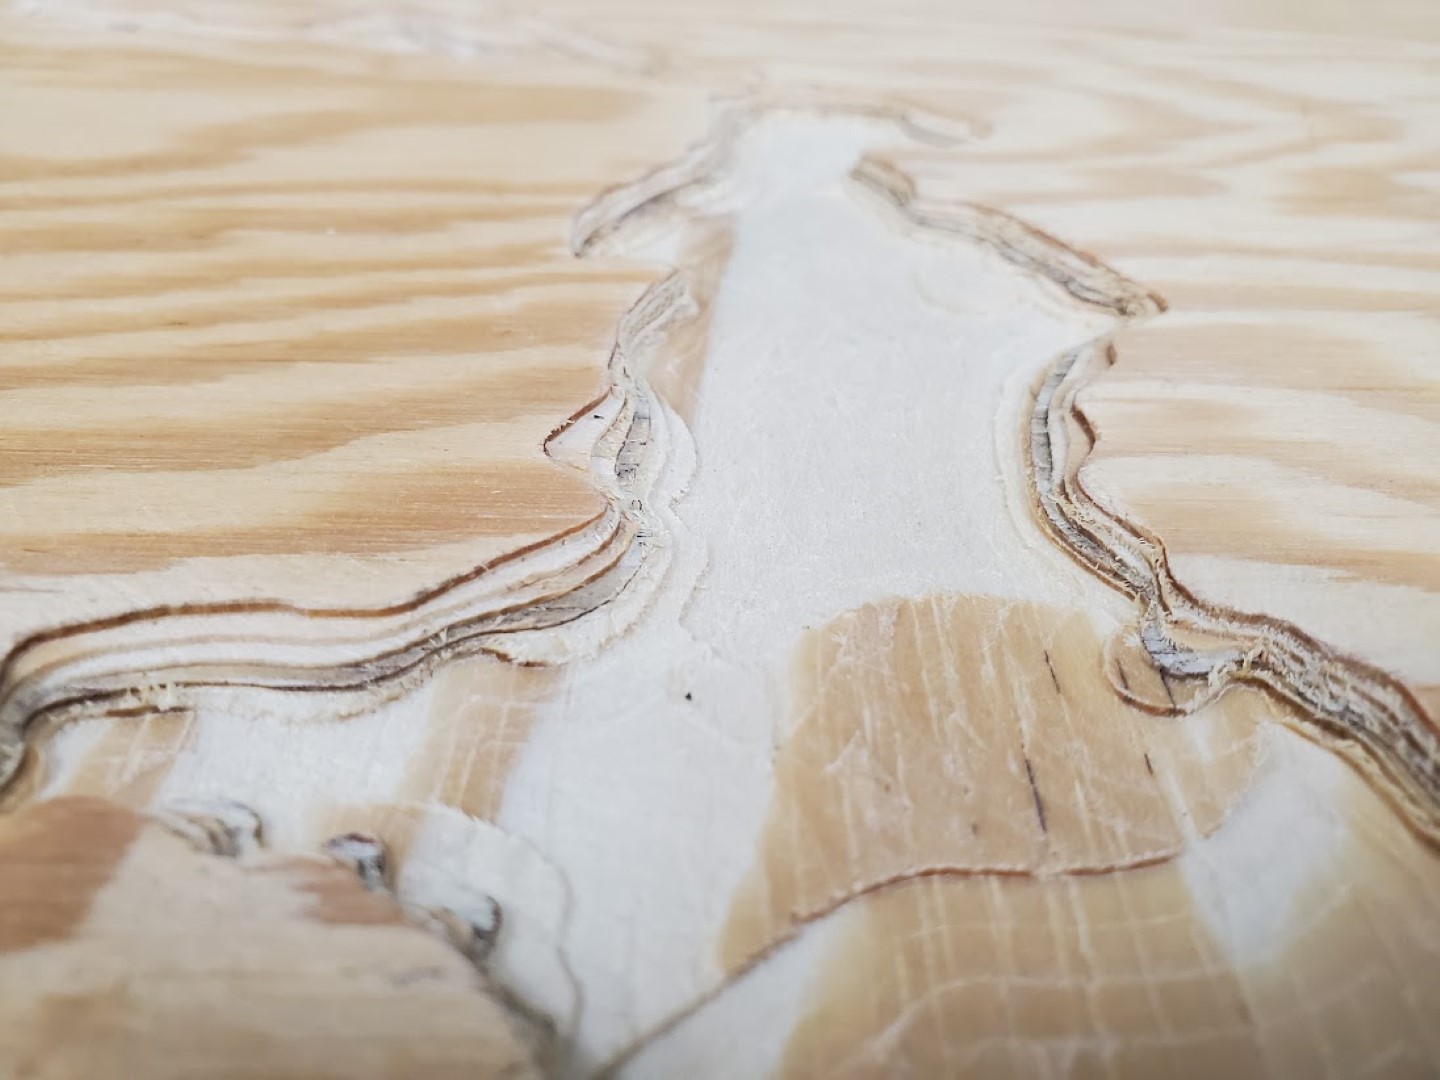
Continuing with the first batch of wood from the sawmill and along with the other furniture changes it sparked the idea to make a new coffee table. The previous table had been passed-on from the previous owner of the previous house, nothing special about it, overdue for replacement. There’s a nearby lake I wanted to incorporate into the design, and by far the toughest part of this project became obtaining its bathymetric data. The entity that controls the lake was helpful with a records request but ultimately their best data was a medium resolution plot, shared via pdf. There were some hints from various navigation and fishing apps that better data might be out there, but after a lot of messing around with importing and converting this turned into a dead end. I eventually resorted to sending the pdf provided by the govt through an image vector tracing tool, followed by many hours of manual cleanup. This gave a single contiguous vector curve for each depth increment that I could then assign to a CNC machining operation.
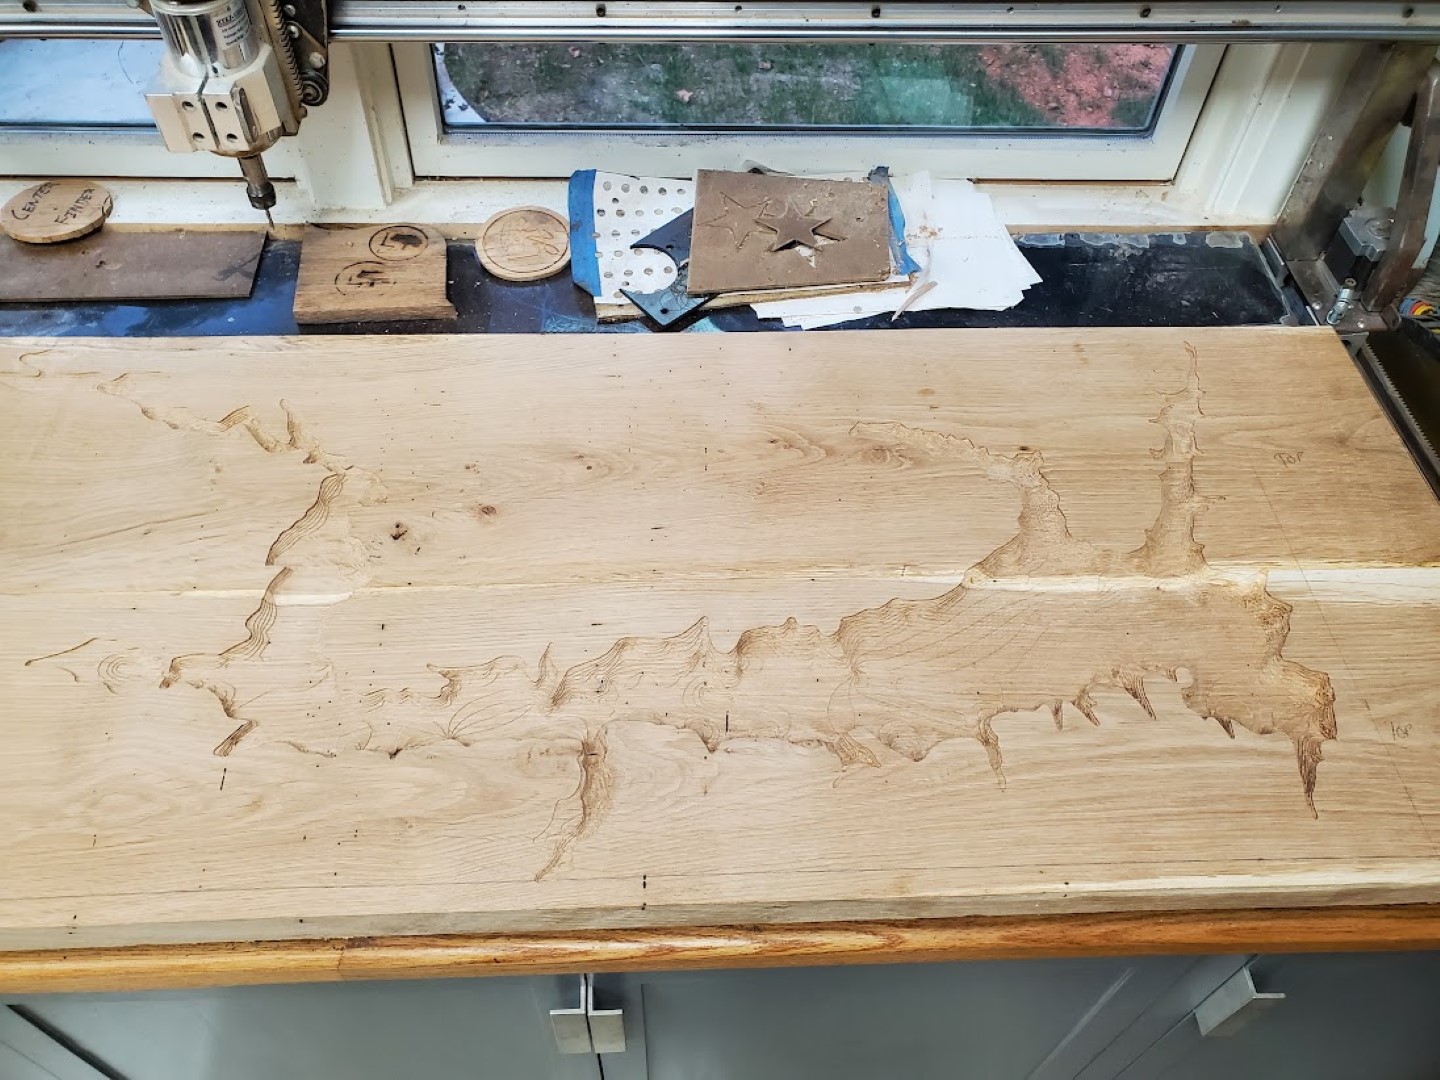
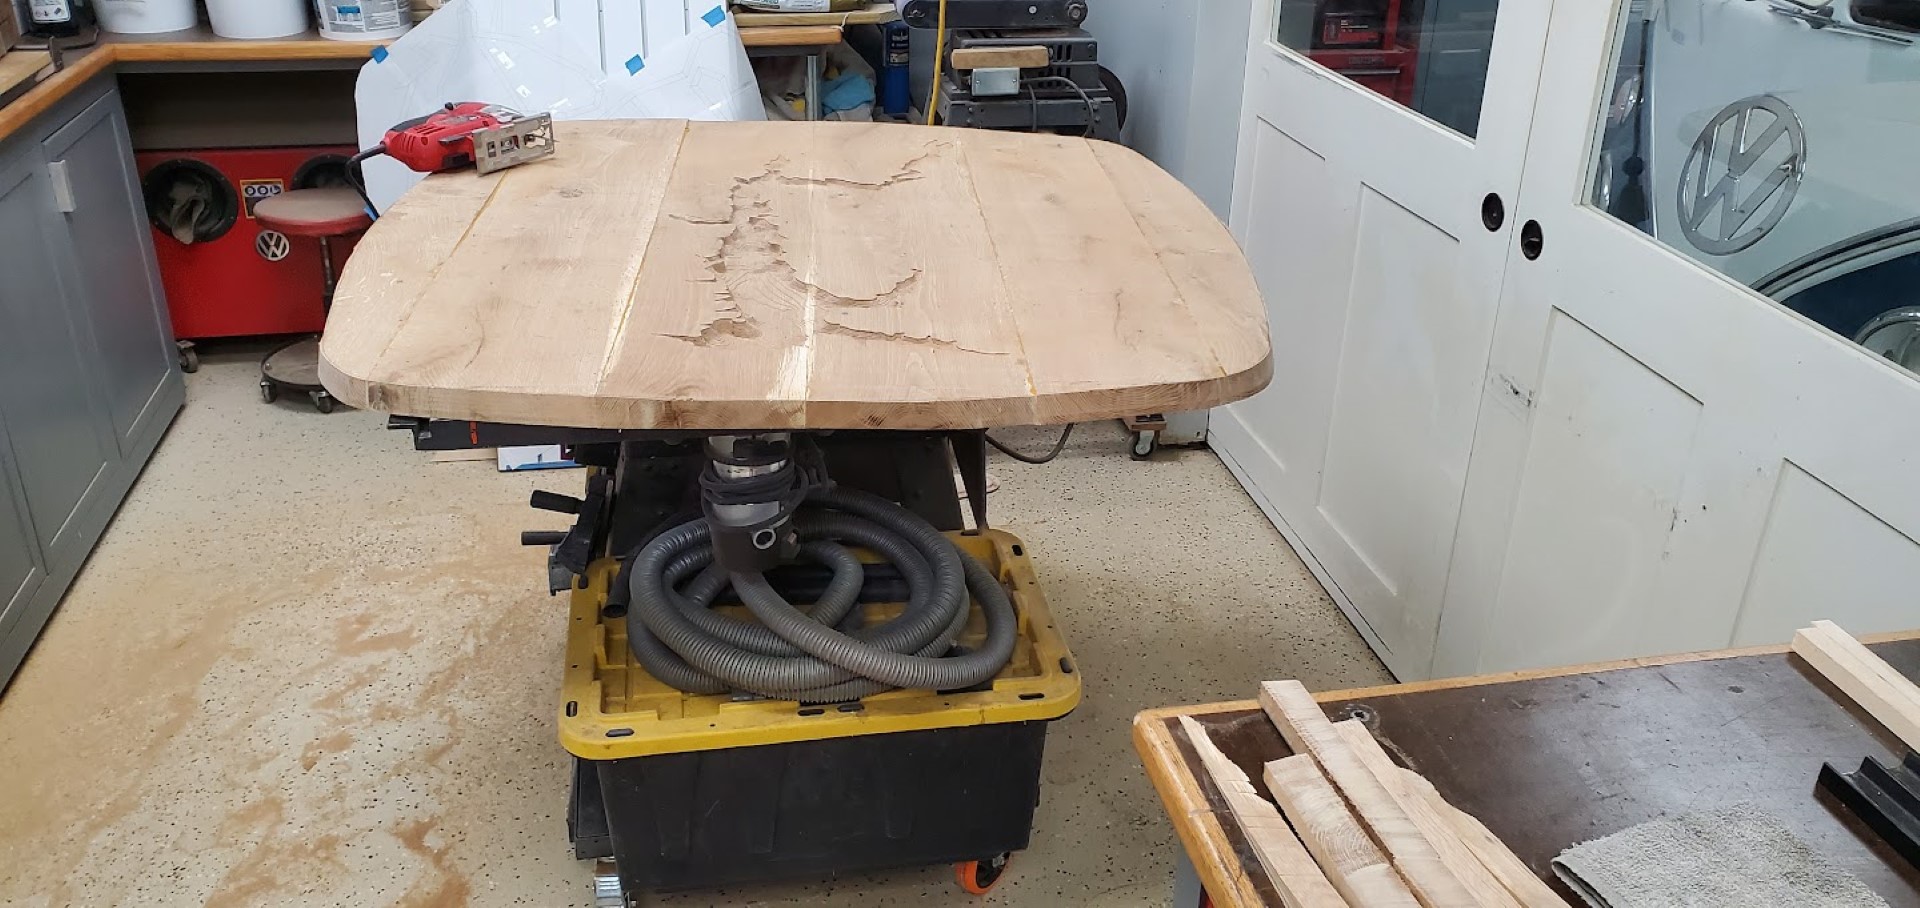
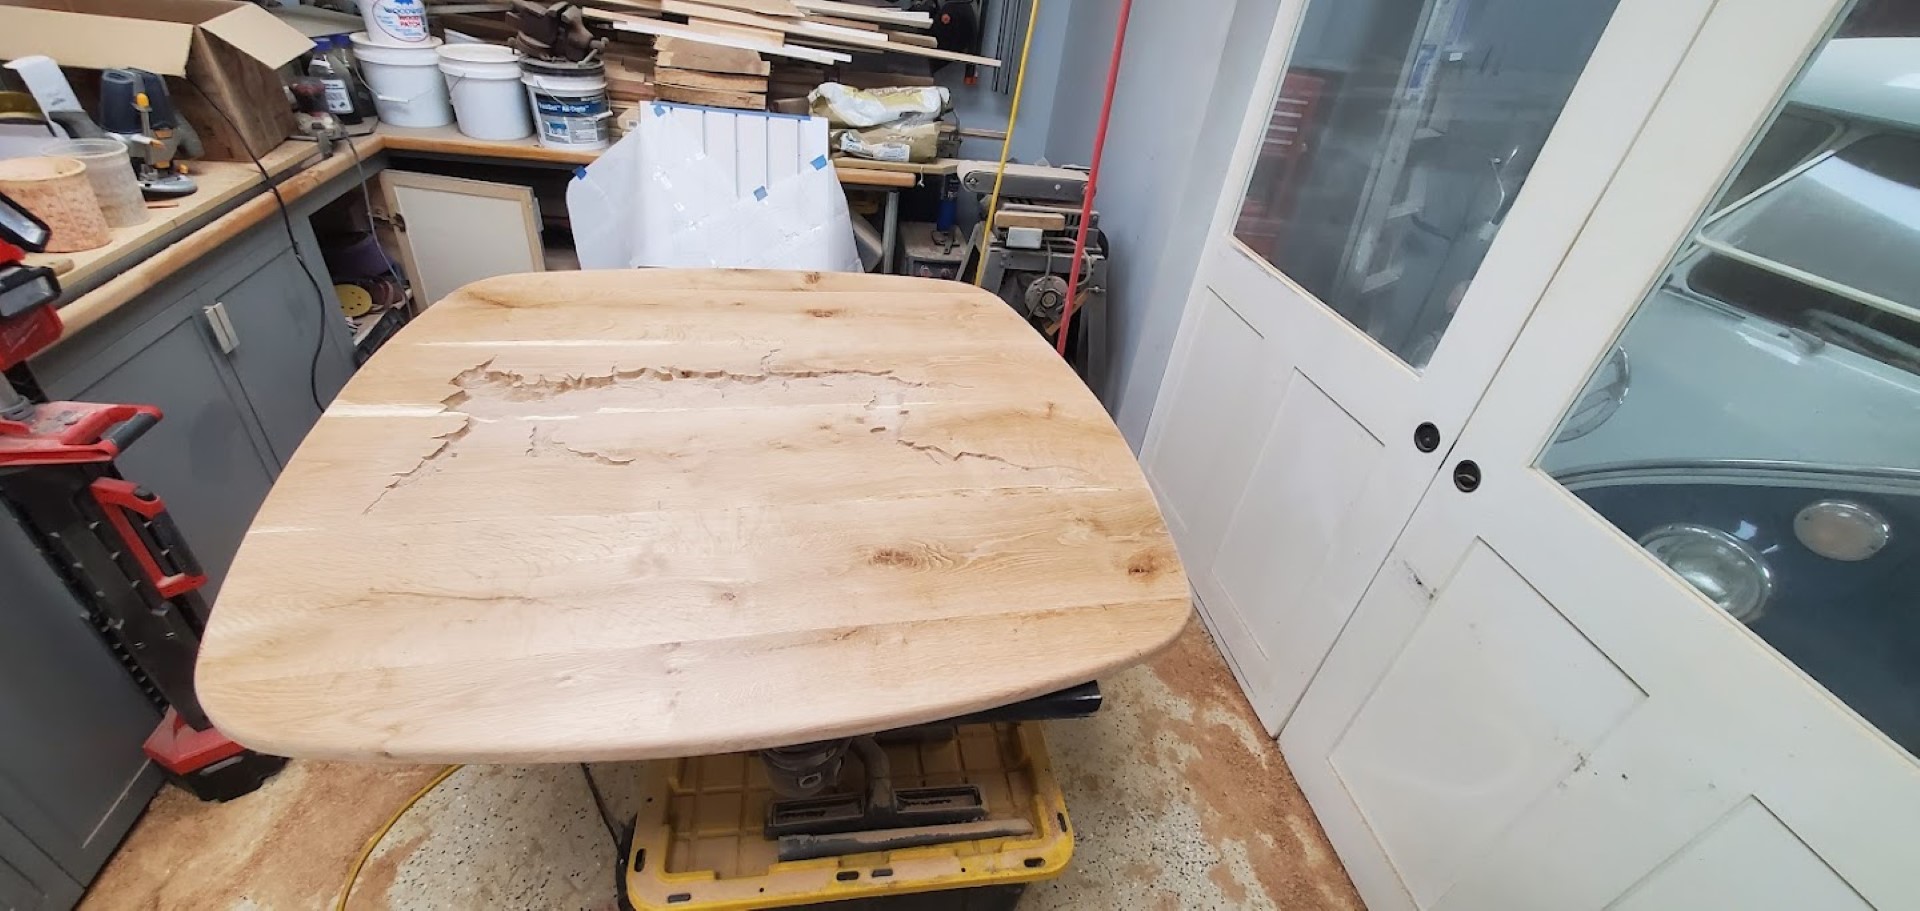
I tested the CNC programming on a scrap piece of plywood before sending the oak slab through. The table is the full 4ft width of the CNC but wider than the CNC’s depth. To get around this problem I ran the carving on the middle section of the table before completing the full slab glue-up. When the full slab was together I traced the large radii using a yardstick as a compass and connected these with smaller corner radii. This outline was cut with a jigsaw before being belt sanded and rounded over with the router. Then final sanding and finishing. I cut two small sections of steel angle and secured them to the bottom of the table across the slab joints with screws in slotted holes. This will help hold the table flat while still allowing some seasonal wood movement. Last step was attaching some off-the-shelf hairpin type legs.

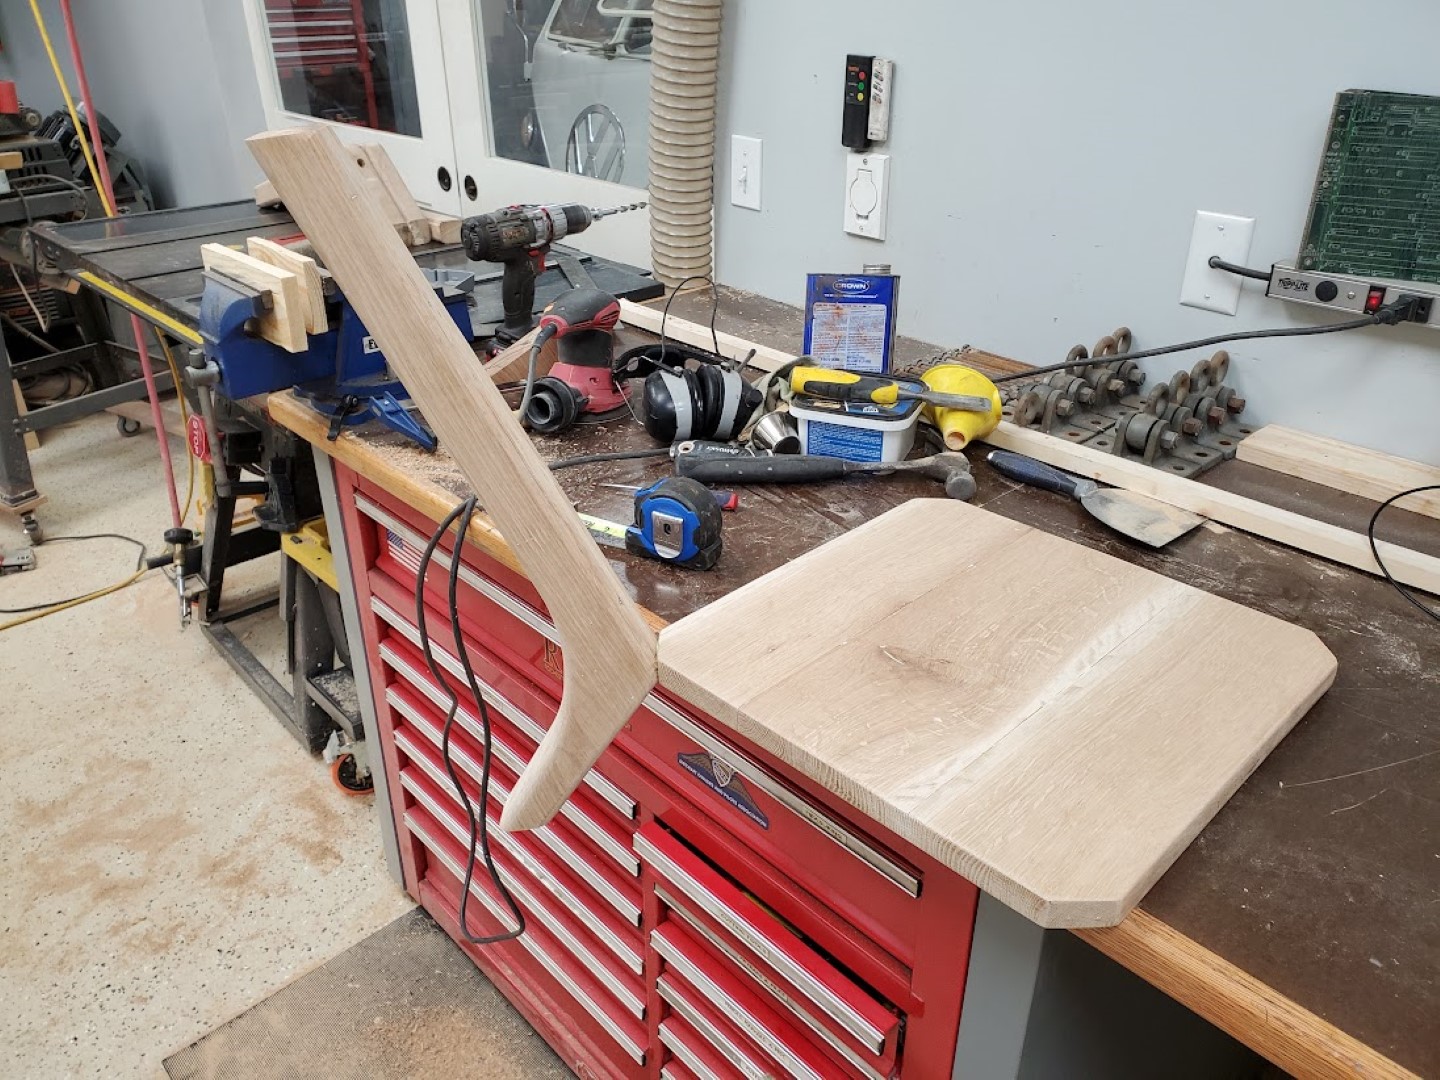
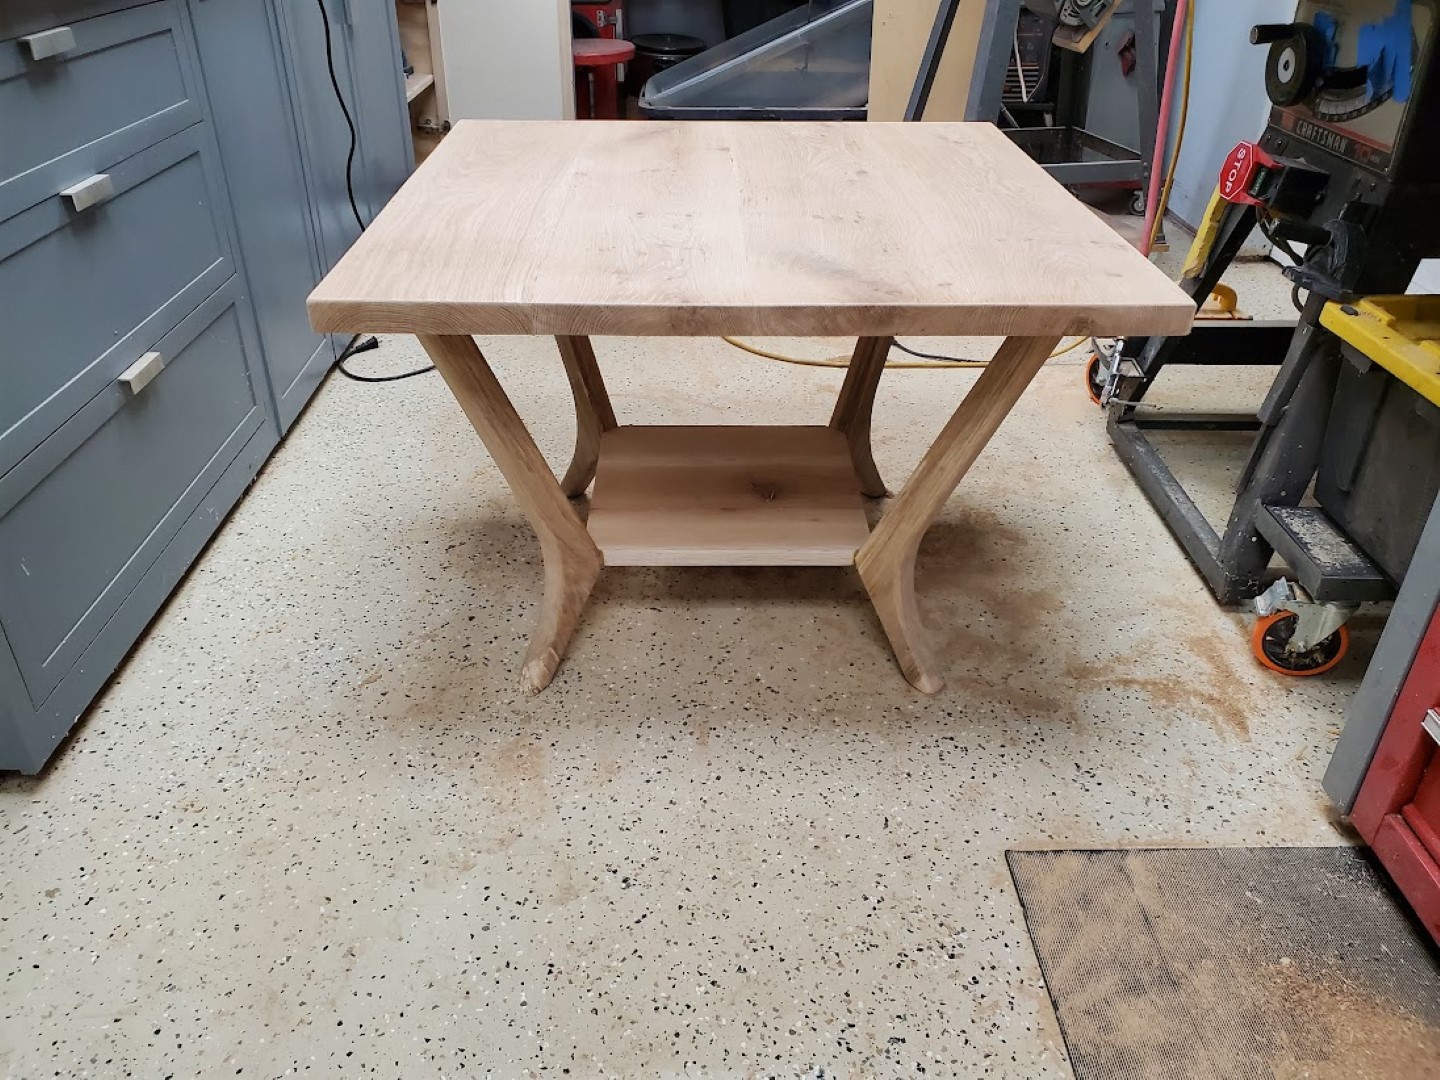
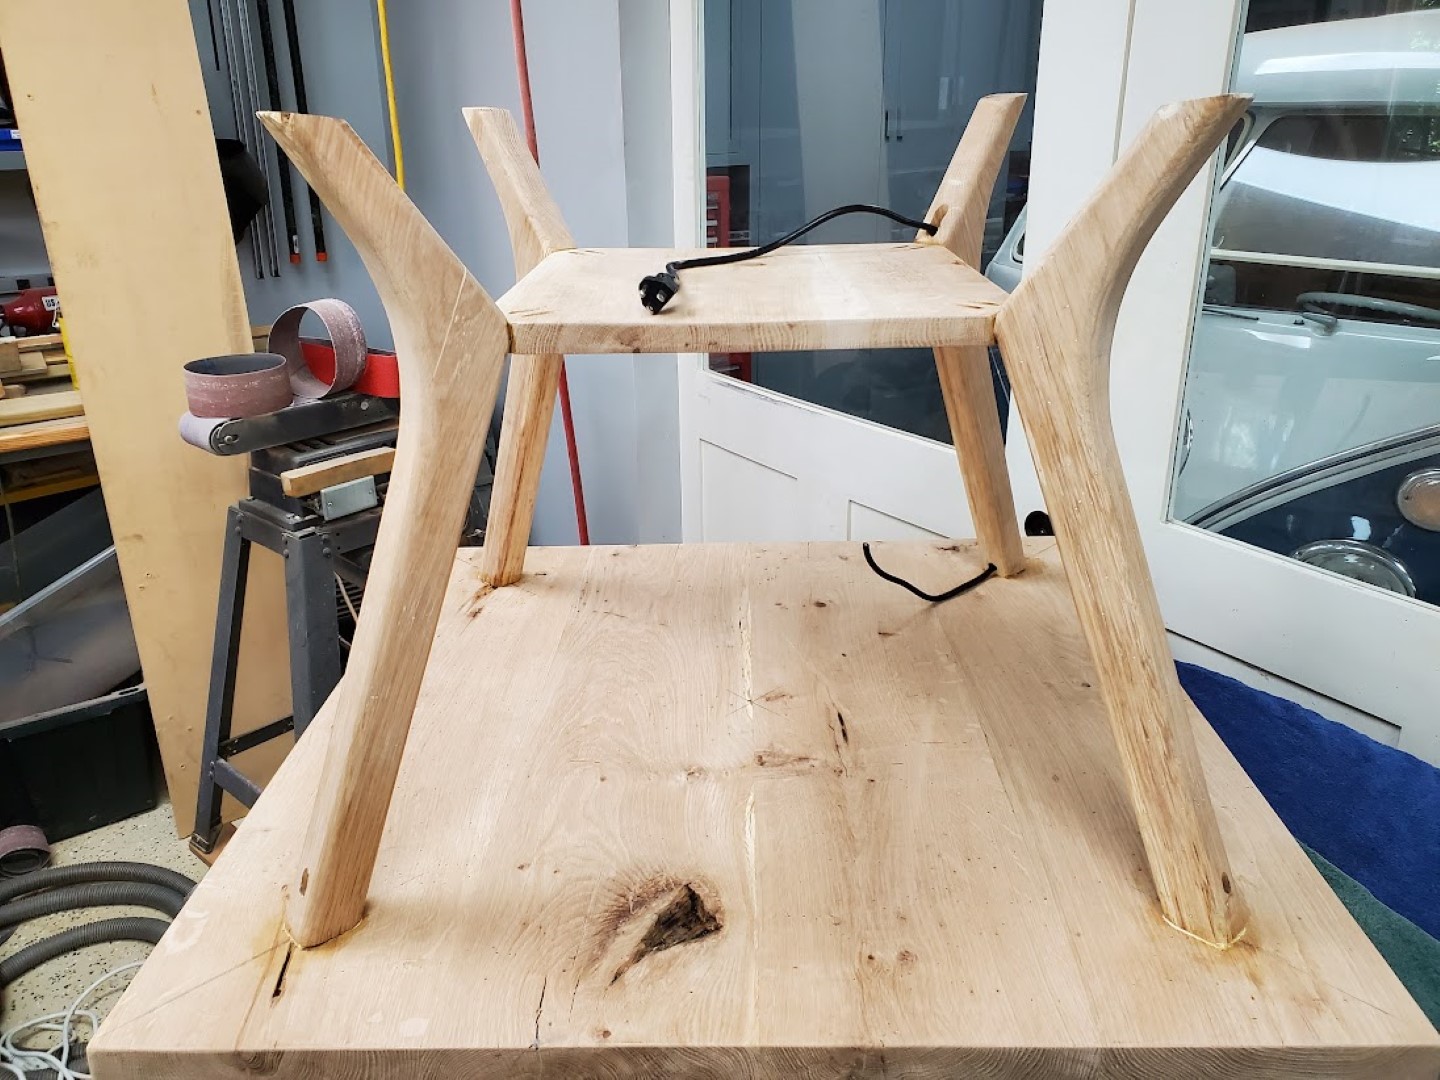
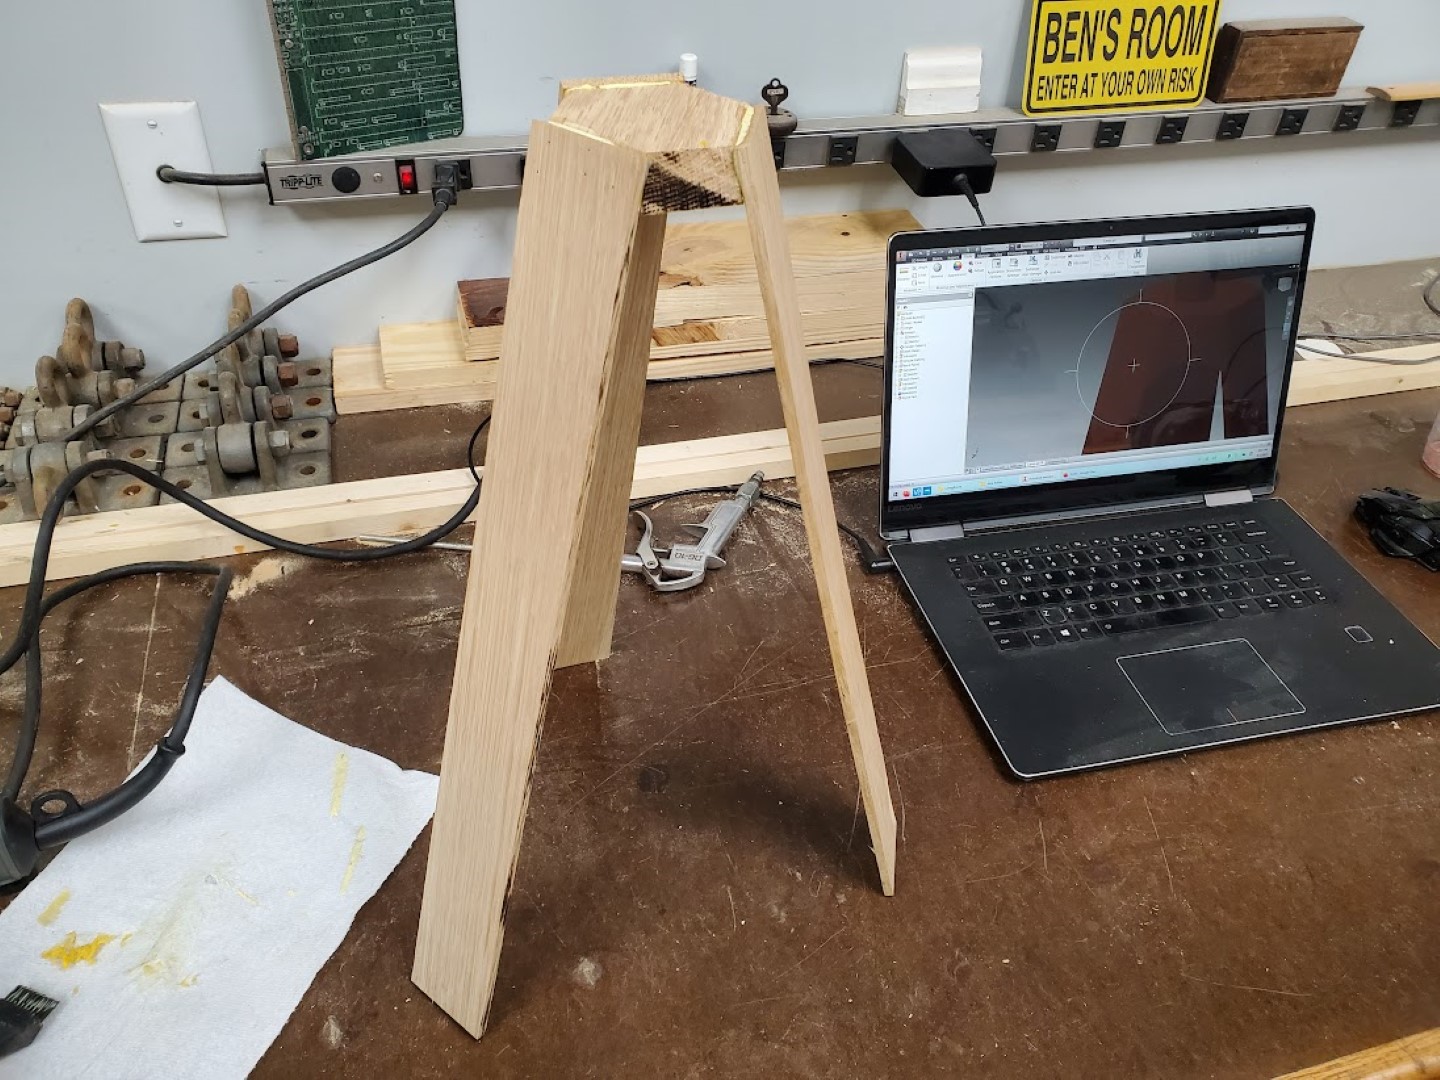
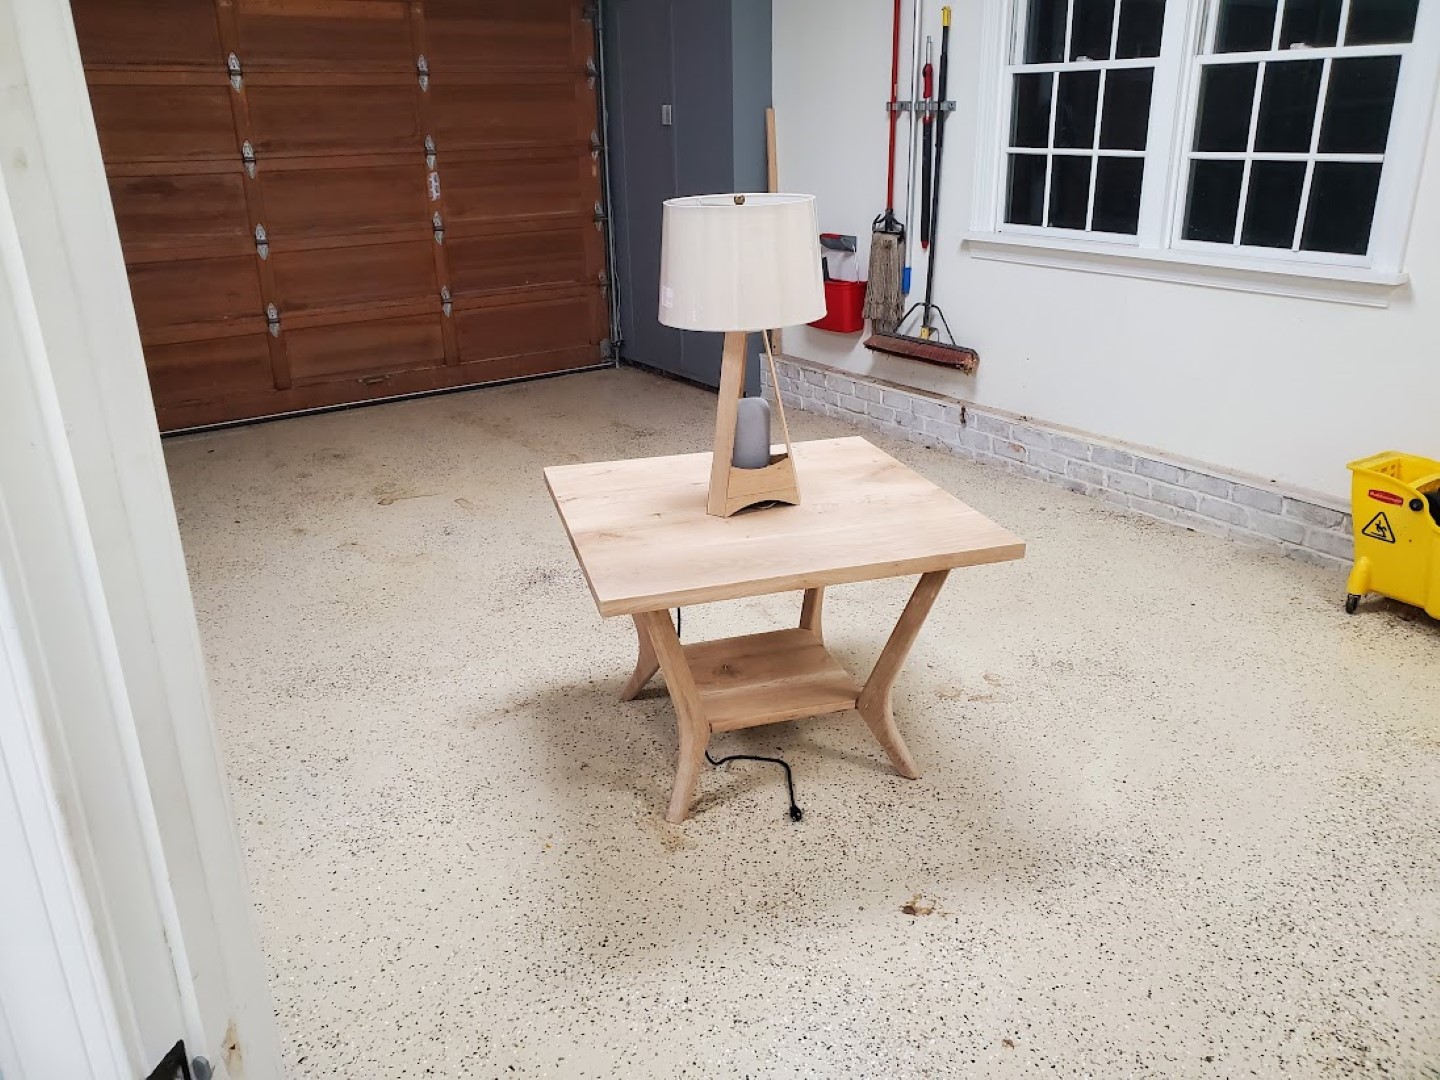
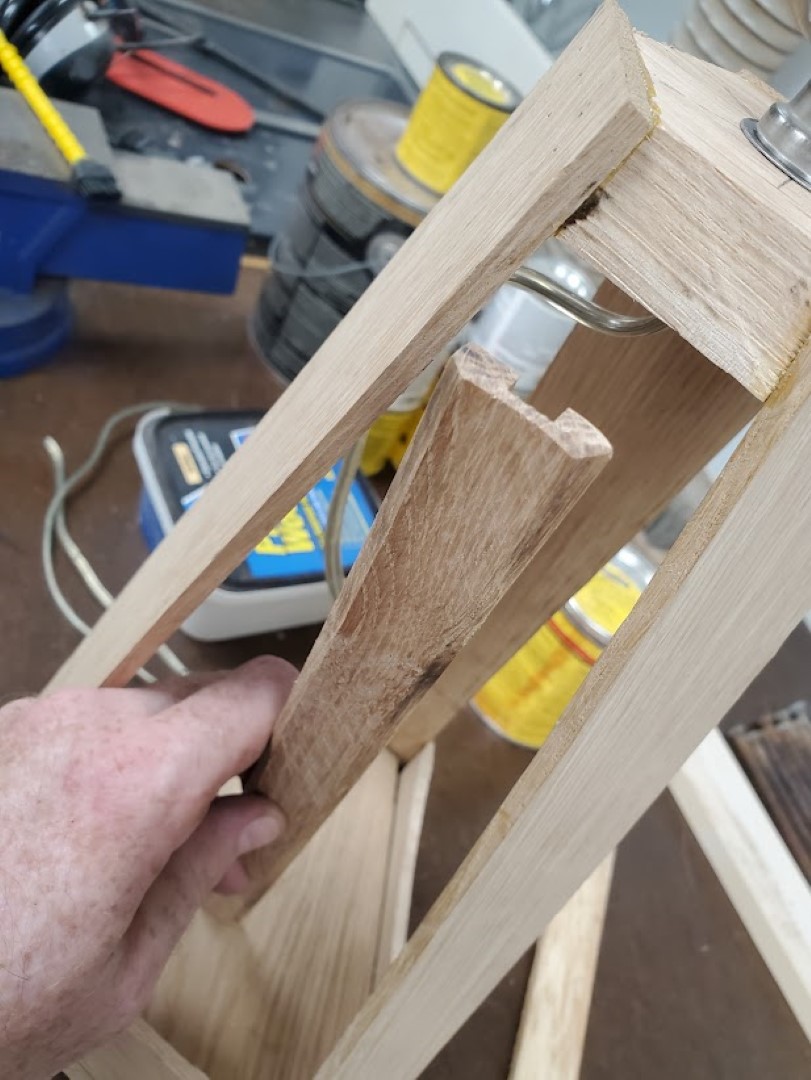
Side Table and Lamp
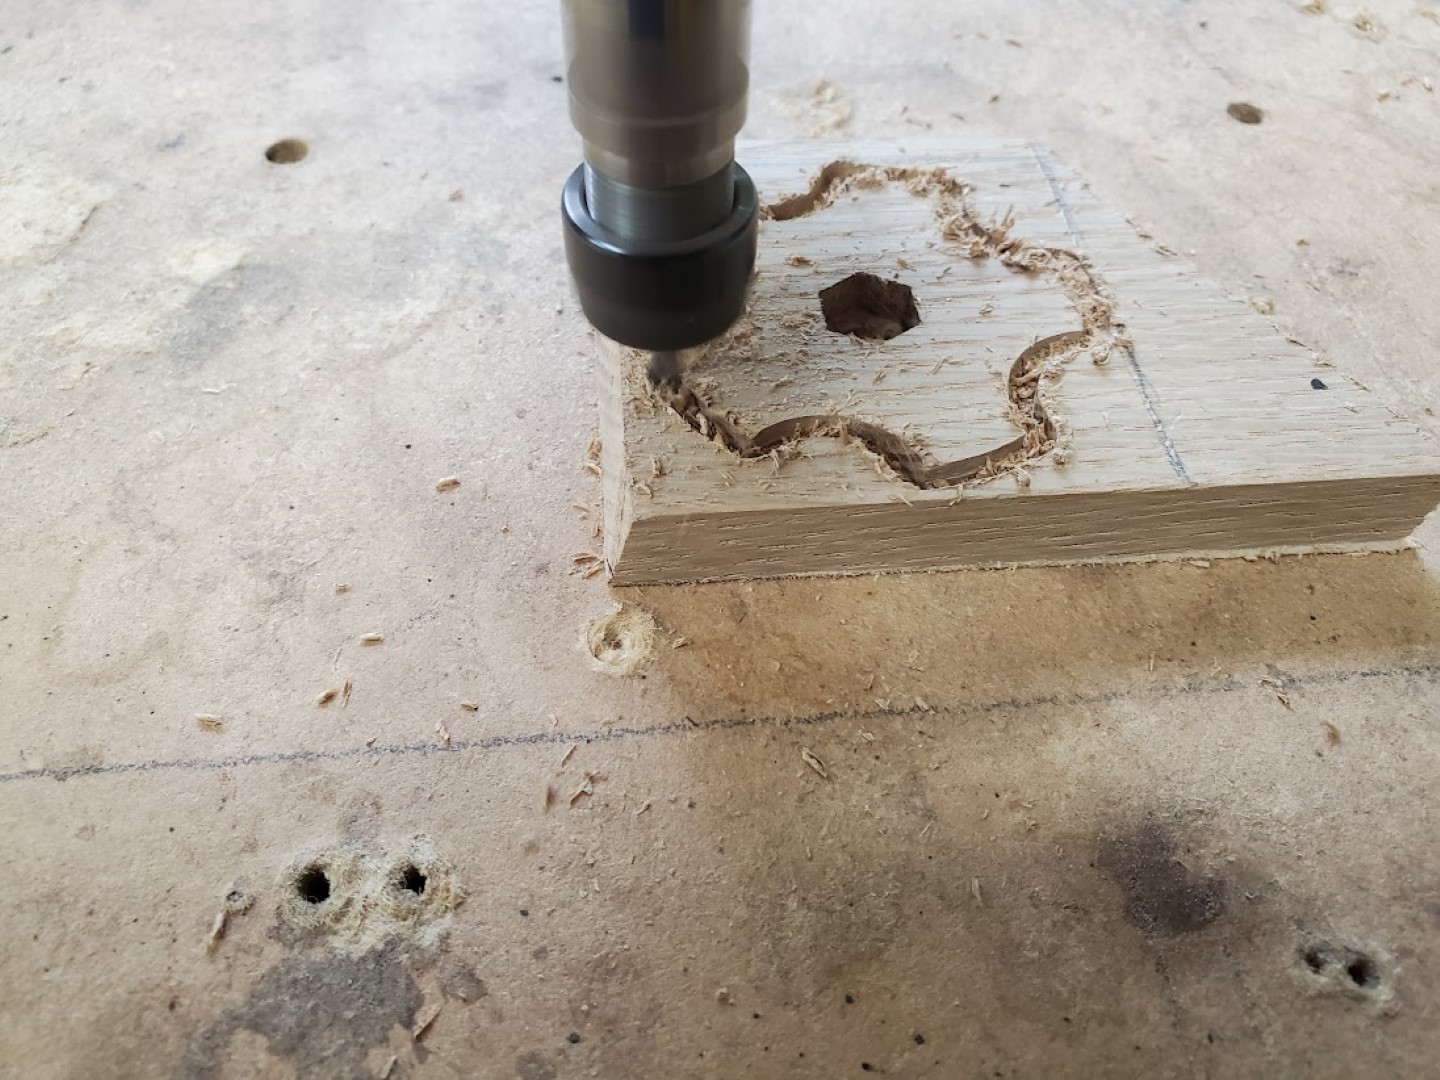
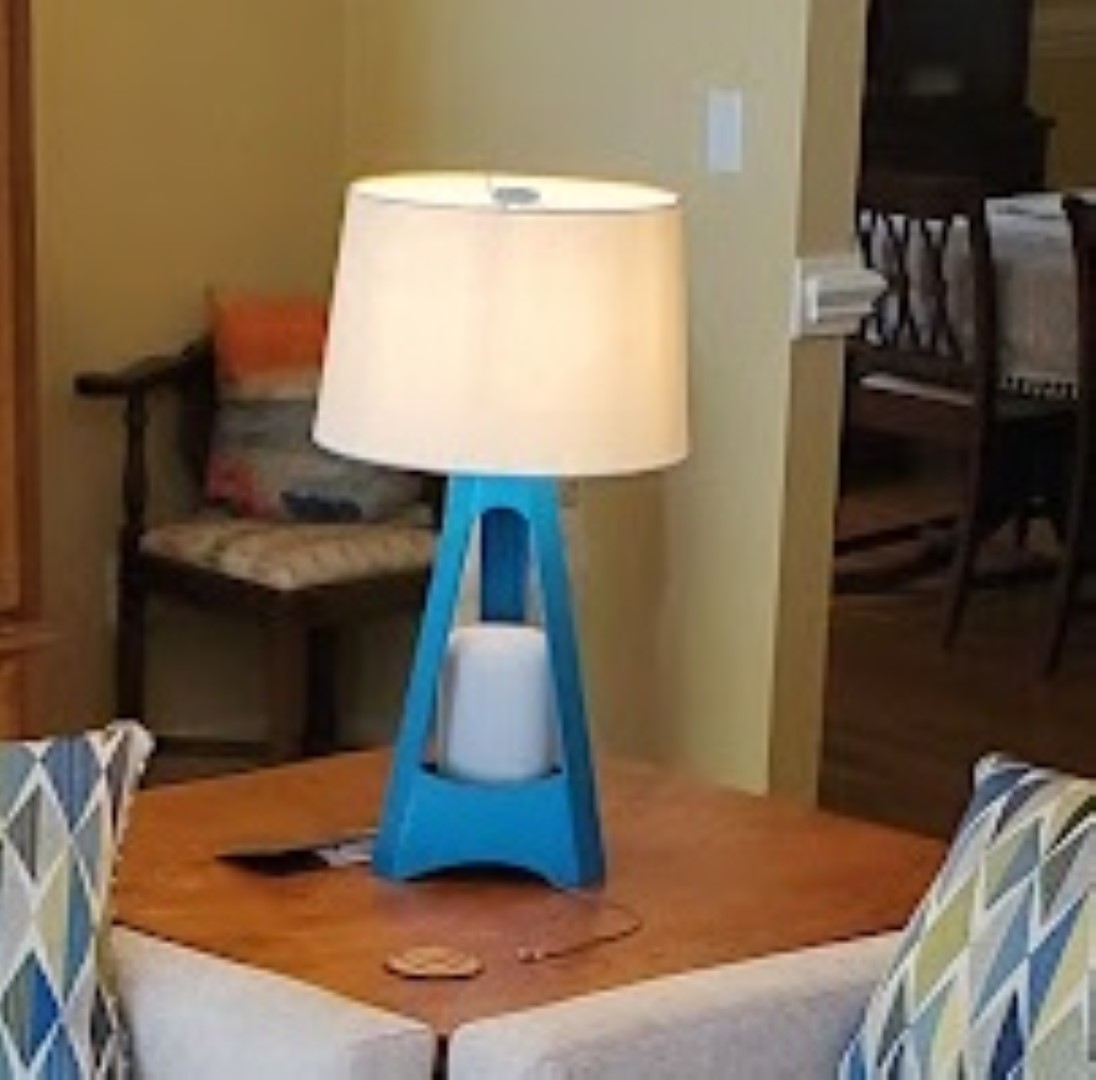
The first batch of wood from the sawmill was getting dry enough for use and we were planning to replace the den sofas; to go along with this change a side table would be needed. At the same time I also created a lamp that would house a smart speaker and act as a cover for the phone charging cable from below. A key consideration for this project was cable management – for the table, a 3-conductor cable is routed through the leg, allowing a power strip to be mounted under the table. The power strip has a phone charger, power to the lamp, and power for the smart speaker which all route up through the center of the table, hidden by the lamp. The lamp cord is also hidden within one of the lamp supports. A knob was cut on the CNC router to secure the lamp shade.


Louvered Generator Cover
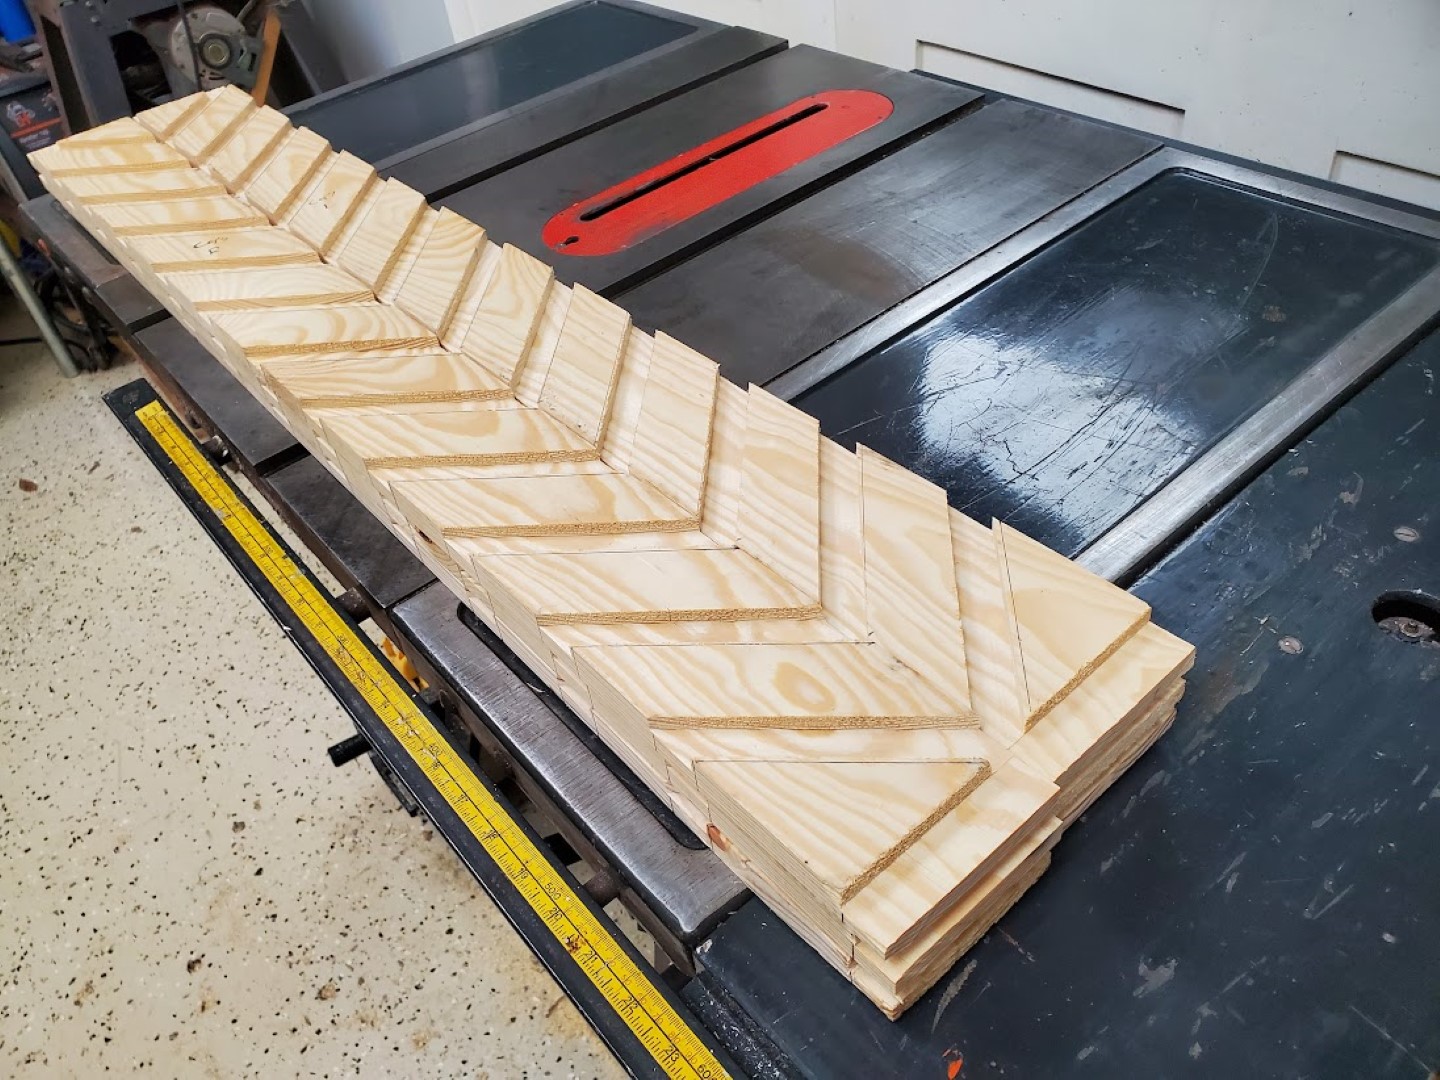
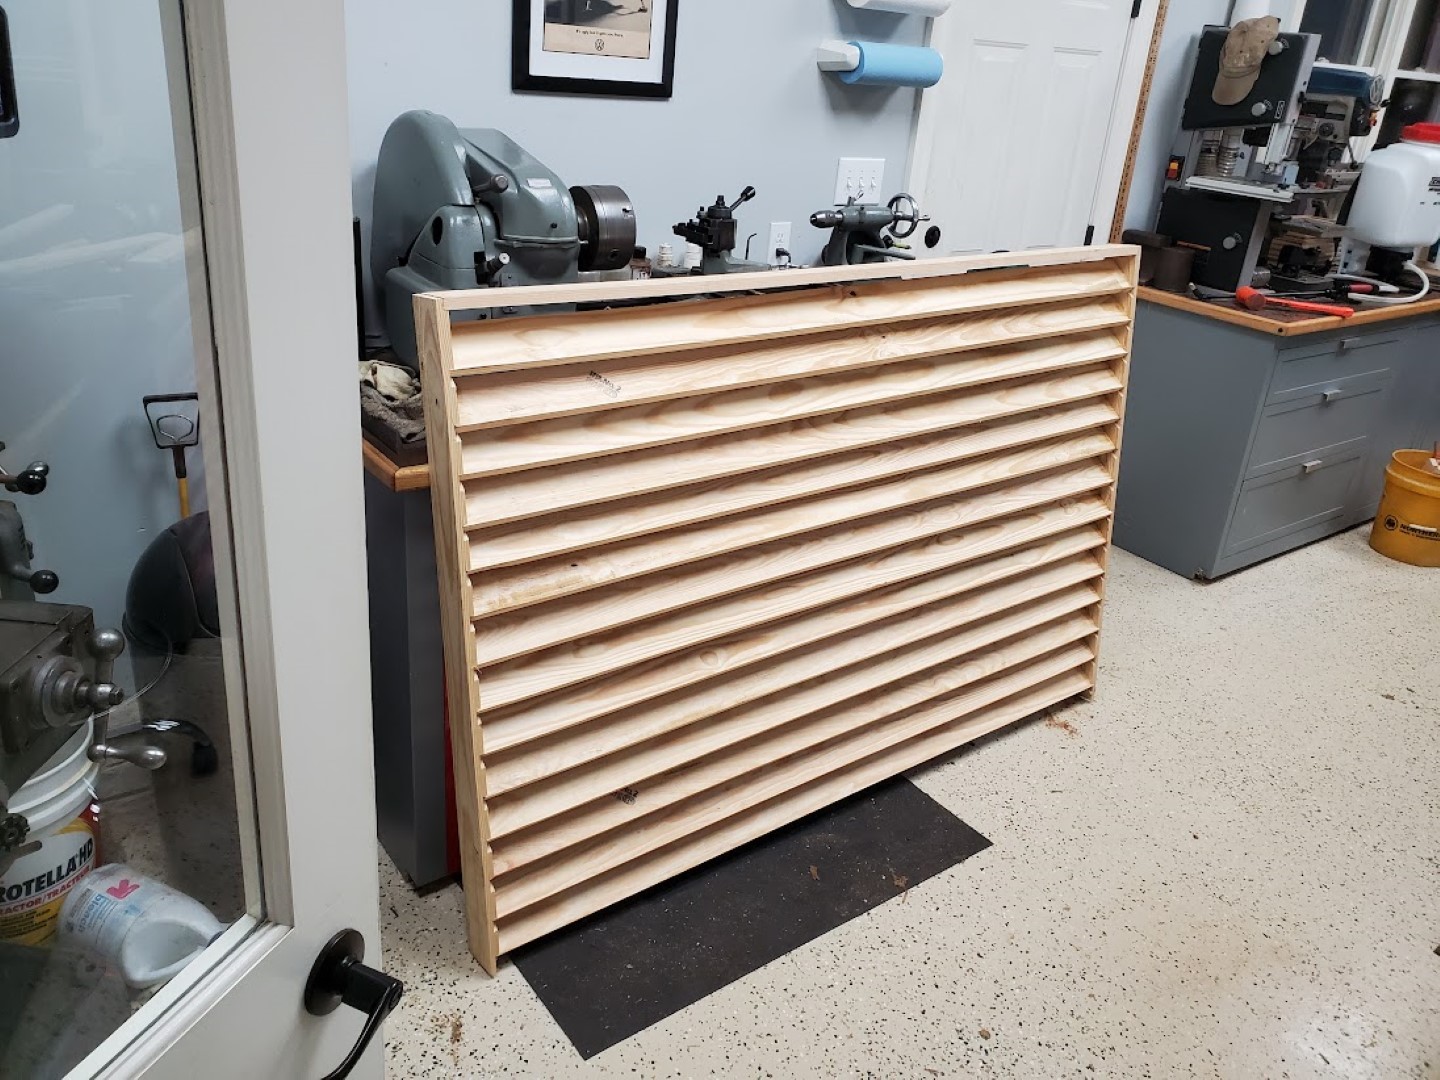
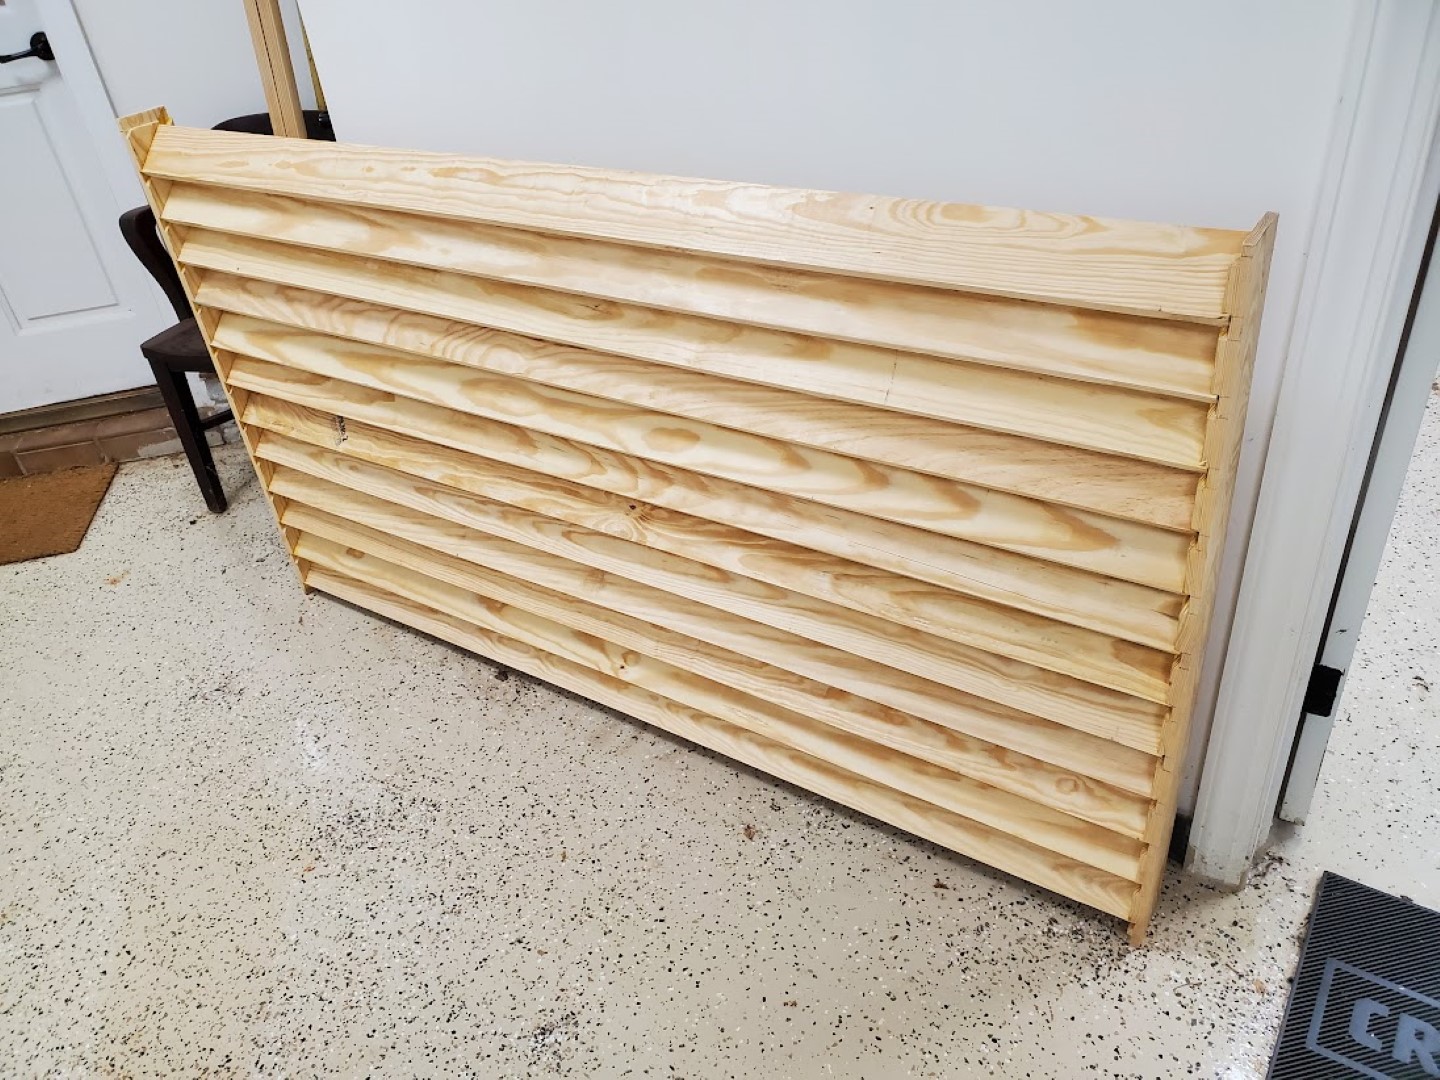
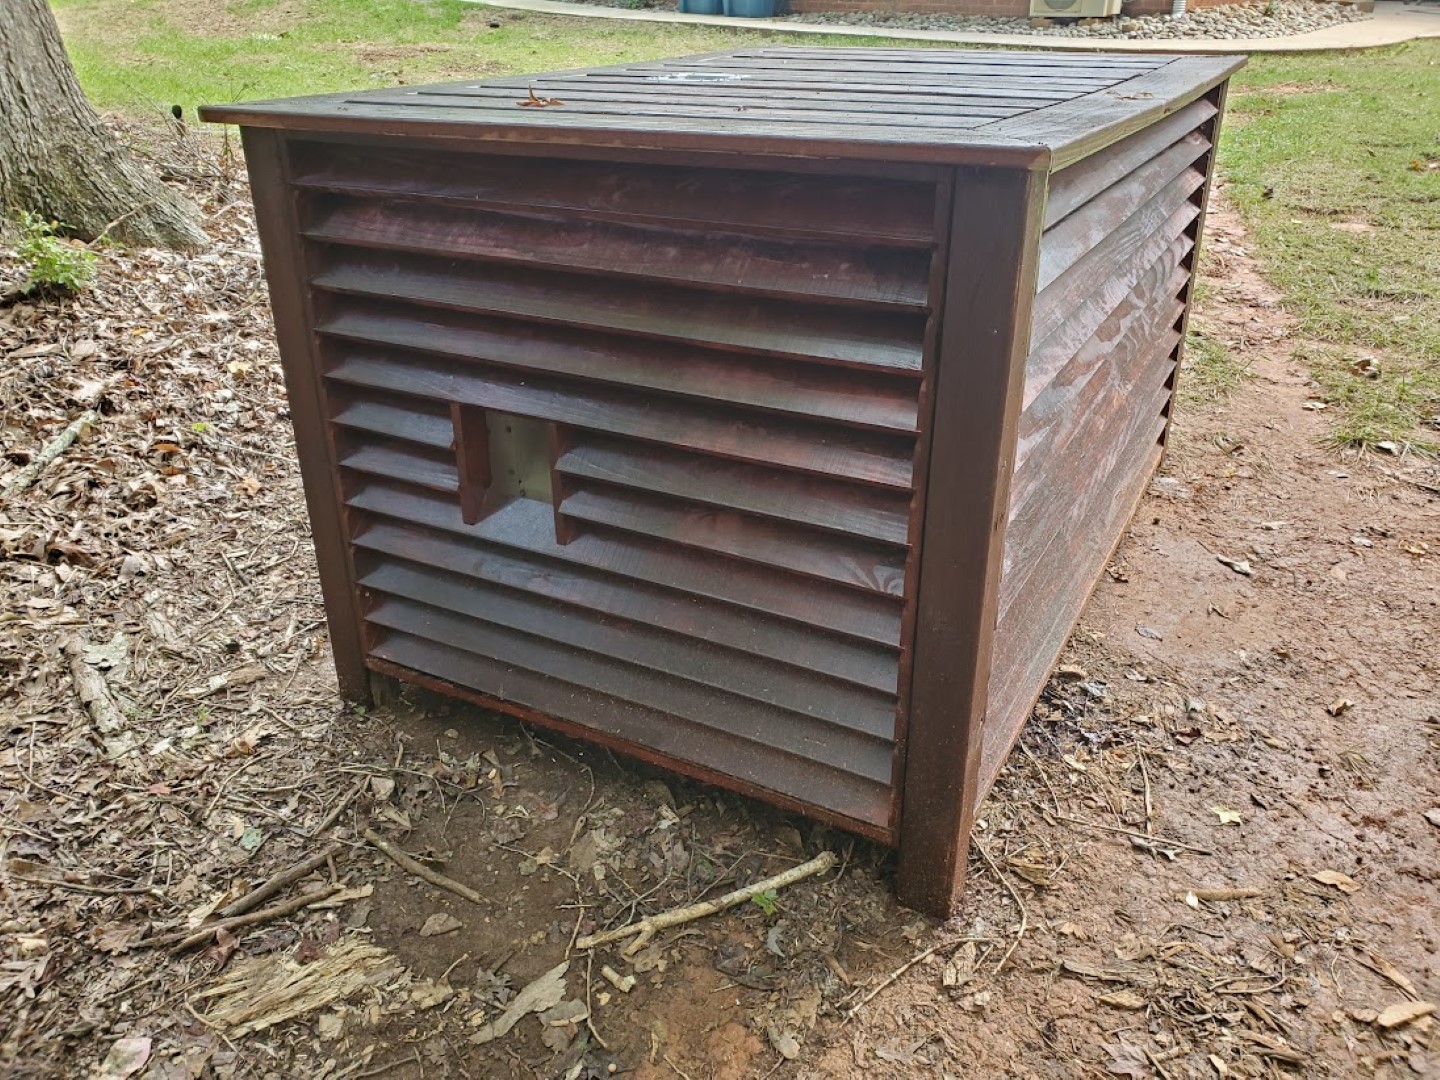
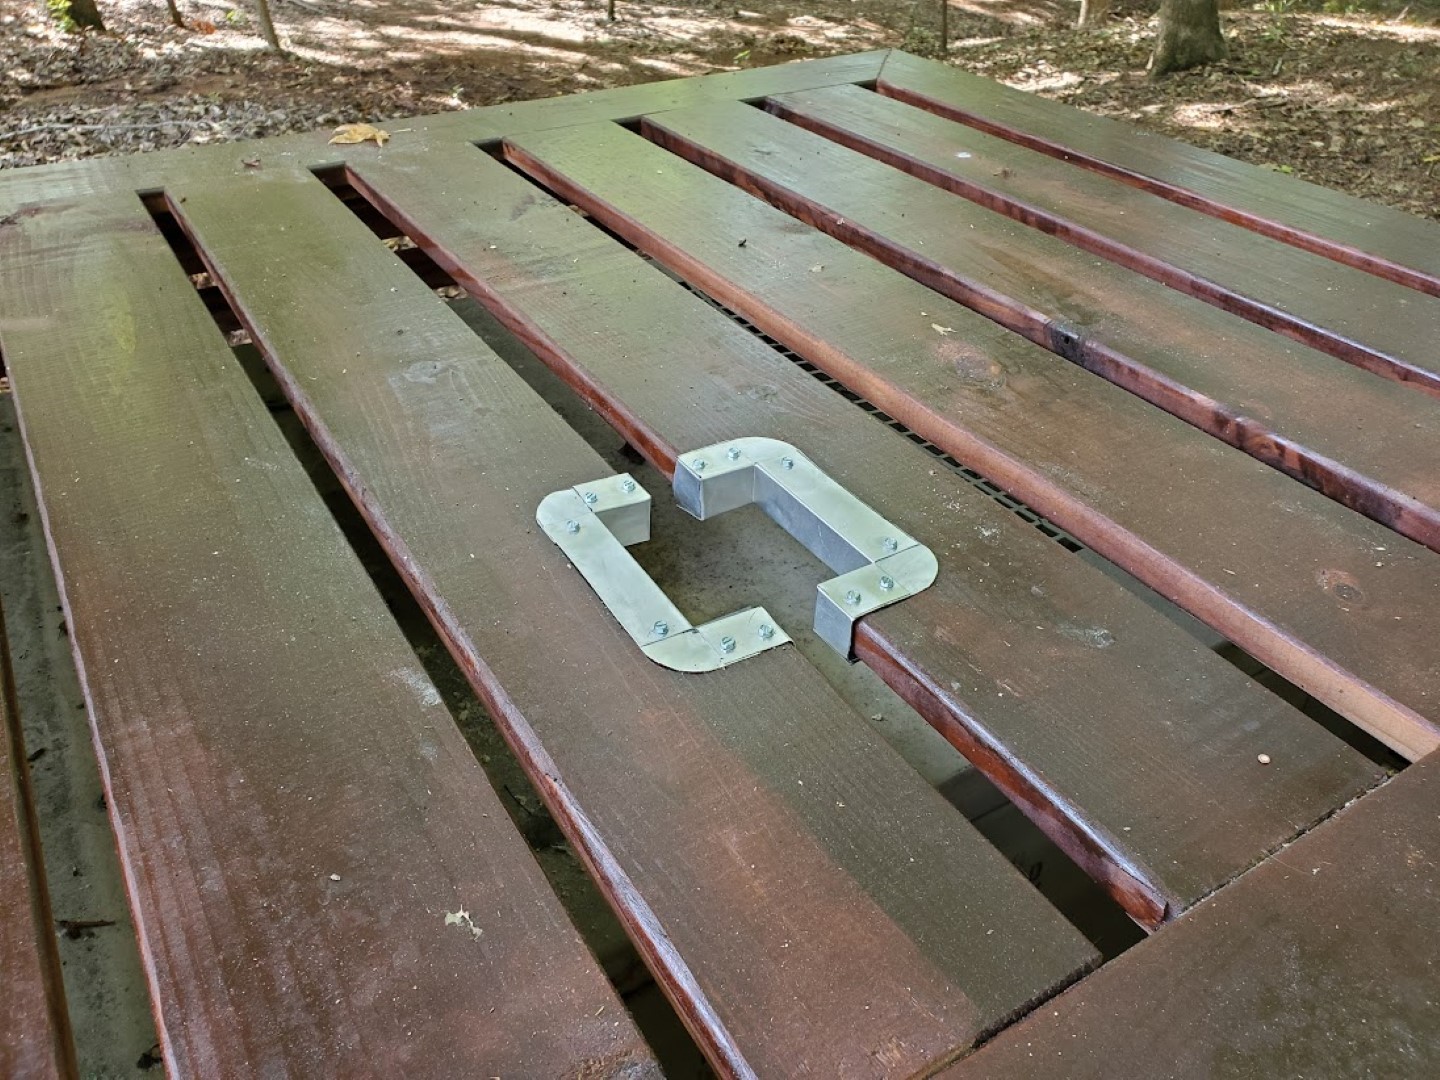
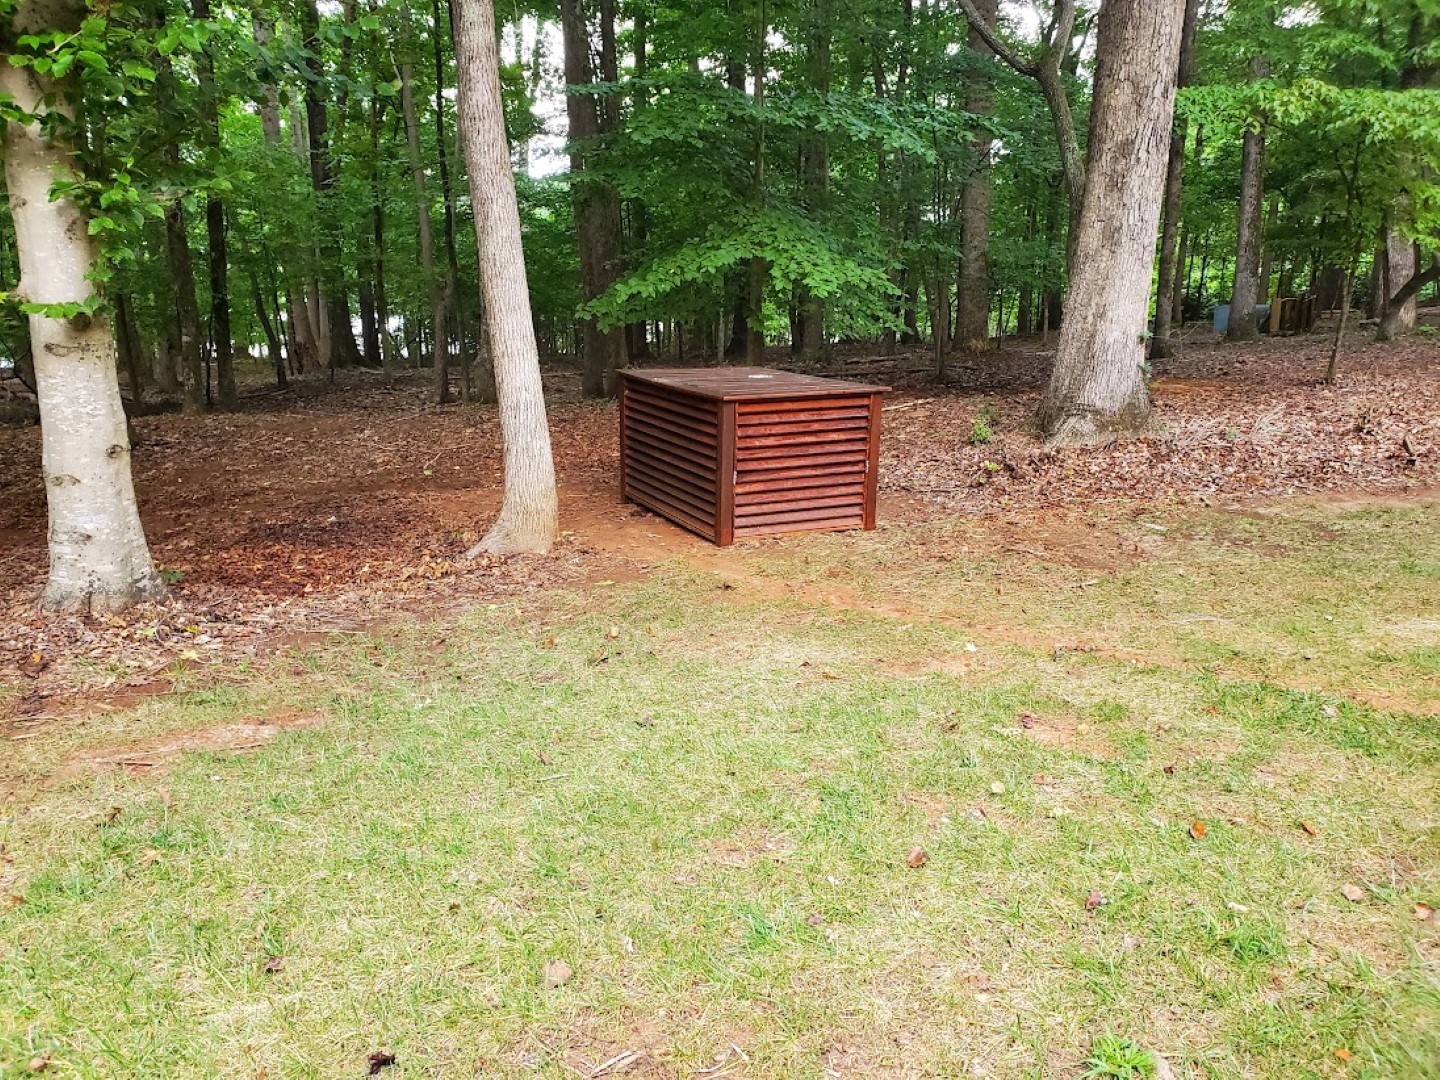
The generator is still working great but as the side of the yard it’s in has become more polished (trees/undergrowth removed, grass planted, sidewalk added, trailer moved) the generator has started to stand out more. To help it blend back in I created some louvered panels to cover it. The louver design allows for plenty of ventilation from all sides. The panels consist of 1×4 slats secured into 1×4 ends with angled grooves cut via dado stack. The panels corners are joined together at 4×4 posts. The rear panel has a cutout for refueling, the top has a cutout for the exhaust flap (with flashing for heat protection) and half of the front folds down for control panel access.
I also made a similar but much smaller cover to go over the top of the plastic service dome for our underground propane tank.