-
Recent Posts
Recent Comments
Category Archives: Bus
Engine Compartment Painted
Since the engine is out I repainted the engine compartment this weekend; didn’t get pictures of the finished product but I’m sure it will be in-view in some other picture at some point.
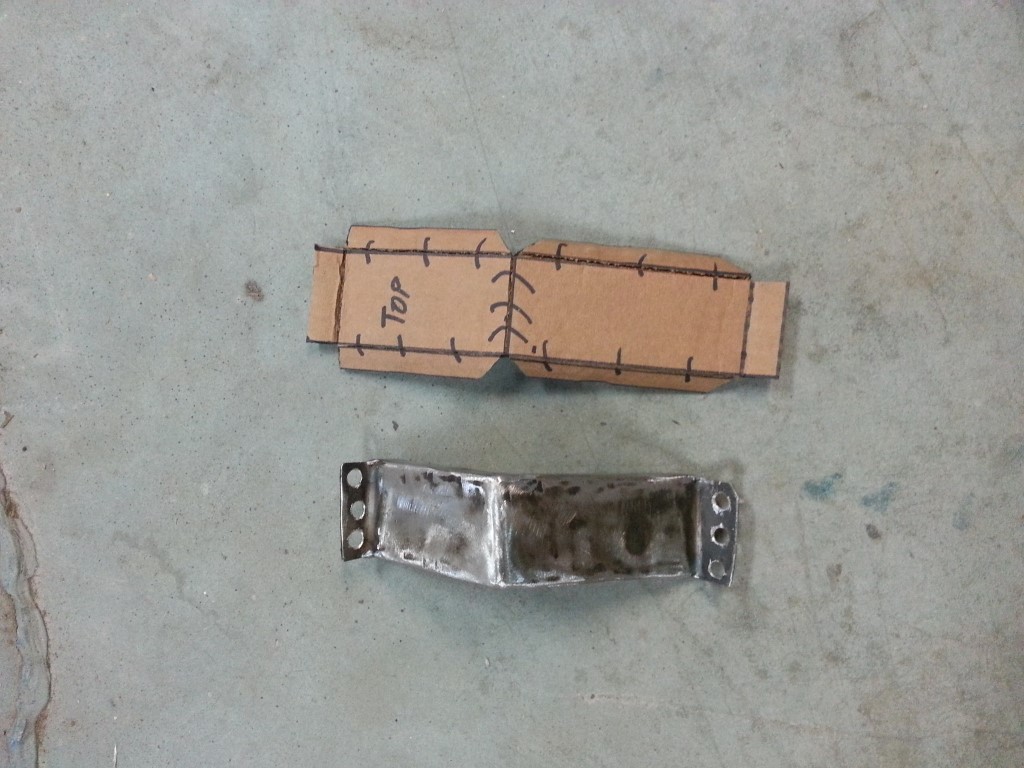
The “Hoover Bit” and other cooling improvements
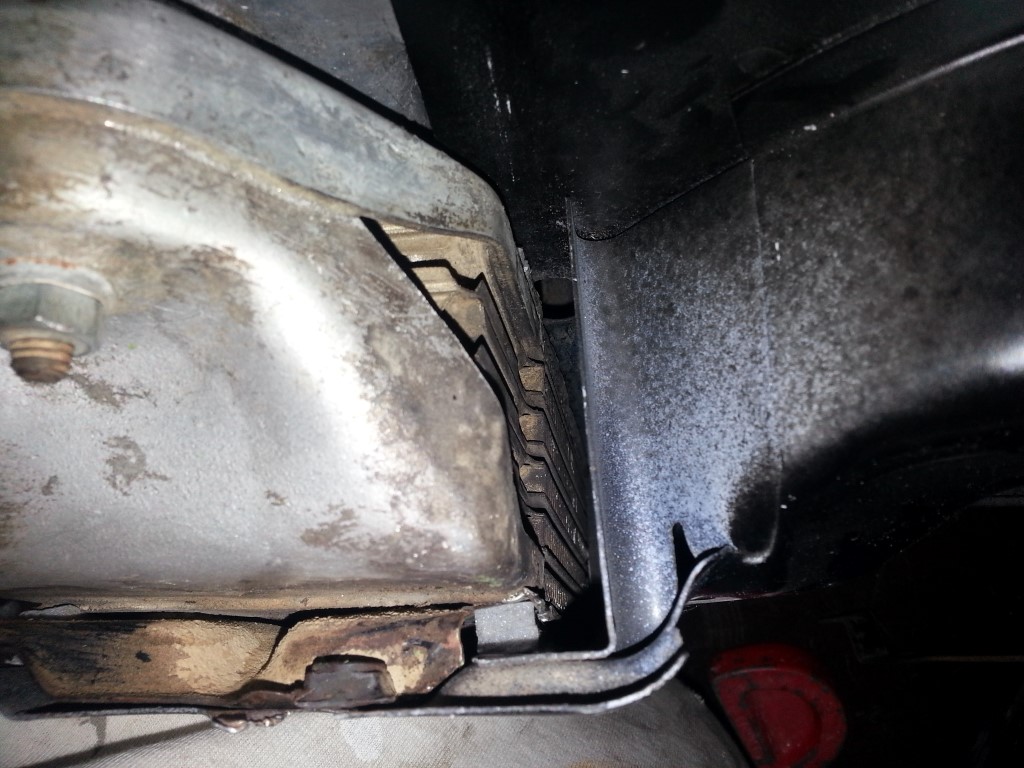
Since the engine is out and I’m waiting on parts, tonight was a good opportunity to double-check the cooling system. I found a few problems:
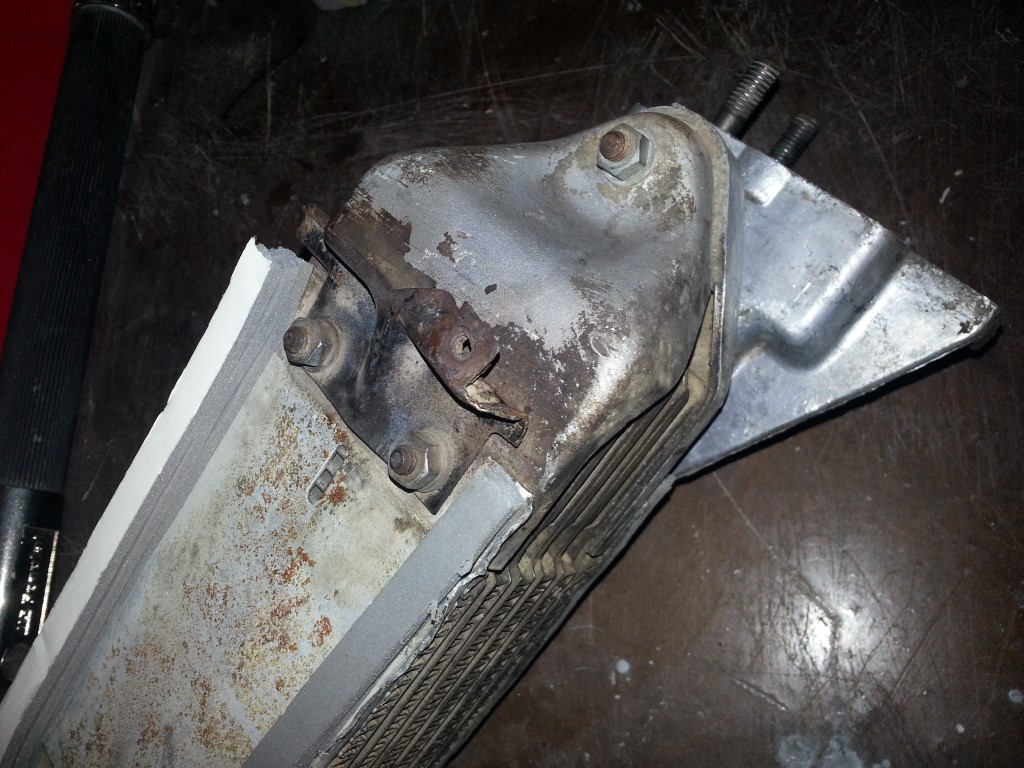
#1 – Cooling air could leak out of the fan shroud near the base of the oil cooler, before going through it. The gap is normally bridged by a piece that’s enigmatically called the “Hoover bit”; I fabricated the missing part of the “Hoover bit” and the gap is now closed.
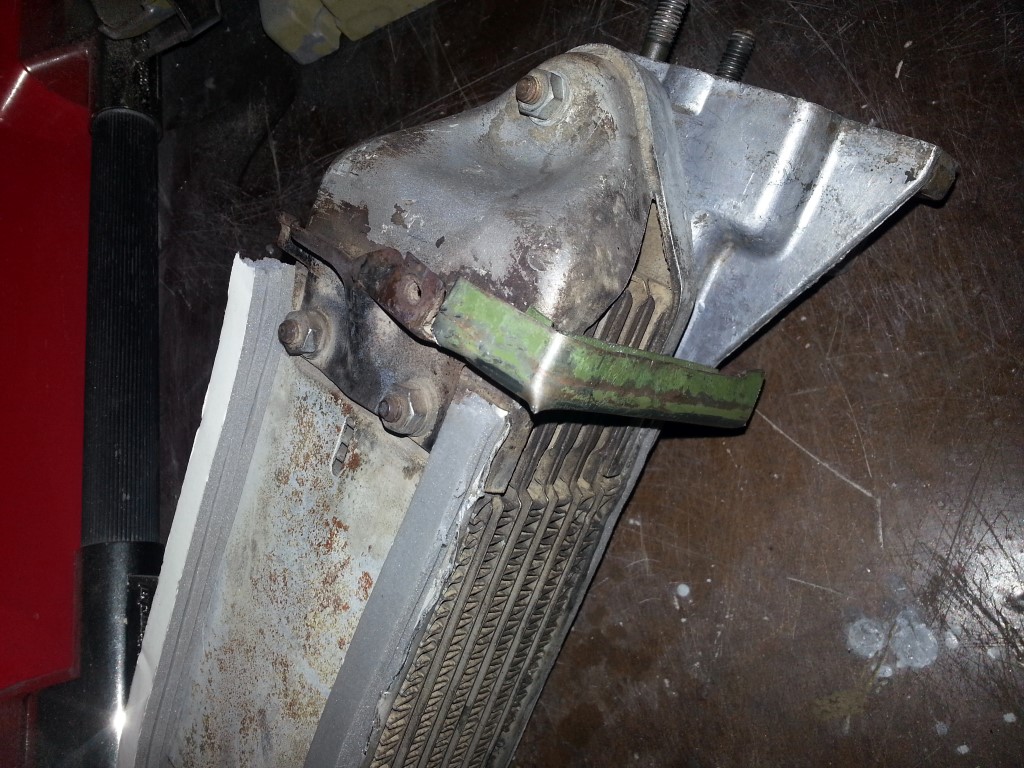
#2 – Air could leak past the cooler on the sides. To fix this I added foam rubber weatherstripping between the cooler and fan shroud as it would have been done originally.
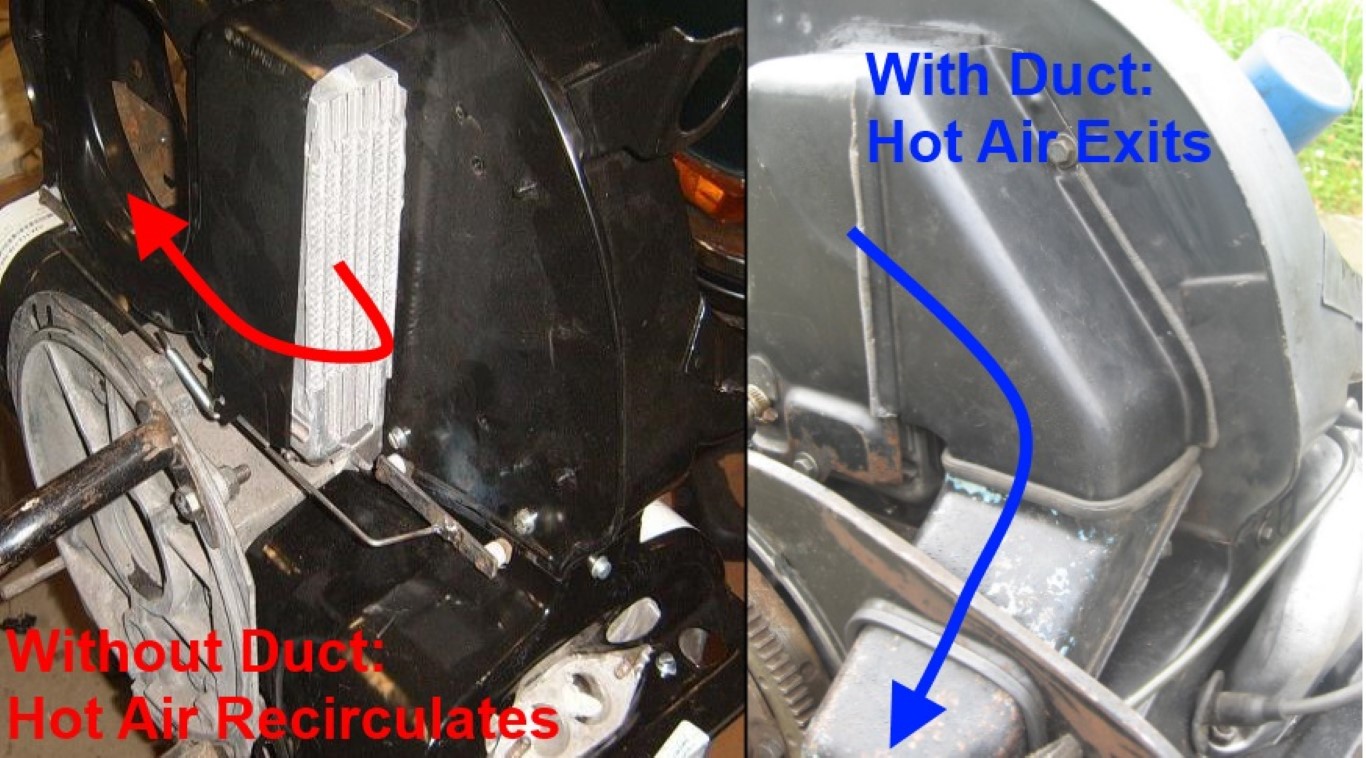
#3 – Even with everything sealed, the hot oil cooler exhaust would exit a few inches away from the fan inlet. With the extreme lengths that VW went through to keep hot/cold air separated this didn’t make any sense. So I did some research and found that a few pieces were missing that move the oil cooler exhaust air over to the hot side of the engine cooling tins; these pieces are now on order.
Engine Parts Cleaned, New Crank on Order
Tonight I cleaned out all of the engine parts and got the replacement parts on order. It will be a week or two before the engine parts arrive, but I have plenty of other things to work on. I may actually take this as an opportunity to paint the engine compartment while the engine is out, so I don’t have to do this again later. The engine is about 250lbs and I can (barely) dead-lift this a few inches from the jack to the table. Doing this is no fun though, so I avoid taking the engine out as much as possible despite how easy it is electrically/mechanically (disconnect 4 bolts, a cable, a hose, and 3 wires, that’s it).
der kurbelwelle ist kaputt
Tonight was my first chance to evaluate the bus after the “meltdown” event of last Thursday. I found a few things of interest:
#1 – Loose linkage on cooling flaps
#2 – Incorrectly adjusted valves
When these were corrected it ran perfectly, and I was finally able to correctly tune it to idle slowly, proving that there was some leakage past the valves. It ran very well and had plenty of power, but unfortunately it also had plenty of loud internal knocking, proving that major damage had been done during the meltdown event. So I pulled the engine, disassembled, and found the culprit:


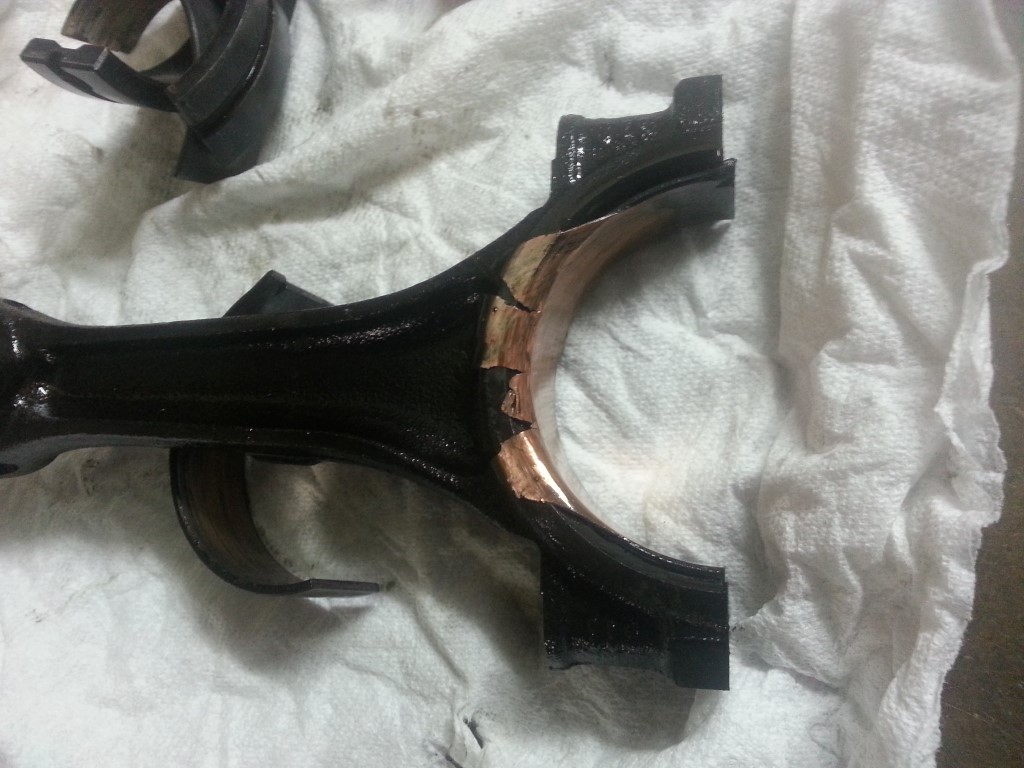

Remarkably, the melted bearings did not damage the block or rod journals and only lightly scuffed the crank. I think the crank is reusable, but since I have to replace all of the bearings anyways this is a good opportunity to replace it with a counterweighted crank. Unlike every modern vehicle, the bus’s original crank was not counterweighted. A counterweighted crank will allow it to run much smoother & quieter, and the new bearing will last much longer than they would with the un-counterweighted crank.
I’m not 100% convinced that the meltdown event was the entire cause of the bearing problems, I found some major pitting in many of the bearings shells that was deeper than the gouging, indicating there was corrosion present. Since the bus has sat with unknown quantities of oil since 1981 this seems logical in retrospect. Also, along with the bearing material there was a lot of sludge clogging the oil screen. This screen had been cleaned prior to running but I think all of the dried oily goop that was throughout the engine case was washed off by the new oil.
Meltdown
Today I drove many miles in the bus, but it was really struggling on the way back to the house. When I finally got back it didn’t have any compression and wouldn’t restart until it sat for several hours. I’m fairly certain it overheated very badly, I’ll know the extent of the damage when I take it apart after I get back from a trip this weekend.
Carb Rebuild #3 / 50+MPH Achieved
Tonight I rebuilt the carb for the 3rd time. This time I was apparently paying a lot closer attention, I found 3 things wrong:
- I had used a washer where the idle cutoff solenoid meets the carb body that shouldn’t have been there. The thickness of this washer was likely keeping the solenoid valve open all the time, allowing it to flood any time it stopped while hot.
- The spring inside the accelerator pump was on the wrong side of the gasket. The accelerator pump wasn’t working because the gasket just stayed to one side, with the spring on the correct side it now moves back and forth with the throttle linkage. This gives an extra shot of fuel on initial acceleration, as it was designed to.
- The auxiliary jet had been overlooked in previous rebuild/cleanings since it is behind another screw. Once I got it out of the carb I found that it was fully clogged. I cleaned it out with a very fine piece of wire and reinstalled it.
After the rebuild I reinstalled the carb and right away it was able to idle at ~800RPM without any issue, something that was impossible previously. I then took it on two test drives, totaling about 7mi. It did OK overall, it stalled once or twice, but unlike previous trips, I was able to start it right back up. Now I just need to properly adjust the timing/carb since the previous attempts to do this with a broken carb didn’t count.
The test drives gave the chance to verify the speedometer with GPS, it’s very close. I was able to calculate the error based on the difference in tire size vs original and it should be over-reporting the speed by ~3MPH, this is consistent with what I saw on GPS. The top speed on the test drives was a little over 50MPH, to go any faster I’ll have to hookup the tach, do the tune up, and retighten the brake adjusters now that the shoes have had their initial seating from the test drives.
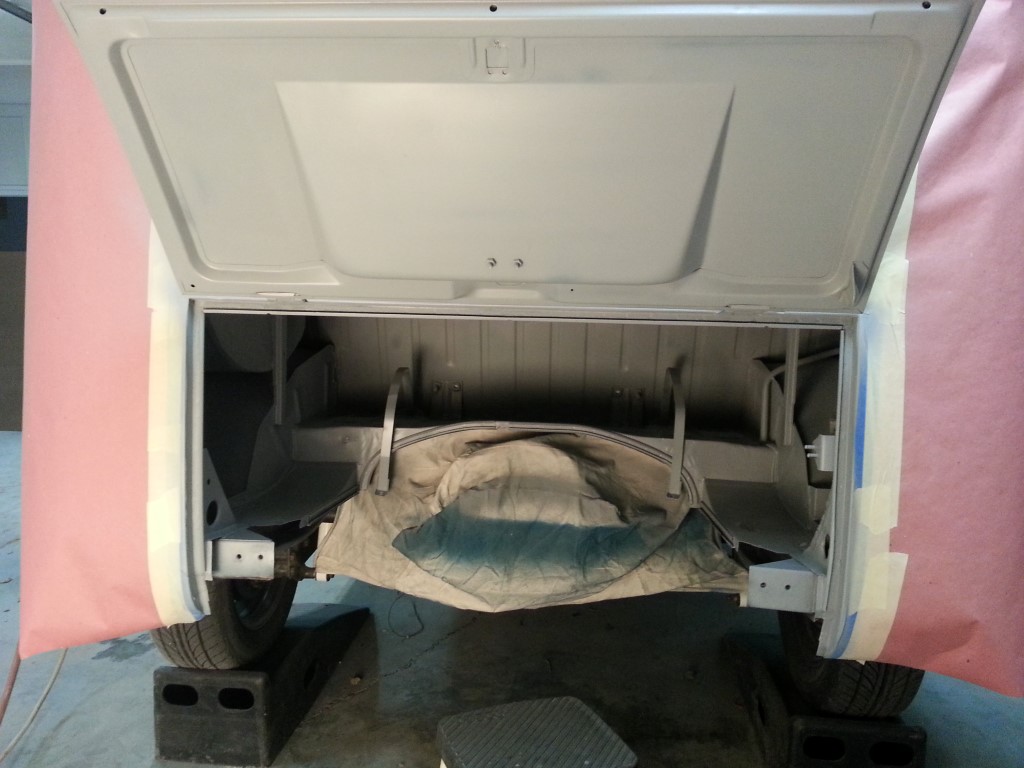
Hatch Painted
Today was a miscellaneous day: the brake lights and horn were connected, I finally painted the rear hatch and installed the rear windshield, I washed several months worth of dust/grime off of it, I made a few more interior panels, and I began looking into the stalling problem.
Seat Belts (and Physics!)
Most of today was spent installing the front seat belts. The bus does have factory mounting points since seat belts were an option from the factory, but the factory mounting points are for lap belts only. It’d be perfectly legal to keep lap belts only, but with a metal dash and sitting so close to the windshield I see shoulder belts as a necessity. To add the shoulder belts I had to add a 3rd mounting point to the B pillar on each side. The 3rd mounting point consists of a nut welded to a chunk of 1/4″ steel plate, a slot is then cut in the B pillar, the plate & nut installed, and the slot welded shut. It’s important that the mounts are strong, time for some physics:
Stopping in 2ft from 45mph (a crash) creates a deceleration, which can be calculated as follows:
(EndSpeed)² = (InitalSpeed)² + 2(acceleration)(distance)
45miles per hour = 20.1168meters/sec
2feet = 0.6096meters
0 = (20.1168m/s)² + 2(acceleration)(0.6096m)
(20.1168m/s)²= -2(acceleration)(0.6096m)
404.6856m/s²= -1.2192m*(acceleration)
(acceleration) = 404.6856m/s²/-1.2192m
(acceleration) = 404.6856m/s²/-1.2192m
acceleration = -331.9272m/s²
331.9272m/s² = 33.83G’s
When decelerating at 33.8G’s, a 200lb mass (i.e. a person) will impart a force on the seat belt that’s calculated as follows:
F=M*A
200lb = 90.7185Kg
F= 90.7185Kg*331.9272m/s² = 30111.9377N
30111.9377N = 6769.4329lbs = 3.3847TONS
Assuming the force is spread evenly across the 3 mounting points, each point would need to withstand a little over a ton of force in this scenario. Granted, you wouldn’t want the mounts to be right at their breaking point, so I estimate each point should be able to withstand at least 5 tons. With 1/4″ plate steel I believe this has been achieved (and then some).
First Test Drive
I drove the bus on public roads for the first time today. It runs/drives great, but it does stall anytime it’s coming to a stop while warmed up. I was able to get around this by putting my foot on the gas during the end of each stop and pulling the handbrake lever to hold it in place, but this wont work longterm so I’ll have to look into the cause.
Today I also fabricated some brackets to hold the back of the passenger seat at the correct angle. These mimic the original brackets.
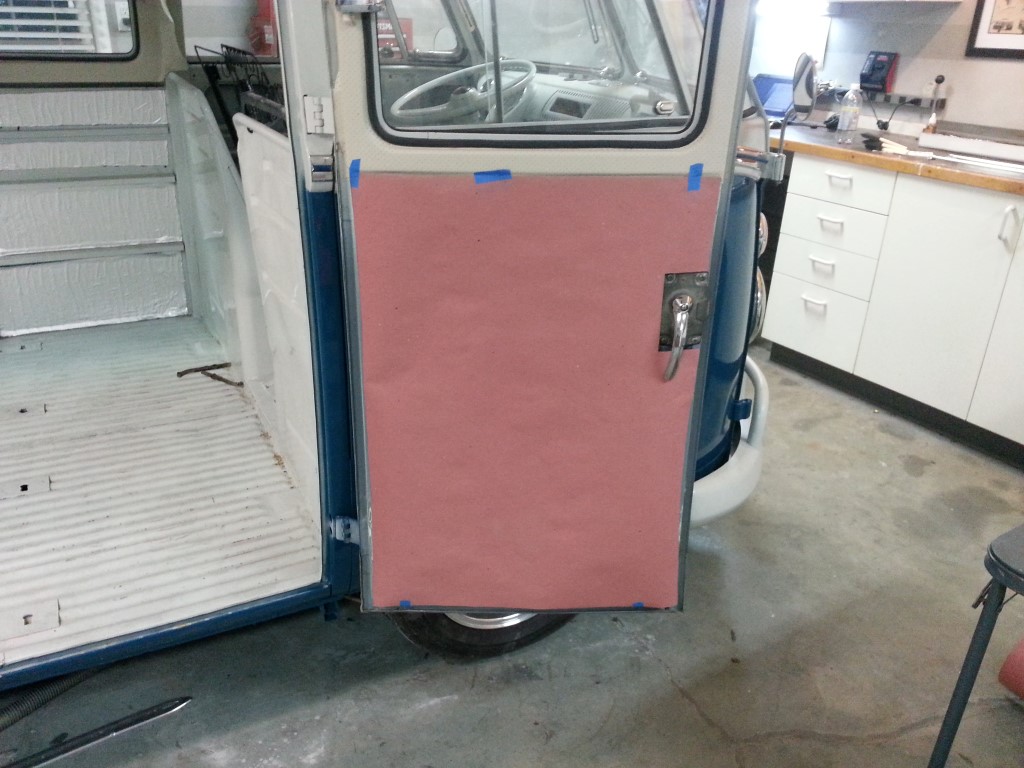
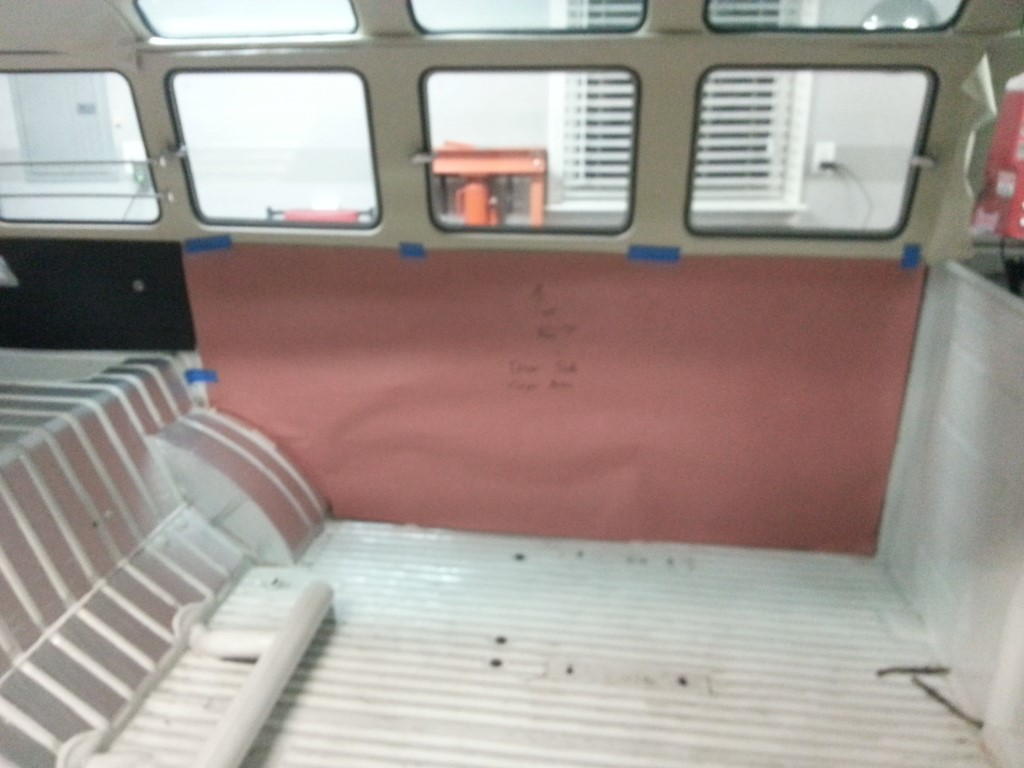
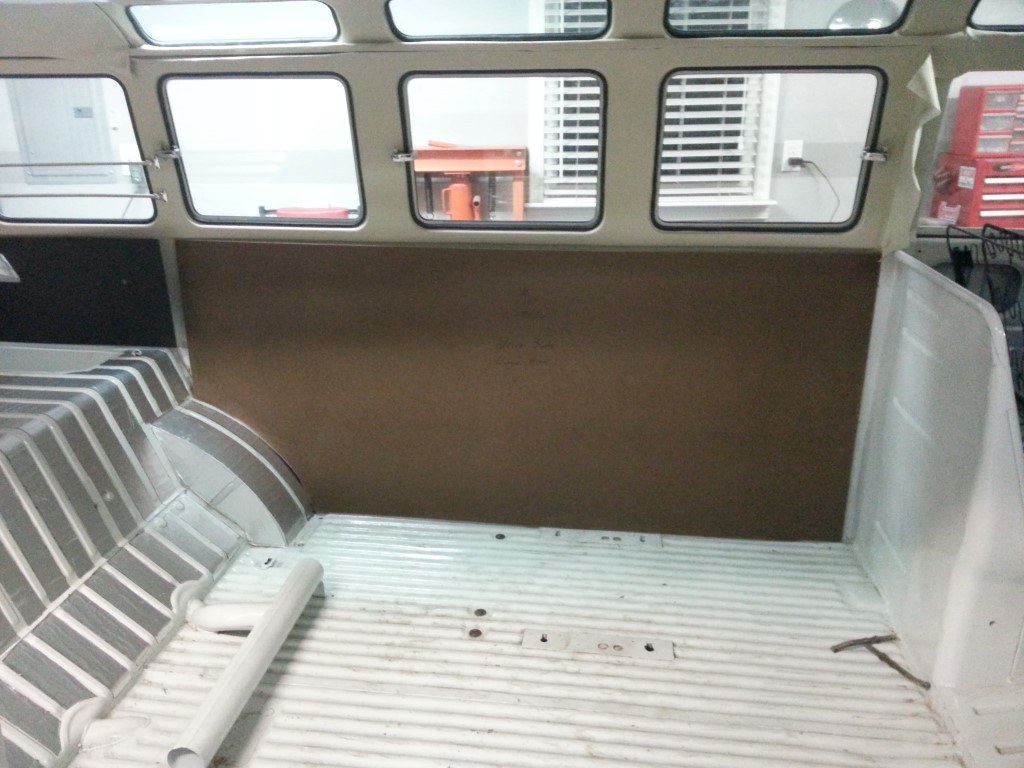
Interior Panels
Tonight I started making the interior panels, starting with the cargo doors and cargo area side panel. First a paper template is made, then the panel is cut from 1/8″ tempered hardboard. The hardboard is an extremely close match to the original panel material, which would have been ~1/8″ tarboard. The hardboard has the same composition except is held together with dried linseed oil instead of dried tar; this type of hardboard was much more common than tarboard on other cars of the same era.
I finished 3 panels tonight and there are 8 more to go: Rear hatch, cargo area behind cargo doors, both front doors, under dashboard (2 panels), and back of both seat partitions. Once they’re all finished they’ll be covered in vinyl and mounted in place.