-
Recent Posts
Recent Comments
Category Archives: Uncategorized
Shop Insulation
The shop is coming along well and this weekend the bulk of the insulation was installed. Friday night we picked up R15 Roxul batts for the walls and installed in just few hours. The attic was another story though and all of Saturday and Sunday AM were spent crab walking over attic joists installing baffles. The baffles are needed to keep the blow-in insulation from falling out of the attic area and into the soffits. The roof over the garage has a shallower pitch towards the edges (if you visualize a pizza hut roof you’re not far off) which made it especially tricky to get access.
Once the baffles were up we picked up the blow-in insulation Sunday mid-day and had it all blown in in couple hours. The high pallet of insulation looked really odd on the trailer, but was secured well. Even compressed it’s not very dense, this was ~900lbs maybe ~1100lbs with the machine.
Fireplace Screen
The new place has an open stone fireplace which presents two problems: #1 When there is no fire, the cats could access it and track soot and ashes around, and #2 when there is a fire there’s no protection from sparks, shifting logs, etc. The previous owners had a free-standing screen – this wasn’t left behind and didn’t address either problem well, so I decided to make a custom screen/door to enclose the fireplace. This started by bending an outer frame from 1/2″ square tube to fit the inside of the fireplace opening. I did this in several segments and welded them together.
Once the outer frame fit well I made two doors to fit inside. The doors attach to the frame via hinges I made from scrap steel tubing and round bar – when fully open there’s just enough room to lift the doors off the hinges if ever needed for cleaning/maintenance.
The left door locks to the bottom of the frame via a round bar that slides up/down inside the door frame. I made a tab on the end of the bar that protrudes through the frame and engages with the handle that’s attached to the frame with slots; it also has a tab to keep the right door latched in place. Since stone is irregular there were inevitable gaps, these were filled by tracing the gap onto cardboard and then these strips of cardboard were used as templates to cut out sheet metal strips. The sheet metal strips were secured to the back of the frame with self-taping screws; since the surfaces are rough this also locked the frame in place. The sheet metal was then sealed to the stone with furnace cement and all of it painted with high temp paint.
New Shop
It’s been over a year since the last update but with good reason: we’ve moved. As a result of the move I’ve been busy with a long list of projects to get the new place up to standard. It isn’t exactly a complete fixer-upper, but it definitely is/was behind on a lot of maintenance and upkeep.
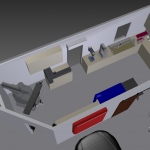
With this change comes more garage space; the plan is to have more dedicated areas in the garage to better serve the three (sometimes conflicting) purposes of: #1 Machine Shop / Wood Shop, #2 Auto repair bay (Doubles as Bus storage), and #3 parking for commuter cars. Key to this idea is building a partition wall between garage and shop areas – cars will no longer get covered in sawdust during projects, and the extra wall will create more wall space for workbenches, machines, and storage.
The design has part of the partition wall at 45deg to make the commuter parking area larger for easier loading/unloading. This also leaves some space for a utilities closet to house the air compressor, dust collection, and the house’s existing central vac unit. Putting the utilities in a small ‘lean-to’ shed on the exterior like I had at the old place would have been a better use of floor space, but there really was no good place for it on the exterior and that would have added more complexity.
I’ll be building 100% of this as I have free time, so it may take a while. Realistically completion will probably be about this time next year.
Jet Engine Oil System – Test Run
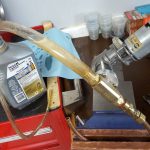
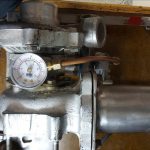
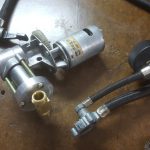
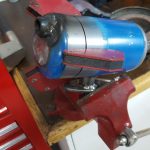
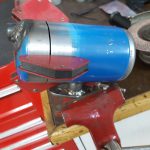
Tonight I tested the oil pump – it worked so well that the pressure blew off one of the plastic tubes I was using for testing and sneezed oil over everything. After I cleaned up the mess I connected it into the system and did another test run. The extra resistance of the oil passing through the turbo bearings caused the pump to stall out on the first attempt. The pump was originally designed to move air, so it’s not surprising that oil was too much of a load. To remedy this I made a new crankshaft for the pump on the lathe with as short of a ‘throw’ for the piston as possible. With the shorter throw, the pump is moving less oil per rev which reduces the load and prevented the motor stall. After this change it successfully ran continuously and held an average pressure in the system of about 75PSI, right about where it needs to be. To keep things simple I don’t have a bypass or pressure regulator in the system; because of this the pressure gauge flutters with each pump stroke but this doesn’t hurt functionality.
The motor draws about 5A, at 12V this is ‘only’ 60Watts and is about the same or even a bit less than when it was an inflator pump. Since it will now be running for longer time periods though I need to keep an eye on the motor temperature. I also need to protect the plastic gear from the (eventual) heat of the combustor above. To address both of these problems I’ll likely make a heat shield for this area as well as add a cooling fan.
Jet Engine Oil System
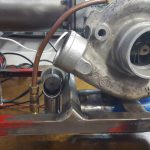
This weekend I resumed work on the jet engine project. When I last left off I had just completed the frame and mounted the turbocharger/combustor. I had also fabricated an oil tank out of an old propane tank and mounted it under the turbo, but had hit a bit of a wall with what to do for an oil pump. There are electric oil pumps available, but basically all of them would be overkill for this application. Also, since this is a hobby I’d much rather put in the time to make something custom vs paying for parts. Turbocharger jet engines have been done by many others, my approach with this is to see how compact and well packaged I can make one – that doesn’t happen by bolting together a bunch of off-the-shelf parts.
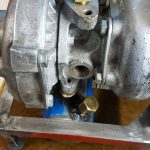
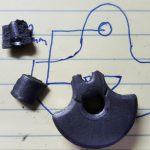
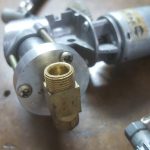
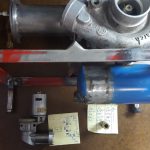
I had considered using the bus’s old oil pump, but this created more problems than it solved (connection of inlet/output pipes would be a challenge as would driving it and selecting a motor). Today after a taking a fresh look at it I realized that an old 12V tire inflator pump that I had could be adapted to work. The plastic casing had broken, but the ‘guts’ were all metal and should hold up to oil pump duty. The only problem was that the cylinder head of the pump had no way of connecting an inlet pipe – being designed for air, it just drew in air from a small hole. To fix this, I made a new cylinder head on the lathe with one large hole in the center. A tee fitting screws into the head and I’ll put a check valve on each side. This larger single-hole head should also help compensate for the increased load of pumping oil, much thicker than air. Once I start running oil through it I may have to make some tweaks to avoid overload (lower voltage, thin oil, etc) but this at least gives a path forward for experimentation.
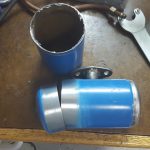
I also shortened the oil tank to make more room underneath for other support systems and made a threaded port on the lathe to weld into the tank to connect the oil pump. The welds aren’t the greatest looking, but are leak-free and that’s what matters – they should clean up OK after some grinding. For now the whole project is in fabrication mode, but once everything is in place and working I’ll go back and do body/paint work on all the parts to make it look nice too.
Converti-bug Top Replacement
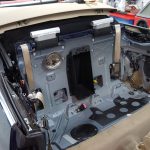
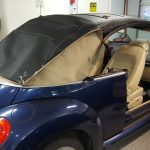
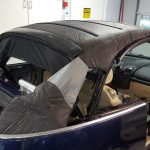
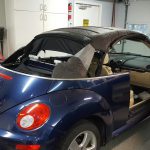
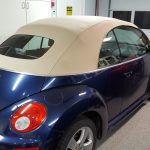
Last night and today we replaced the top on the Beetle. It was in ‘OK’ shape but was showing its age and the back window had begun separating/leaking, requiring roof replacement. Complexity level for this ranks right up there with an engine rebuild or debugging bad assembly code. The biggest challenge is that all the miscellaneous springs, ropes, and bungees involved don’t have the usual ‘this clearly bolts there’ pattern – instead it’s a spider web of cords that have to be routed just right, and their appearance changes greatly depending on how far up/down the roof is. With the help of lots of reference images though it all went back together correctly. Fortunately for modern tops like this there’s enough repeatably between cars that the tops come pre-cut with all the right seams/edges pre-made; there’s no trimming or other ‘upholstery’ type work that would be required on an older car.
Summer Update
It’s been a busy summer with a number of miscellaneous trips. To keep with the recent aviation theme, I’ll share the photo below that I took on a recent commercial flight of an Antonov 124 – a large russian transport plane that you definitely don’t see everyday. It’s the smaller version of the world’s largest airplane, the AN-225 Mriya.
BBQ Flight
This weekend we headed south to a small airport with an on-field BBQ restaurant. It’s an hour and a half drive, but only 20min by air.
The pictures of the light sport plane landing give a good representation of the between-the-trees approach. This is not uncommon at small airports; it’s a bit intimidating at first but is not a problem if you stay on center-line and are ready to make a go-around if something doesn’t look right.
