Background:
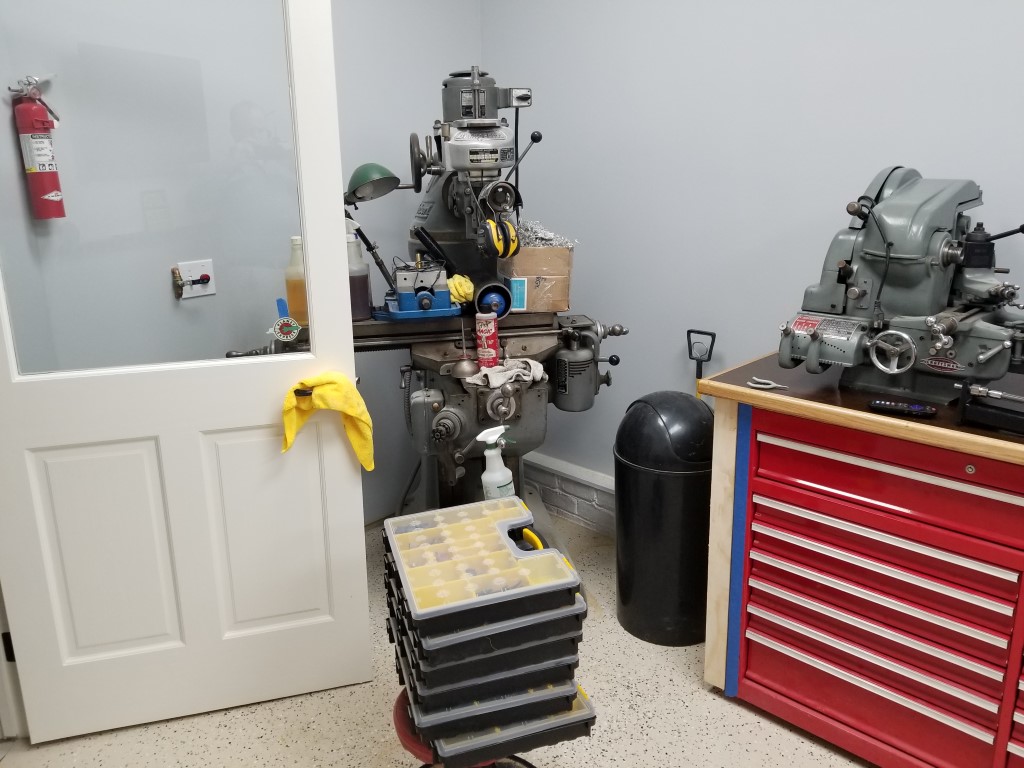
The new shop has given me the opportunity to rethink storage of the miscellaneous small parts I have laying around: nails, screws, nuts, bolts, brackets, cable ties, electrical connectors, fittings, etc. The previous system I had was to sort by type (i.e. nails) into individual plastic shelf bins (the common Blue/Red/Yellow type). This was better than nothing, but the downside was that every time I needed something I had to dump the whole bin into a sorting tray and search.
The new method uses a rack of portable parts storage cases. These cases give the ability to sort by main type (i.e. nails all in one case) but also by individual size (i.e. 1″ finish nails). The cases also have removable bins inside of various sizes; by swapping these around I’ll be able to optimize storage – swap bins between the cases that have more big parts vs those that have more small parts.
I considered the individual drawer style of parts organizers also; when I’ve had these in the past it seemed like I was constantly opening and closing the tiny drawers to look at parts from above; the drawers also easily jammed closed when full. The parts storage cases should prevent both of these problems.
(There are lots of similar projects online that sparked the idea, so this definitely isn’t something I can take credit for coming up with.)
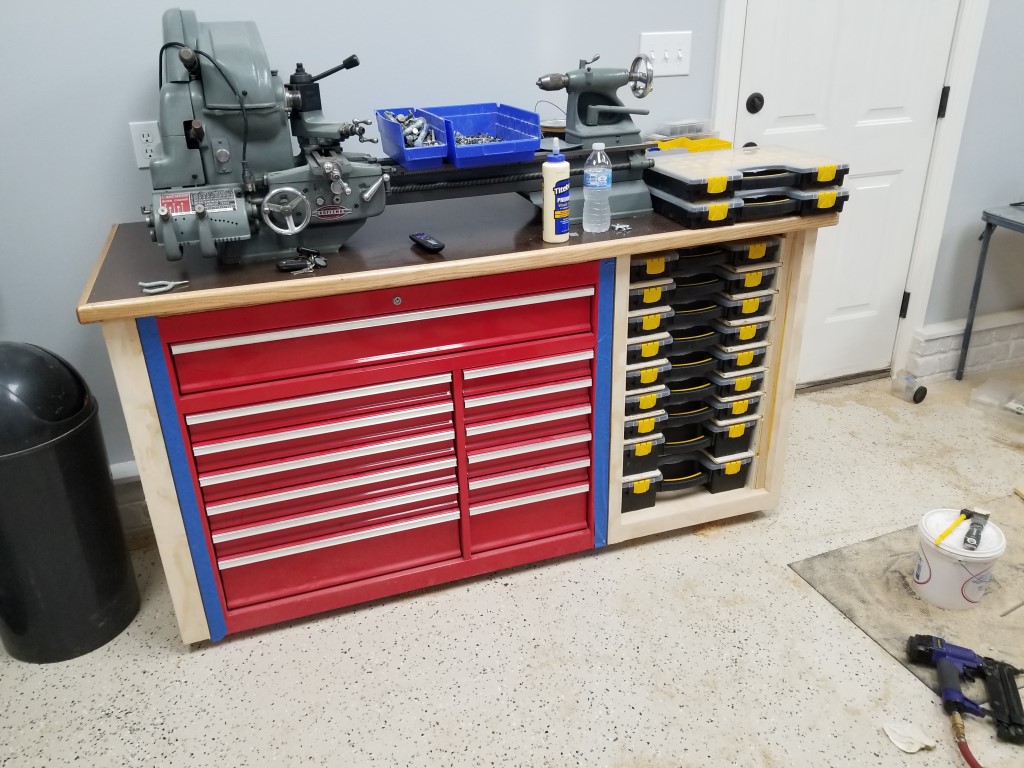
Construction:
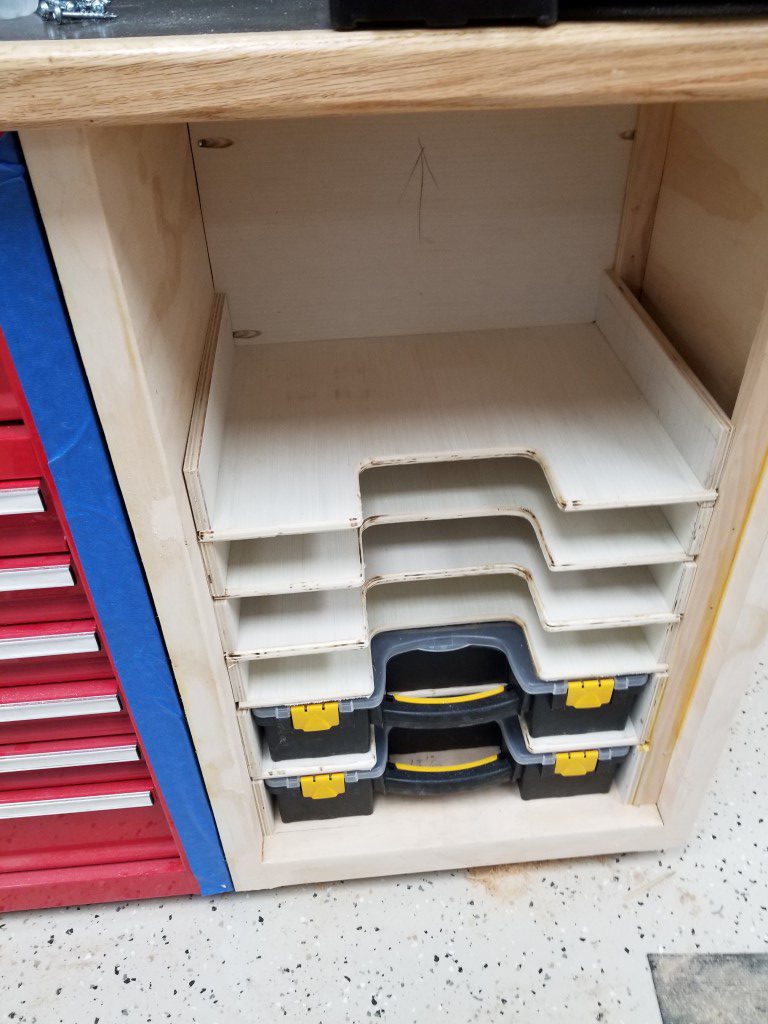
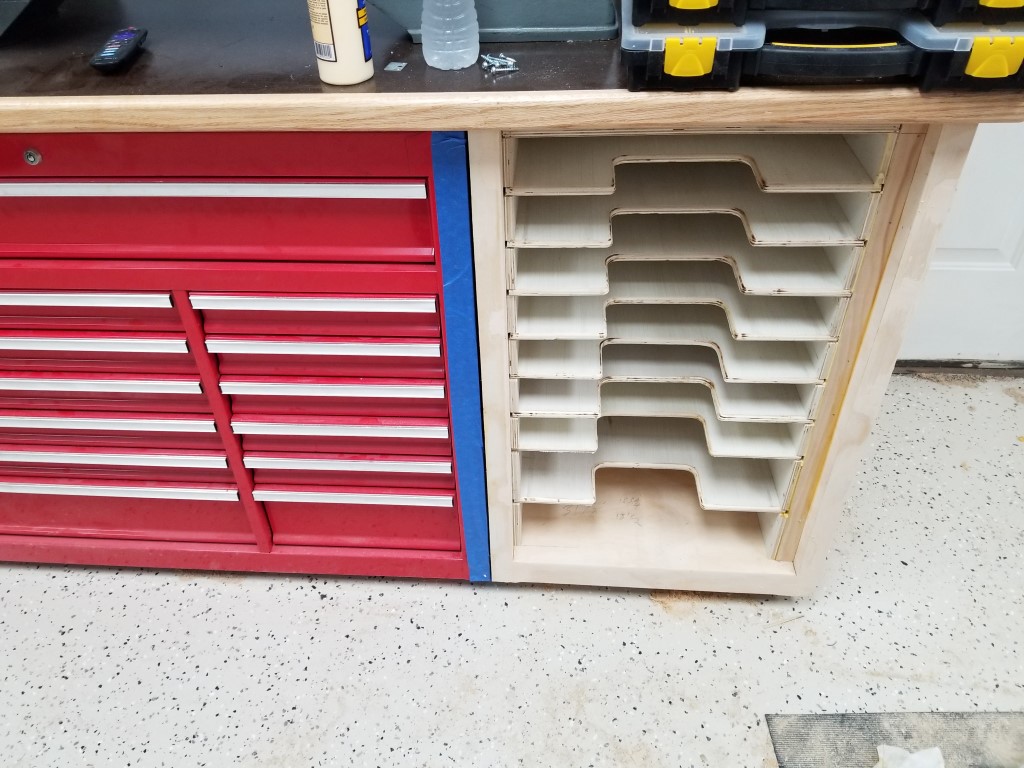
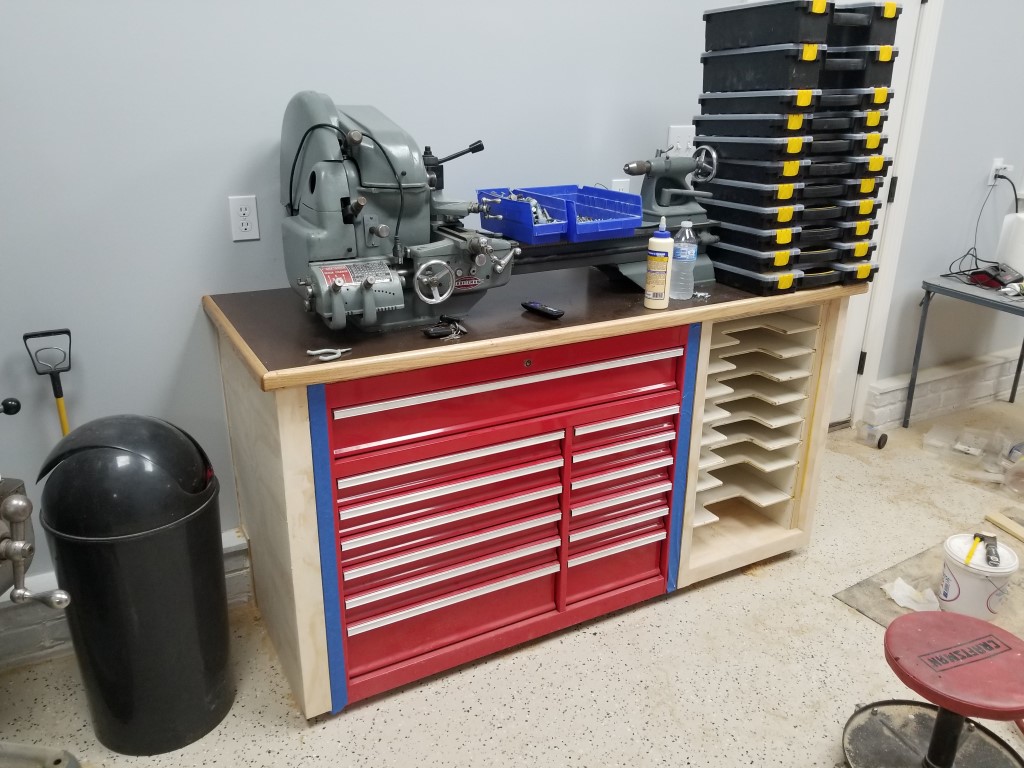
Last weekend I built a cabinet to house the ‘machinist’ toolbox used for the mill and lathe tools; the cabinet also supports the lathe itself. For the countertop I’m again using the “Norm Abrams” design – plywood topped with a varnished hardboard layer that’s cheap/easy to replace when it gets too beat up; I had these at the last shop and they worked really well. I left room in the cabinet for this parts organizer idea, so today I just needed to outfit it with shelves to support the parts cases. The rack consists of the shelves themselves as well as spacer blocks that help support the shelves and make it easy to get the correct spacing. The process for making the shelves was as follows:
- Rough cut each shelf from the plywood panel with a circular saw.
- Square and cut the shelf to final dimensions on the table saw.
- (For the first shelf) Drill holes at the corner of the handle area and finish cutting it out with the bandsaw.
- (For all other shelves) Clamp the shelf to the first shelf and trim out the handle area area with the flush cut router bit.
- Run the router over both front edges with a 1/4″ round-over bit.
There’s now an empty space in the cabinet behind the cases that I may eventually tap into and repeat the same idea using the smaller version of the cases; this would be accessed from the side of the cabinet, but for now it’s not needed.
I intentionally got a couple extra cases. This allows more options for swapping around internal bins, but primarily it’s so I have backups in case a case ever gets broken and exact replacements are no longer available.
All that’s left is to add an inset door (the cases are offset to the left to allow room for a door and hinges on the right), a slide-out platform at the top, and then finish trimming/sanding/painting everything.
(I also finished and painted the walls/trim then ground and epoxied the floor over the last several weekends, but I forgot to get in-progress pictures.)