Generator Install
After fixing the generator last year (this project) I needed to install it permanently. I pulled the permit last year and it expires soon, so lately I’ve put more work into this to get it done. After a year of on-and-off work it’s finally ready for inspection. Permanent installation consists of 3 main parts: mounting the generator, installing an interlock, and running cable from the generator to the house electrical panel.
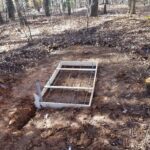
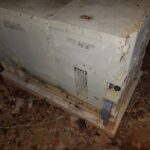
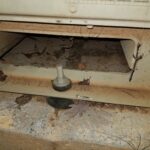
#1 – Mounting the generator was relatively easy – I dug out a flat area, made a form, added rebar, and poured concrete. The only tricky part here was keeping the threaded bolts positioned correctly so that they’d line up with the generator mounting holes. After the concrete cured I moved the generator in place and bolted it down, using hockey pucks as vibration dampers. I turned down the upper hockey pucks on the lathe and machined a step into them so that it keeps the generator centered on the mounting bolts.
#2 – The interlock requirement is the most important part of any generator installation since it prevents energy from the generator back-feeding into the utility, which would create a dangerous situation for the linemen that are working to restore power. There are several ways to accomplish the interlock:
– Automatic Transfer Switch: This switch is placed inline between the meter and main panel, during an outage it automatically disconnects the house from the utility, connects to the generator, and sends a signal to start the generator. This capability would be nice but there’s a lot of complexity, expense, and extra work involved.
– Manual Transfer Switch: This switch is placed inline between the meter and main panel and you can manually select which power source the house is using. This is much simpler than the automatic switch, but still requires an additional small panel for the switch.
– Main Breaker Interlock: This is a sliding plate that mounts inside the existing main panel and it prevents the main breaker from being ON at the same time as another nearby breaker (and vice versa). The generator powers the main panel through the nearby breaker.
I opted for the Main Breaker Interlock since it’s allowed where I live and it’s the simplest way.
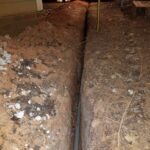
#3 – Running cable was the toughest part. Since the generator isn’t a residential unit that’s fire-rated to be directly next to the house (it probably would perform better than a residential unit, but the military doesn’t do the residential testing) it had to be at least 2ft away. 2ft away would have made for an awkward placement and it would have been in the way a lot, so instead I took it much farther out near the tree-line; leading to a ~60ft long trench. Code requires either 18″ of cover or 24″ of cover depending upon whether or not conduit is used. I opted to use conduit since the shallower trench saved digging effort and also reduced the chance of encountering any other utilities in the process. Most of the digging was through very dense/hard clay and it was slow-going with a trenching shovel. I welded the shovel back together at least a few times. I also experimented digging with the pressure washer, which mostly made a mess. The last 2ft near the house were through concrete; the technique I used for this was to turn the area into Swiss cheese with a hammer drill, break it out with a small air chisel, and then progress down to the next layer. I had been on and off of this effort over the past year and finally finished this weekend.
(#4) Misc things. Since the generator wasn’t originally intended for residential installation there were a few extra things I did to convert it:
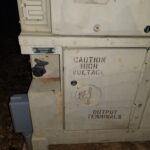
– I added cabinet locks to all of the access doors. This isn’t for security so much as it is to prevent anyone that shouldn’t be in there from getting into danger, especially the front door that has the output terminals directly behind it.
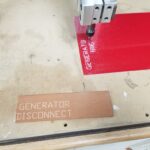
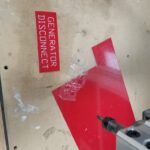
– One of the code requirements is that there must be a way to disconnect the generator outdoors. The generator itself sort-of/kind-of meets this requirement since it has a switch on the operator panel that will open the relay that connects the output power. Since this switch isn’t directly a disconnect though and since there’s a lock on the operator panel that could restrict access I also added a ‘real’ disconnect on the exterior of the house. I used the CNC router to make an engraved sign to mark it.
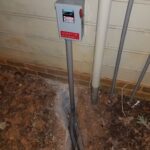
– Since the interlock completely disconnects the house from the utility it can be tough to know when power is restored. Electrically it would be possible to have a light/buzzer on the utility connections before the main, but since this wouldn’t have a breaker it wouldn’t be safe or code compliant. I found a device that’s made exactly for this problem and installed it. It has it’s own power via a 9V battery and has an antenna that wraps around the line from the utility to monitor power status. The alarm is armed manually when on generator power and as soon as utility power returns its siren sounds.
– I made a step-by-step instruction list with photos so anyone that’s home at the time of a power outage can start the generator and operate the interlock. This list and the key to the generator are held inside the main panel with magnets.
Next step is to get it inspected and then I can backfill the trench and clean the mud off of everything one last time.
Exterior Projects & ‘Custom’ Molding
This weekend I finally got around to a few exterior projects at the house:
– One of the gable sides had flaking trim paint on its vent / rake boards and needed fresh paint on the siding. I sanded and repainted the trim and then put several coats of new paint on the siding. This gable end is the only original Masonite siding on the house that’s exposed (the entire back was replaced with LP Smartside by the previous owner, the dormer siding I’ll be replacing soon, and the rest of it is either under the porch or deep eaves where it never gets wet). Anywhere Masonite siding can get wet it’s critically important to keep good paint on it to avoid swelling; I think I caught this just in time. Getting access to the area took a little creativity and involved a few roof brackets, planks, and making a platform/box from 2×10’s; it was very rigid once all the parts were secured together though.
– Installed gutter guards. Leaves should start falling soon and I’ll see how it goes, anything will be an improvement.
– The gable side on the back of the house had a rotted rake board and molding. Replacing the rake board was no problem; I just needed to rip a 1×6 to the exact width and put a slight roundover on the bottom edges to match the existing rake boards.
(I didn’t get a before shot, but this shows the new board and missing molding. The dark area of the old board was covered by bad molding, but is still good. It will get primed before installing the molding, and this way the seams are staggered for stability)
Unfortunately the molding that’s between the rake board and shingles (conveniently called ‘shingle molding’) is not readily available. Replacing the molding leaves several options:
#1 – A millwork shop may have it in stock, but this would take a lot of driving around to find. Usually those places have 8-5 M-F hours and sometimes won’t talk about such a small order.
#2 – I could probably find it online, but it wouldn’t ship in one piece plus there would be a delay time, added shipping costs, etc.
#3 – Sometimes it’s possible to find the same profile on a larger piece (i.e. base molding) and rip it to width. I checked this as an option when looking for for the molding originally, but this also wasn’t available.
#4 – If I found the correct profile router bit I could make the molding with the router table. This can be pricy though, plus it adds delay time and it takes a lot of setup/finishing to get a good output.
#5 – I was able to find a matching profile on a piece that was too narrow. Since the ‘missing’ part is rectangular it’s possible to just make the missing strip and glue it on.
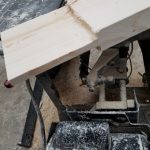
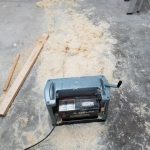
I’ve used #4 for matching other weird trim on the house, but for this scenario #5 made the most sense. To get a good glue joint I first ripped a bit off of the pre-primed molding to expose the wood. Next I ripped a 12ft scrap of 1x{something} to the right width. Dry fitting the two pieces next to each other showed that the 1x piece was just a bit thicker than the molding. I feed this strip through the planer until it was an exact match and then tightly taped the back sides of the two pieces together, forming a hinge. The tape ‘hinge’ was opened to apply glue and then tightly taped back together. Once the glue dries overnight it will be scrapped, fed through the planer, and then sanded, primed, and installed.
Cabinet Handles
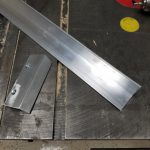
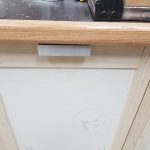
Over the last few nights I’ve been working on handles for the cabinets. The handles are 4″ sections cut from 1.5″ aluminum angle. Before cutting to length I ripped ~1/2″ off of one side of the aluminum so the handles weren’t too wide. This was my first time cutting aluminum on the table saw, it was very quick and effective but also shot scalding hot aluminum chips in every direction and sounded like a Pterodactyl being fed through a wood chipper.
Since I may add/change cabinets in the future I wanted to make sure that I wasn’t locked into a particular brand/model of handle that could be discontinued, by making my own with standard materials this isn’t a problem and the cost was also kept to a bare minimum.
Once all the sections were cut to length I sanded the rough edges and drilled/countersunk holes on the drill press. I made a quick fixture with clamps and wood blocks to get the holes consistently located. To attach the handles to the cabinets I chiseled out a 1/8″ recess and then attached the handles flush with the door edges.
I’m undecided on whether these will keep their current ‘brushed’ looking finish or whether I’ll polish or paint them. I’ll decide that when the time comes to finish/paint the cabinets.
Shop Cabinets
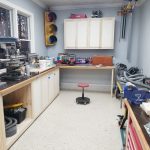
This weekend I resumed work on the shop and made major progress on the cabinets:
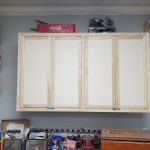
– Upper cabinet built
– Another cabinet built for small parts storage
– Doors for existing base cabinets built
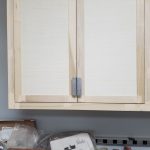
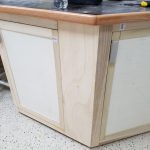
The doors are ‘shaker’ style for simplicity; building these is as easy as cutting a piece of 1/2″ plywood to the right size and then wrapping it in the same 1×2 poplar used for the cabinet face frames. All the door frame pieces got a 1/2″ dado to fit around the plywood edge and then the top/bottom frame pieces had 1/8″ removed from either side of their face on the ends to make a tenon. I found that the majority of the build time is in changing between the various setups needed (cut to length vs dado cutting vs tenon cutting vs cutting plywood, etc) so after the first test door I tried to build as many doors at a time in parallel as possible.
I went with ‘inset’ mounting of the doors because i like the clean/simple look. This gives a lot less room for error compared to overlay mounting since the gap is visible and it and needs to be small and consistent. It’s critical that cuts are within 1/16″ and that everything stays perfectly square or things go downhill fast. For the dados I used an old ‘wobble’ style dado blade (these are so sketchy they’ve been banned in europe); the geometry of this contraption is such that it can’t leave a perfectly square bottom. It’s not really a problem since the dado bottom is internal/unseen, but it made measuring and setting the correct dado depth difficult.
I definitely had a few mistakes to correct along the way, but overall I think it was just enough of a challenge to help improve my woodworking. Next steps are to make handles, make/install drawers for the last open base cabinet, and (eventually) do the finish work of filling/sanding/painting.
Small Parts Organization
Background:
The new shop has given me the opportunity to rethink storage of the miscellaneous small parts I have laying around: nails, screws, nuts, bolts, brackets, cable ties, electrical connectors, fittings, etc. The previous system I had was to sort by type (i.e. nails) into individual plastic shelf bins (the common Blue/Red/Yellow type). This was better than nothing, but the downside was that every time I needed something I had to dump the whole bin into a sorting tray and search.
The new method uses a rack of portable parts storage cases. These cases give the ability to sort by main type (i.e. nails all in one case) but also by individual size (i.e. 1″ finish nails). The cases also have removable bins inside of various sizes; by swapping these around I’ll be able to optimize storage – swap bins between the cases that have more big parts vs those that have more small parts.
I considered the individual drawer style of parts organizers also; when I’ve had these in the past it seemed like I was constantly opening and closing the tiny drawers to look at parts from above; the drawers also easily jammed closed when full. The parts storage cases should prevent both of these problems.
(There are lots of similar projects online that sparked the idea, so this definitely isn’t something I can take credit for coming up with.)
Construction:
Last weekend I built a cabinet to house the ‘machinist’ toolbox used for the mill and lathe tools; the cabinet also supports the lathe itself. For the countertop I’m again using the “Norm Abrams” design – plywood topped with a varnished hardboard layer that’s cheap/easy to replace when it gets too beat up; I had these at the last shop and they worked really well. I left room in the cabinet for this parts organizer idea, so today I just needed to outfit it with shelves to support the parts cases. The rack consists of the shelves themselves as well as spacer blocks that help support the shelves and make it easy to get the correct spacing. The process for making the shelves was as follows:
- Rough cut each shelf from the plywood panel with a circular saw.
- Square and cut the shelf to final dimensions on the table saw.
- (For the first shelf) Drill holes at the corner of the handle area and finish cutting it out with the bandsaw.
- (For all other shelves) Clamp the shelf to the first shelf and trim out the handle area area with the flush cut router bit.
- Run the router over both front edges with a 1/4″ round-over bit.
There’s now an empty space in the cabinet behind the cases that I may eventually tap into and repeat the same idea using the smaller version of the cases; this would be accessed from the side of the cabinet, but for now it’s not needed.
I intentionally got a couple extra cases. This allows more options for swapping around internal bins, but primarily it’s so I have backups in case a case ever gets broken and exact replacements are no longer available.
All that’s left is to add an inset door (the cases are offset to the left to allow room for a door and hinges on the right), a slide-out platform at the top, and then finish trimming/sanding/painting everything.
(I also finished and painted the walls/trim then ground and epoxied the floor over the last several weekends, but I forgot to get in-progress pictures.)
Shop Insulation
The shop is coming along well and this weekend the bulk of the insulation was installed. Friday night we picked up R15 Roxul batts for the walls and installed in just few hours. The attic was another story though and all of Saturday and Sunday AM were spent crab walking over attic joists installing baffles. The baffles are needed to keep the blow-in insulation from falling out of the attic area and into the soffits. The roof over the garage has a shallower pitch towards the edges (if you visualize a pizza hut roof you’re not far off) which made it especially tricky to get access.
Once the baffles were up we picked up the blow-in insulation Sunday mid-day and had it all blown in in couple hours. The high pallet of insulation looked really odd on the trailer, but was secured well. Even compressed it’s not very dense, this was ~900lbs maybe ~1100lbs with the machine.
Fireplace Screen
The new place has an open stone fireplace which presents two problems: #1 When there is no fire, the cats could access it and track soot and ashes around, and #2 when there is a fire there’s no protection from sparks, shifting logs, etc. The previous owners had a free-standing screen – this wasn’t left behind and didn’t address either problem well, so I decided to make a custom screen/door to enclose the fireplace. This started by bending an outer frame from 1/2″ square tube to fit the inside of the fireplace opening. I did this in several segments and welded them together.
Once the outer frame fit well I made two doors to fit inside. The doors attach to the frame via hinges I made from scrap steel tubing and round bar – when fully open there’s just enough room to lift the doors off the hinges if ever needed for cleaning/maintenance.
The left door locks to the bottom of the frame via a round bar that slides up/down inside the door frame. I made a tab on the end of the bar that protrudes through the frame and engages with the handle that’s attached to the frame with slots; it also has a tab to keep the right door latched in place. Since stone is irregular there were inevitable gaps, these were filled by tracing the gap onto cardboard and then these strips of cardboard were used as templates to cut out sheet metal strips. The sheet metal strips were secured to the back of the frame with self-taping screws; since the surfaces are rough this also locked the frame in place. The sheet metal was then sealed to the stone with furnace cement and all of it painted with high temp paint.
New Shop
It’s been over a year since the last update but with good reason: we’ve moved. As a result of the move I’ve been busy with a long list of projects to get the new place up to standard. It isn’t exactly a complete fixer-upper, but it definitely is/was behind on a lot of maintenance and upkeep.
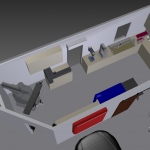
With this change comes more garage space; the plan is to have more dedicated areas in the garage to better serve the three (sometimes conflicting) purposes of: #1 Machine Shop / Wood Shop, #2 Auto repair bay (Doubles as Bus storage), and #3 parking for commuter cars. Key to this idea is building a partition wall between garage and shop areas – cars will no longer get covered in sawdust during projects, and the extra wall will create more wall space for workbenches, machines, and storage.
The design has part of the partition wall at 45deg to make the commuter parking area larger for easier loading/unloading. This also leaves some space for a utilities closet to house the air compressor, dust collection, and the house’s existing central vac unit. Putting the utilities in a small ‘lean-to’ shed on the exterior like I had at the old place would have been a better use of floor space, but there really was no good place for it on the exterior and that would have added more complexity.
I’ll be building 100% of this as I have free time, so it may take a while. Realistically completion will probably be about this time next year.
Adding Auto-Refill to Keurig
It’s not that manually refilling a Keurig tank is hard, it’s just unnecessary. Commercial Keurigs (and some of the high-end home versions) are built with this in mind and can be directly plumbed for water. Our Keurig, however, is a ‘normal’ home machine without provisions for direct plumbing; so some creativity was involved in adapting it for this feature. Altogether this was a fairly simple 3-step process:
#1 – Make bracket from scrap piece of PVC pipe.
#2 – Install miniature float valve ($3 w/ free shipping) and bracket into tank.
#3 – Plumb float valve to existing water filter under sink.
All plumbing is nicely concealed behind the microwave/cabinets, so the only evidence of anything different is the float visible in the tank. Before anyone freaks out about the evil toxic plastic floating in the water, I should point out that the tank itself is plastic anyways, as is much of the tubing that supplies water to the faucet when filling the old-fashioned way. Total project cost was well under $10.


