Window Crank Adapter
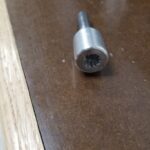
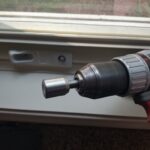
It’s not particularly hard to use a window crank, but multiplied by several windows it does take a little bit more time than it could. With this in mind I created an adapter for a cordless drill to more quickly open/close windows, particularly as it’s starting to cool down some and we’re using the windows more.
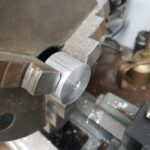
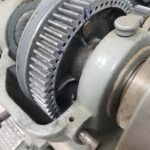
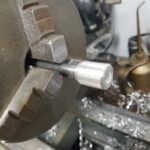
Construction was relatively straight forward, it’s just a bit of aluminum turned to size and with a hole drilled with the same size as the OD of the splines on the window crank mechanism. The only tricky part was creating the splines since this is the first time I’ve attempted it. The lathe has a built-in index plate that allowed the adapter to be positioned in the 12 evenly divided positions required; once it was in each position I used a small lathe tool to broach a slot, moving the carriage back and forth with the lathe off while slowly raising the tool. I then turned a bit of steel rod to size and pressed it into the back of the adapter.
Overall it turned out OK – the splines aren’t the greatest due to the tool not being very rigid, but it’s plenty good enough for it to engage with the window and hold solidly.
Hacking the Player Piano – Part 1
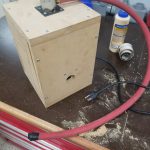
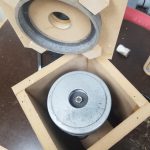
It was only a matter of time before this happened – the player piano (original post) is a real workout to play manually. Since it works on vacuum, I had set aside the motor from an old vacuum cleaner for potential use in powering the piano. Tonight I built a small box to contain the vacuum motor and connect it to the piano. The box is made from MDF, partly because I had scrap that needed to be used, and partly because it’s very heavy & sound absorbing. I made the big fitting by cutting/milling a square from scrap, I then bored a hole in it on the lathe and welded it to a scrap of pipe.
One very large hose goes to the manifold powering all the key bellows, and another smaller hose powers the vacuum motor for the tracker/scroll mechanism. I didn’t notice the smaller connection at first, so I had to go back and tap a fitting into the connection for the large hose; there’s still enough room for both to connect though.
Overall it seems to work great, this effort was definitely a quick proof-of-concept though and I’ll need to go back and fix/test a few things:
#1 – Motor controller to slow down the vacuum motor. Currently it has way more vacuum than is actually needed and slowing down should reduce noise from the motor.
#2 – Ensure cooling is OK. Especially after slowing the motor down I need to test that air flow is good enough to keep the motor consistently cool.
#3 – Mount in piano base and complete further noise insulation.
#4 – Tee hoses (and potentially add check valves) so that manual operation still works.
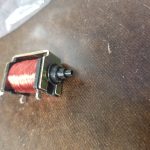
Beyond that I do have plans to eventually (could be tomorrow, could be in 5yrs) automate the player mechanism using some small pneumatic solenoids I found on ebay. These would tee off of each line from the tracker bar and when they open it would simulate a hole in the paper passing by. With this it would then be computer controlled and able to play anything. By default these are off/closed, so the paper mechanism would still work fine, in computer-controlled mode I’d just need to block off the tracker bar holes with some tape.
Security Lug Defeated
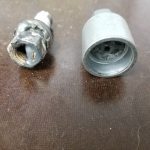
This week’s challenge was a flat tire; I switched to the spare relatively quickly and uneventfully except that when I was tightening the security lug bolt the security key slipped out a bit. When it slipped it broke a little chunk off of the security key and warped the security pattern on the lug bolt. I ordered a new key and lug right away but since I didn’t want to risk the warped lug bolt breaking the new key, I had to come up with some other way to remove it.
First I tried a broken lug extractor – these are cheap and readily available at the local car parts place. They’re basically a regular impact socket with a reverse thread on the inside rather than the usual hex pattern. The theory is that as you loosen the lug the socket’s threads bite into and turn the lug bolt. This actually would have worked great if it weren’t for a collar that’s integrated into the security bolt – the socket only bit into this collar and it spun on the lug bolt without turning the bolt body. It’s almost like they thought of this scenario when the security lug was designed…
Next I tried to cut some small grooves in the bolt head and deform the collar into these grooves so that the collar would be able to drive the bolt out. I think this was an OK idea, but since the collar was glass-hard steel it chipped instead of deforming.
Running out of options, I decided just to weld a nut to the security lug bolt and unbolt it. I had held off on this ‘nuclear option’ because there is a level of risk – the ground current could actually weld the bolt into the hub somewhat or damage bearings/electronics – I chose the ground clamp location carefully and also cleaned it carefully to avoid this. It was a messy weld (prioritizing not damaging the spare) but worked great. I think the heat from welding may also have helped by expanding the bolt and relieving some of the pressure against the spare.
With the lug bolt out the spare was swapped to the (now repaired) wheel and tire. Not sure how a dealer/mechanic would handle this scenario, but I’m guessing it means the welder has now paid for itself for at least the 3rd or 4th time.
Adding Auto-Refill to Keurig
It’s not that manually refilling a Keurig tank is hard, it’s just unnecessary. Commercial Keurigs (and some of the high-end home versions) are built with this in mind and can be directly plumbed for water. Our Keurig, however, is a ‘normal’ home machine without provisions for direct plumbing; so some creativity was involved in adapting it for this feature. Altogether this was a fairly simple 3-step process:
#1 – Make bracket from scrap piece of PVC pipe.
#2 – Install miniature float valve ($3 w/ free shipping) and bracket into tank.
#3 – Plumb float valve to existing water filter under sink.
All plumbing is nicely concealed behind the microwave/cabinets, so the only evidence of anything different is the float visible in the tank. Before anyone freaks out about the evil toxic plastic floating in the water, I should point out that the tank itself is plastic anyways, as is much of the tubing that supplies water to the faucet when filling the old-fashioned way. Total project cost was well under $10.
The Bungee Shifter Device
I’ve been driving the bus quite a bit this week and so far all is well. It seems happier/smoother/quieter with each trip. If first gear is selected it works for a foot or two then pops out; if it’s held in first it works for a foot or two then grinds. Although I did clean and reseal the trans I didn’t do anything with the internals and I think they’re just too far gone. Luckily the 1600 has plenty of torque to just start in second all the time; it’s a little tougher on the clutch but I’ll replace it when I replace the trans. Replacing the trans has been part of the plan anyhow, the stock trans requires 4500RPM (redline) in 4th gear to go 65MPH; the replacement will have taller gearing to both allow higher speed and lower the revs at normal speeds.
It pops out of 4th too, which is apparently a very common problem. Since it stays in 4th if held, I’ve solved this by deploying a strategically placed bungee cord anytime it’s in 4th for longer than I feel like holding onto the shifter.


