Checkride Passed!
I haven’t updated in quite some time; summer was very busy with work, travel, and the occasional practice flight. I documented a number of these things with the intention to later post, however I failed logging into my phone one too many times and it deleted all photos.
Bus: Only minor work done on the bus, mainly more wet-sanding & polishing.
CNC: I created a homemade drag knife for cutting out vinyl/cardboard/paper. This is still a work in progress as are accuracy refinements and fine tuning.
Aviation: I passed the Private Pilot check ride! This generally means I can now fly any single engine land airplane (that does not require a Complex, Hi Performance, or tail-wheel endorsement) to/from any airport (besides the obvious: military/etc); and I can now carry passengers that aren’t flight instructors. I should be getting the official plastic certificate (There’s no such thing as a “Pilot’s License”) card in the next few weeks like the one below.
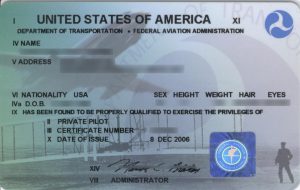 In practice, switching to something other than a Cessna 172 would require a little bit of transition training and there are time limitations to renting the trainer plane. So not sure what’s next with this hobby, but there’s a lot to learn and it’s still very interesting…
Bus Fuel Clog
The weather is warming up and I’m anxious to start driving the bus again. Since the last trip prior to winter ended with stalling I put the bus up on ramps and investigated the problem. Based on the behavior I had suspected fueling problems. I checked the fuel pump and it was OK (though it’s 30years old so I’ll likely replace soon anyways), and also replaced the fuel filter. The old fuel filter was full of rust particles but it wasn’t really restricting the flow. A clue came about during replacement of the filter when I forgot to crimp the fuel hose upstream of the filter. Normally this would mean a shower of gasoline but there were only a few drips, indicating a clog upstream of the filter. I pulled the hose fitting off of the bottom of the tank and found it almost completely clogged. I had cleaned the tank when I had it out for repainting but it doesn’t take much to cause a clog. Now that it’s being driven the gas is sloshing and continuing to clean it out further. I’d expect the worst of the gunk has passed through by now but I’ll have to check this fitting periodically.
Winter Update
Aviation: Winter is here and with it has come lots of overcast weather that’s no good for flight training, slowing progress quite a bit. In total I’ve now soloed 6-8 times and have started working on cross-country training. Cross-country flying adds many new elements: flight planning, talking to Air Traffic Control, radio navigation, visual navigation by waypoints, etc. All this has to be done while still flying the plane, so it’s definitely a challenge. Currently targeting to have my FAA checkride sometime before April.
Bus: Winter also puts a damper on bus driving since I don’t have the heat connected yet. On the last drive before the temperature dropped I had a big loss in power every few minutes and had to pull over and idle before power came back. I haven’t looked into it yet but this seems consistent with a clogged fuel filter; I was expecting the first filter to go quickly since it’s filtering out all the rust/varnish/trash from the fuel tank that sat for 30 years. I probably could swap the filter and have it going again but I think this is a good opportunity to now pull the engine/trans again and go through it with a fine-tooth comb with the goal of getting it smoother/quieter/stronger to enable longer trips. No immediate plans to do this, probably when the weather warms up.
Tech Projects: I just ordered a float valve to automate refilling the Keurig, I’ll post pictures of how that goes. Also I’m getting interested in making a small CNC machine; I’ve had this on my long-term to do list for a while but recently component prices have dropped substantially so I’ve started the planning process.
Bus Photos
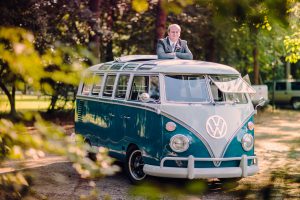
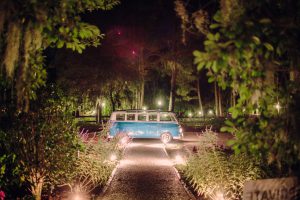
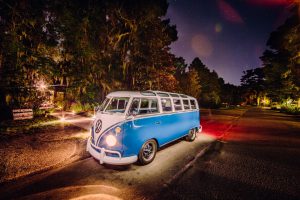
The last few months have been very busy so I haven’t done much with the bus. We did get the photos back from the wedding a while ago, they came out great!
Successful Return & Next Steps
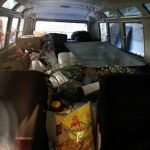
The bus made the trip back from Charleston uneventfully. It was loaded at least half full with various wedding stuff, luggage, tools, etc. We had originally thought of having the bus ready for the wedding as a bonus, but in retrospect it was actually a large part of the wedding logistics and things wouldn’t have gone as smoothly without it.
Having performed admirably for the wedding trip, the bus will now get a bit of a vacation over the winter. During this time I’ll have the engine/trans out again for closer inspection; the trans will need to be either rebuilt or replaced in order to get more speed while also bringing the interior noise levels down. I’ll also work on the interior, paint touch-ups, and various other miscellaneous stuff during this time.
I’ll continue to post updates as these changes are made; but the format of the site may quickly change as I incorporate more ‘non-bus’ projects.
Wedding Errands
The bus has been very useful for all the miscellaneous errands required leading up to the wedding; it’s also been very popular (too popular!) with passers-by in downtown Charleston and on Kiawah island. We had to run an errand in Mt Pleasant today which necessitated the bus hauling itself over the 3rd longest cable-stayed bridge in the western hemisphere. It was windy up there but the bus did OK and even kept up with traffic.
Wet-Sanding & Polishing
Today I worked on wet-sanding and polishing; starting with the blue areas. The paint straight from the gun leaves a finish that is shiny, but has the texture of an orange peel. The goal of wet sanding is to level off all the peaks of this orange peel texture so that the paint is flat. First 500grit is used, then 800grit, then 1500grit; the panels are kept wet and rinsed frequently to avoid dust build-up that could scratch the paint. It’s critical that the surface is not sanded below the lowest low spot of the orange peel texture, otherwise primer could be exposed and repainting would be required. Luckily the low spots, being untouched by the sanding block, are visible fairly readily as slightly darker spots. After the sanding is completed the paint is flat, but dull looking from the very fine sand scratches. Polishing with rubbing compound and a rotary buffer brings the shine back. The passenger side of the bus is mostly complete; I’ll likely get the driver side complete by the bus’s first long trip, but I’m unsure about the front/back/white areas.
Passenger Front Seat
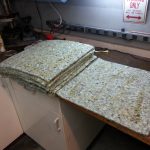
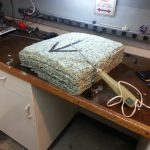
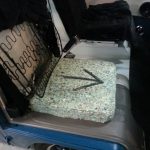
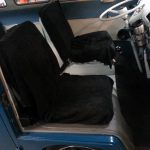
The only seat component missing in the whole bus prior to today was the seat bottom of the passenger side front seat. Since the bus has the “walk through” option instead of the standard front bench seat, the seat bottom is hard to find. So tonight I built a seat bottom out of foam until an original seat bottom can be found. I used carpet padding since it’s fairly cheap and locally available; the technical foam industry name for this stuff is “rebond” since it’s made from foam scraps glued together. Rebond is also used in modern car seats, so although a seat made from carpet padding sounds weird, it’s actually correct/ideal. I glued the layers together with contact cement and then shaped the whole stack with an electric carving knife. The result is very comfortable and compresses much less than I was afraid it might.
Interior Panels Complete
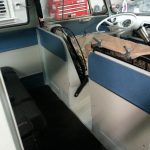
I finished up the last two big interior panels tonight; all that’s left to do on the interior is:
– Two tiny hardboard/vinyl panels for behind the sun visors
– Rubber/trim around the bottom of the front seat pedestals
– Plywood/vinyl panel under the rear seat
– Make/install vinyl seat covers
– Passenger front seat bottom


