Cabinet Handles
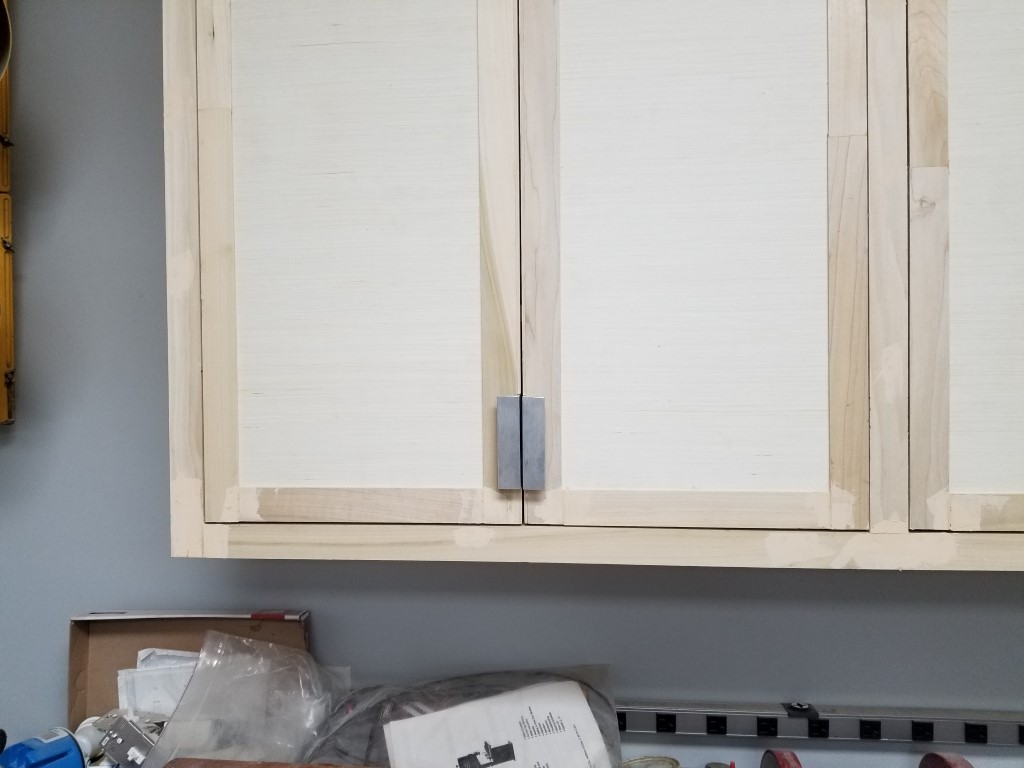
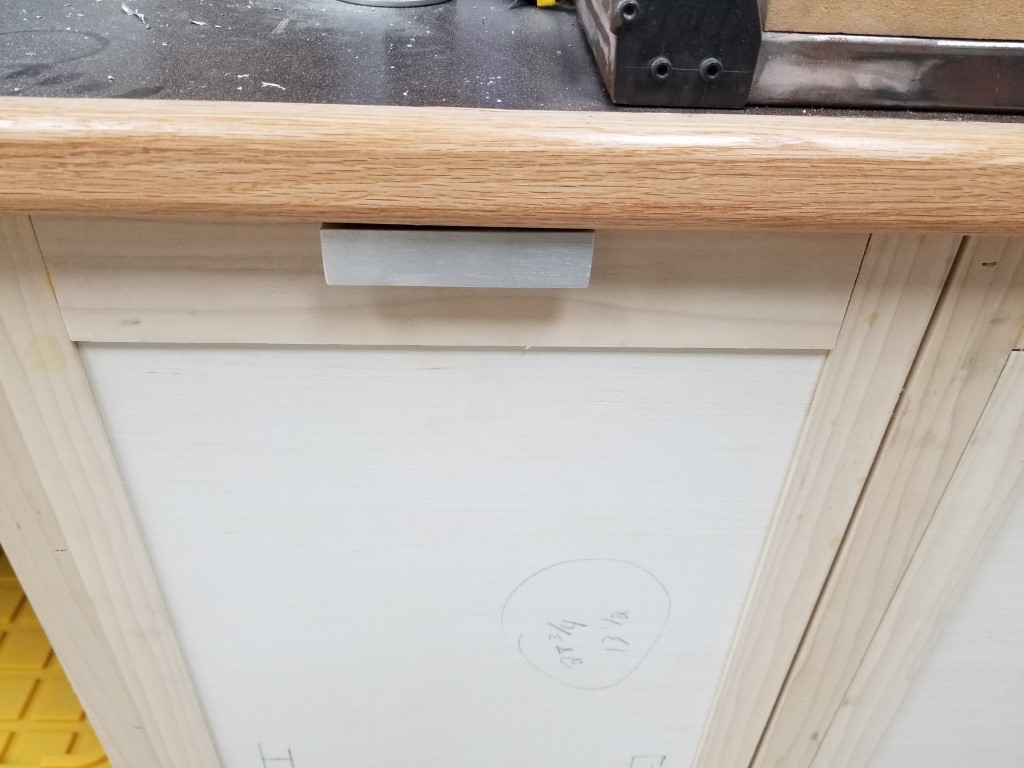
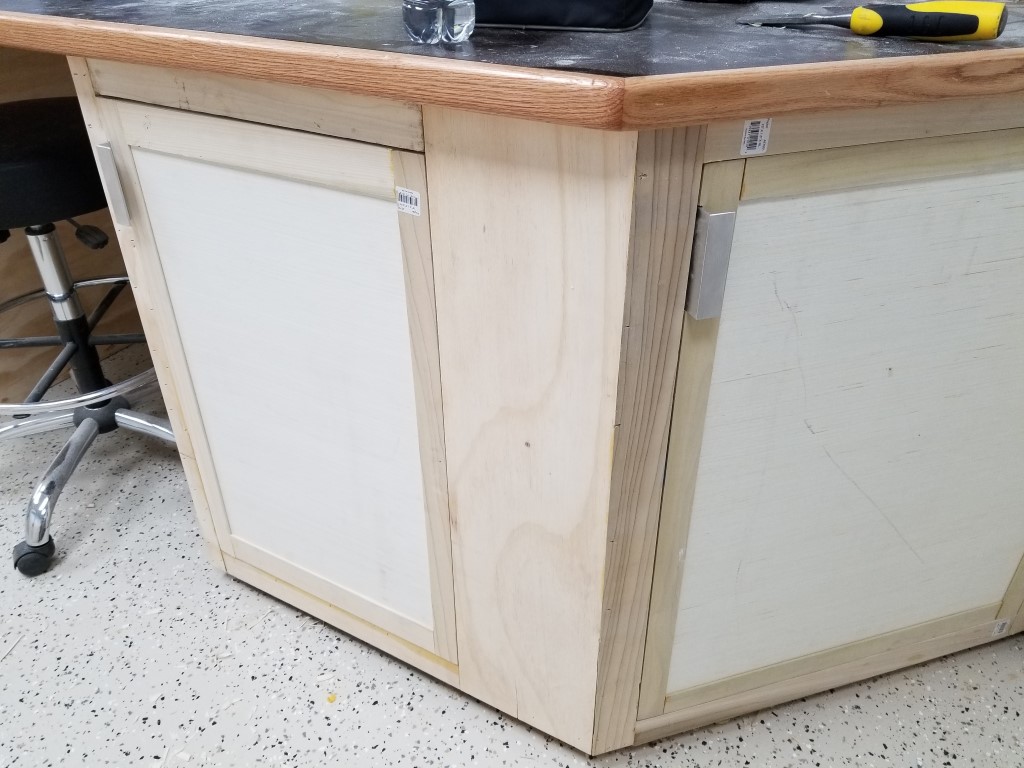
Over the last few nights I’ve been working on handles for the cabinets. The handles are 4″ sections cut from 1.5″ aluminum angle. Before cutting to length I ripped ~1/2″ off of one side of the aluminum so the handles weren’t too wide. This was my first time cutting aluminum on the table saw, it was very quick and effective but also shot scalding hot aluminum chips in every direction and sounded like a Pterodactyl being fed through a wood chipper.
Since I may add/change cabinets in the future I wanted to make sure that I wasn’t locked into a particular brand/model of handle that could be discontinued, by making my own with standard materials this isn’t a problem and the cost was also kept to a bare minimum.
Once all the sections were cut to length I sanded the rough edges and drilled/countersunk holes on the drill press. I made a quick fixture with clamps and wood blocks to get the holes consistently located. To attach the handles to the cabinets I chiseled out a 1/8″ recess and then attached the handles flush with the door edges.
I’m undecided on whether these will keep their current ‘brushed’ looking finish or whether I’ll polish or paint them. I’ll decide that when the time comes to finish/paint the cabinets.
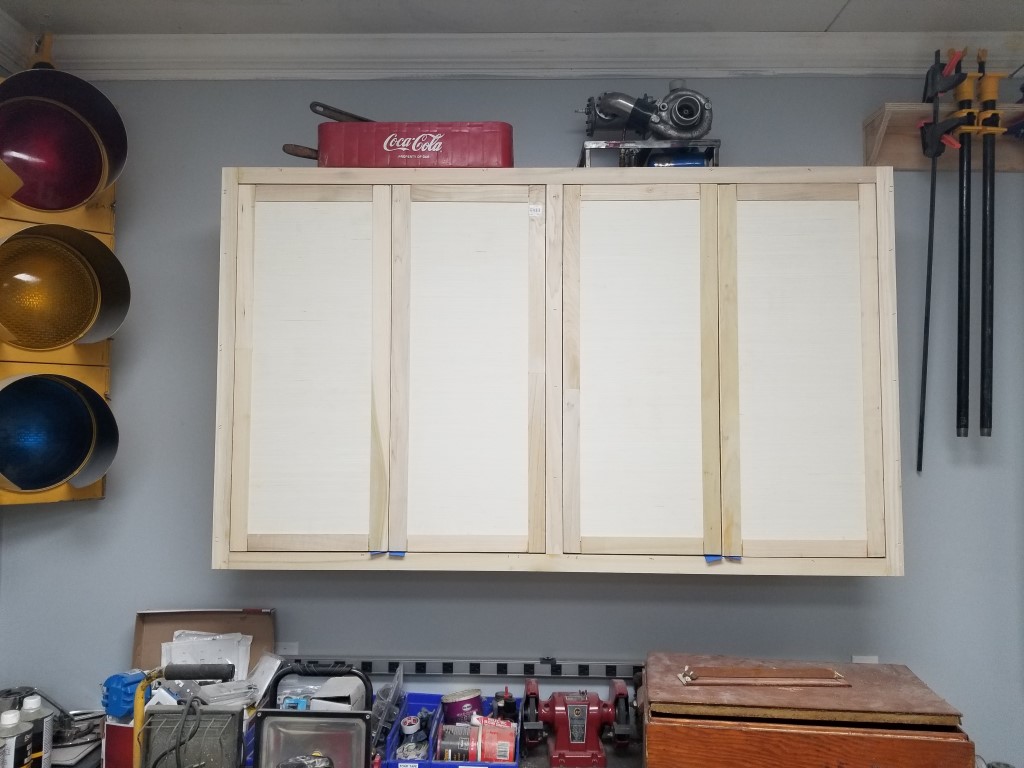
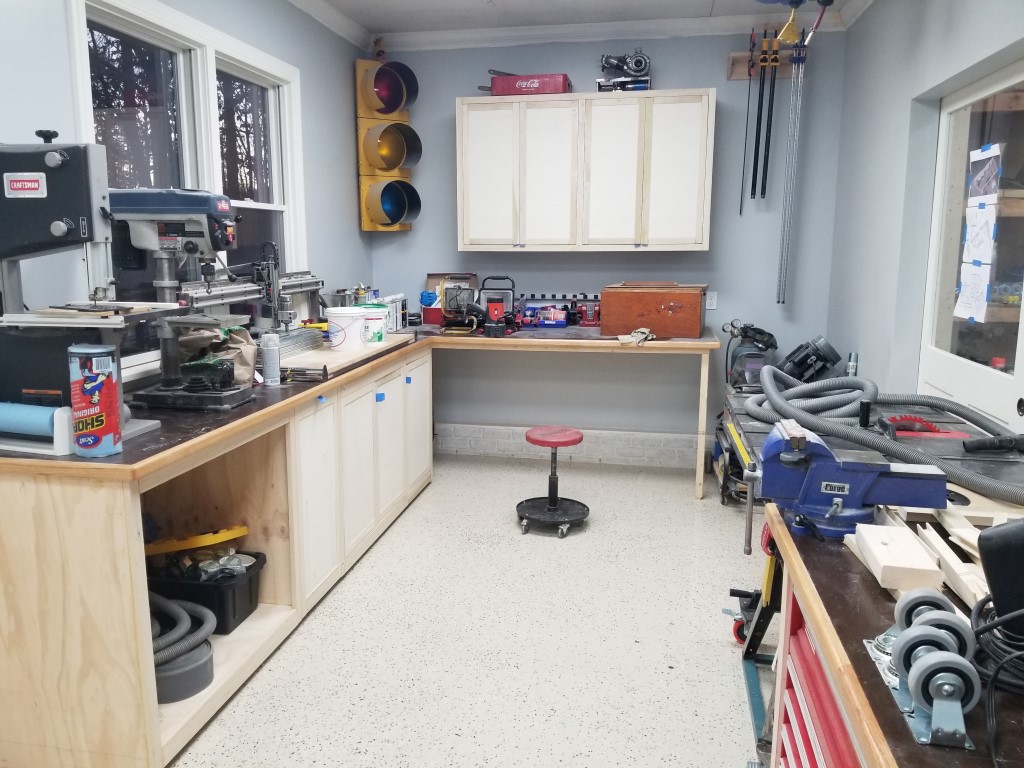
Shop Cabinets
This weekend I resumed work on the shop and made major progress on the cabinets:
– Upper cabinet built
– Another cabinet built for small parts storage
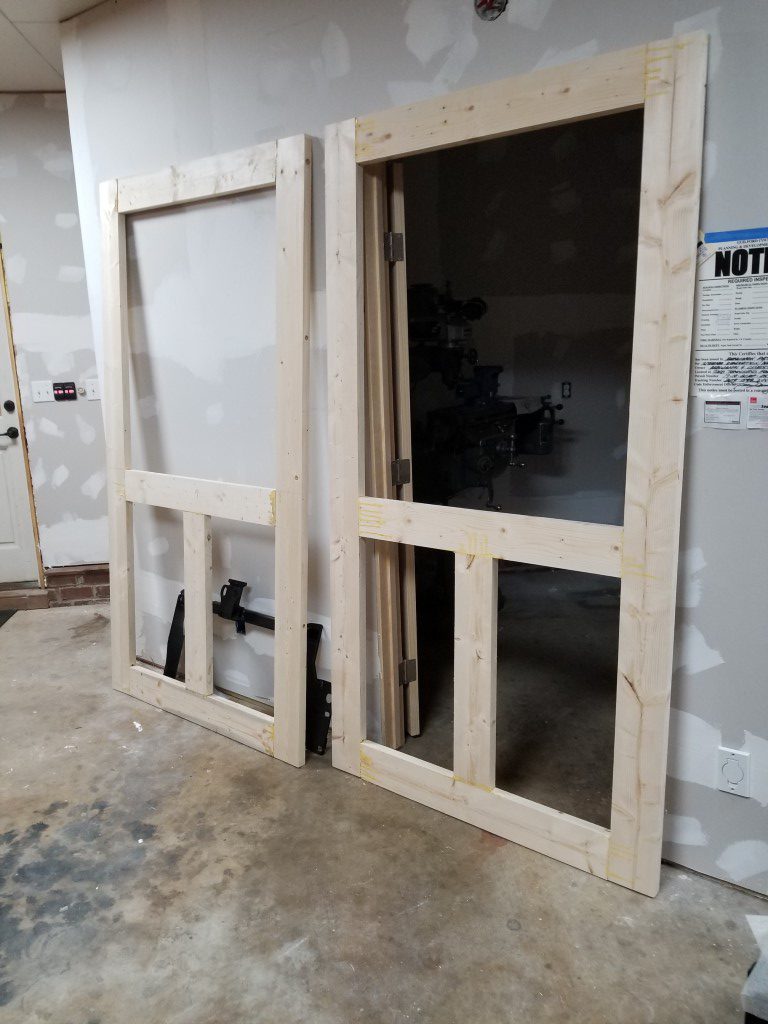
– Doors for existing base cabinets built
The doors are ‘shaker’ style for simplicity; building these is as easy as cutting a piece of 1/2″ plywood to the right size and then wrapping it in the same 1×2 poplar used for the cabinet face frames. All the door frame pieces got a 1/2″ dado to fit around the plywood edge and then the top/bottom frame pieces had 1/8″ removed from either side of their face on the ends to make a tenon. I found that the majority of the build time is in changing between the various setups needed (cut to length vs dado cutting vs tenon cutting vs cutting plywood, etc) so after the first test door I tried to build as many doors at a time in parallel as possible.
I went with ‘inset’ mounting of the doors because i like the clean/simple look. This gives a lot less room for error compared to overlay mounting since the gap is visible and it and needs to be small and consistent. It’s critical that cuts are within 1/16″ and that everything stays perfectly square or things go downhill fast. For the dados I used an old ‘wobble’ style dado blade (these are so sketchy they’ve been banned in europe); the geometry of this contraption is such that it can’t leave a perfectly square bottom. It’s not really a problem since the dado bottom is internal/unseen, but it made measuring and setting the correct dado depth difficult.
I definitely had a few mistakes to correct along the way, but overall I think it was just enough of a challenge to help improve my woodworking. Next steps are to make handles, make/install drawers for the last open base cabinet, and (eventually) do the finish work of filling/sanding/painting.
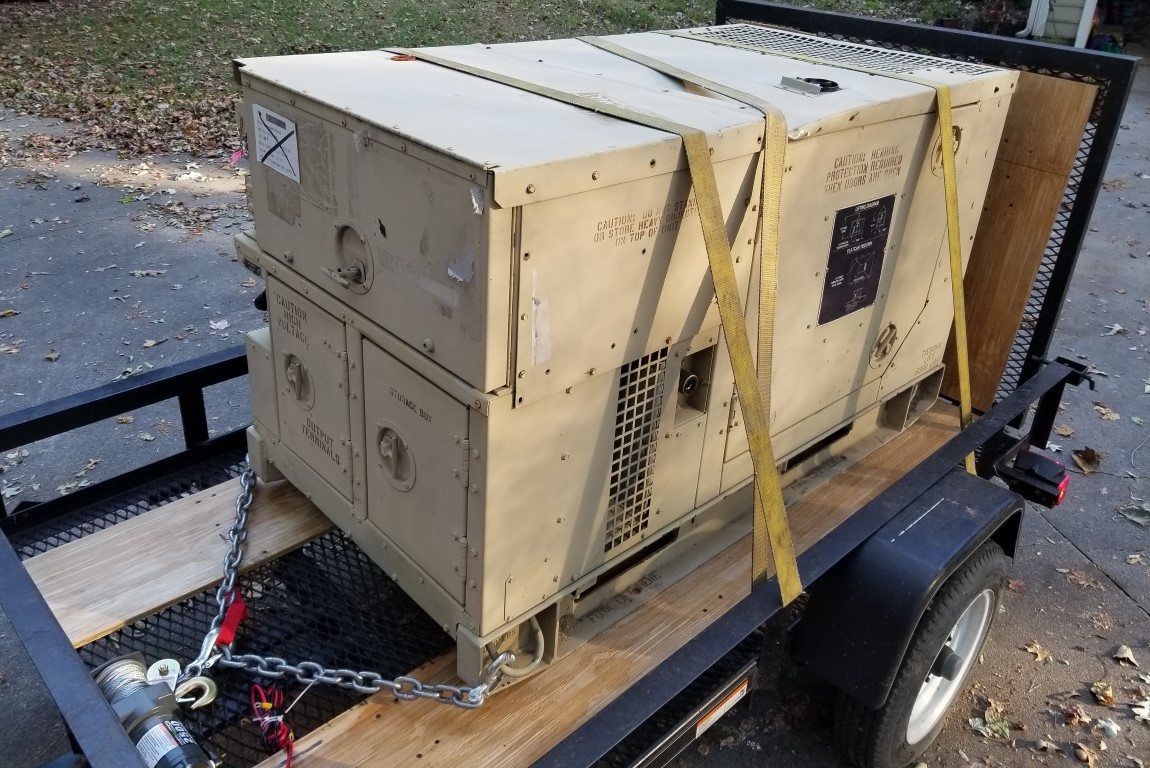
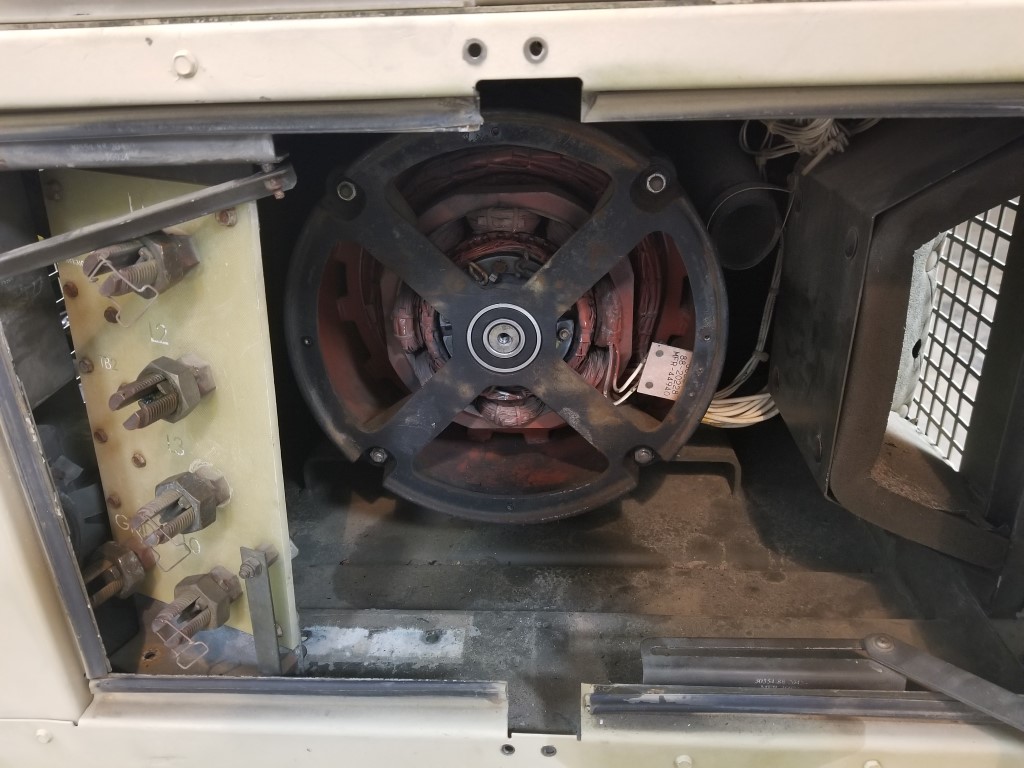
Generator Rebuild
Hurricane Michael hit our area hard and took out power for almost 5 days. Luckily the small generator we already had was enough to keep the fridge running and some lights on, but not much else. The small generator is 120V only, so it also was not able to power the 240V well pump; 4 nights without running water was not fun. It’s not likely we’ll have another outage that’s this long for a while, but we have had a number of shorter outages that seem to indicate that this will be an ongoing problem – a bigger generator would be nice.
With that in mind we started looking at options; there are a number of ‘off the shelf’ options out there for whole-house standby power, but most of them are very pricey both to install and to run (propane particularly) and we couldn’t justify the cost for something that gets used so infrequently. What did seem to make some sense though was rolling the dice a surplus military generator; the prices are very low (when the condition is unknown), they’re way over-built, and are made to be repaired easily.
I bid on and won an online surplus auction for a diesel generator and picked it up outside our friendly neighborhood military base. It was a fairly easy move at ~1200lb; at pickup I just dragged it onto the trailer with a winch and to offload I tilted the trailer and winched it back down with iron pipes underneath as rollers.
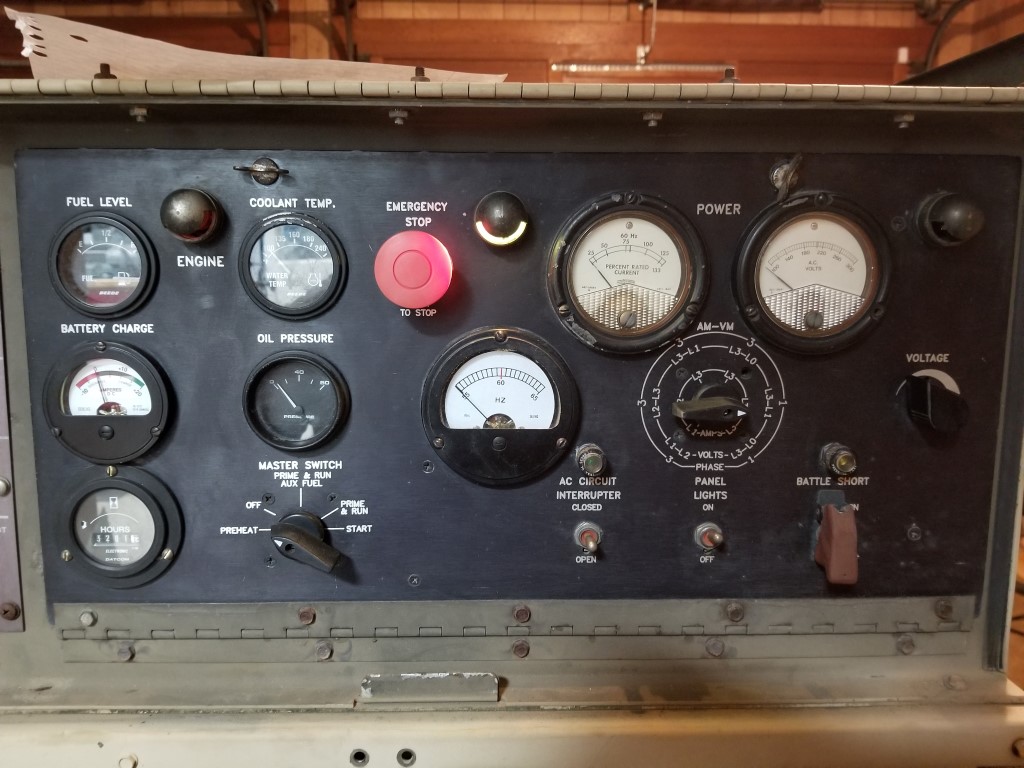
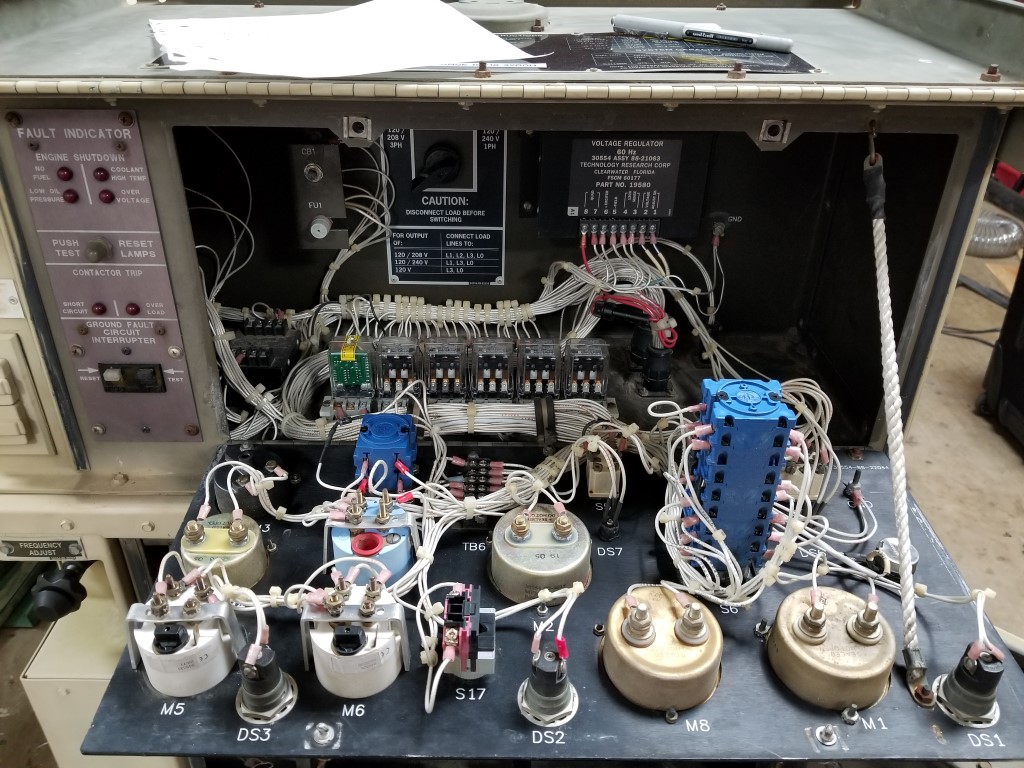
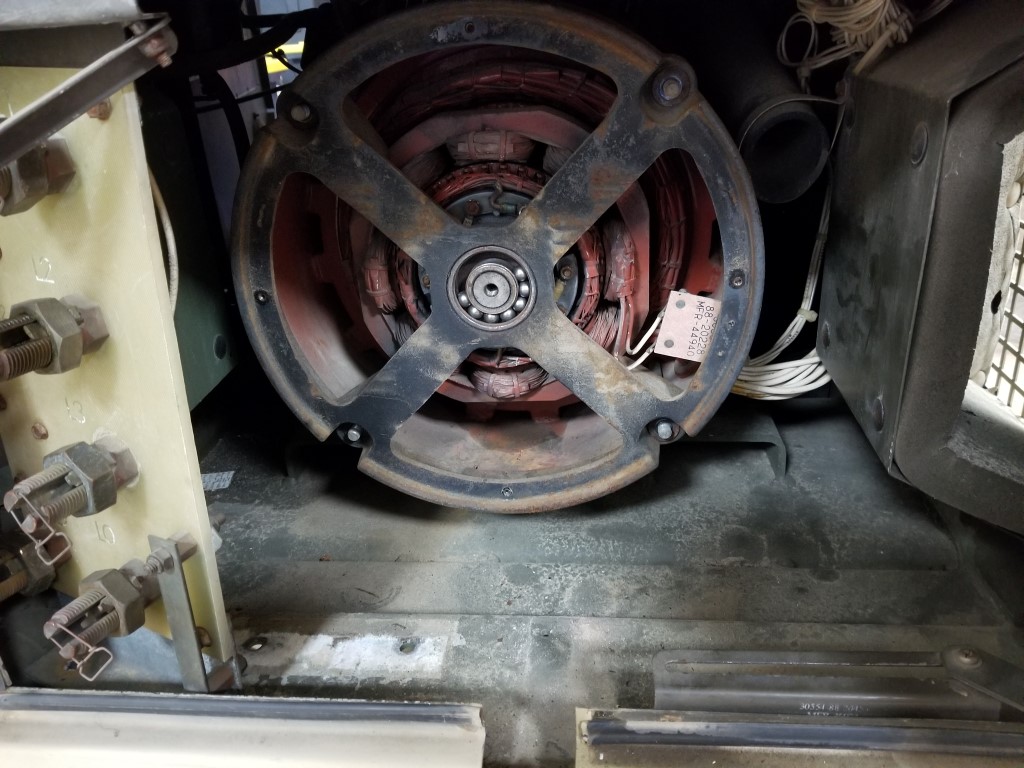
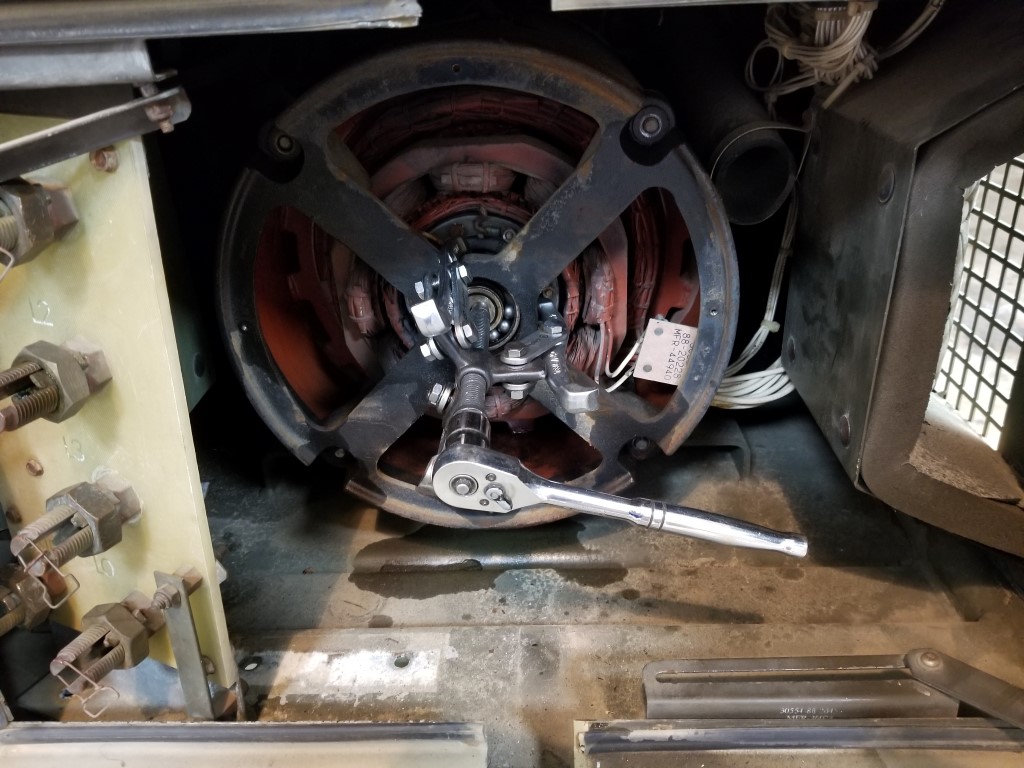
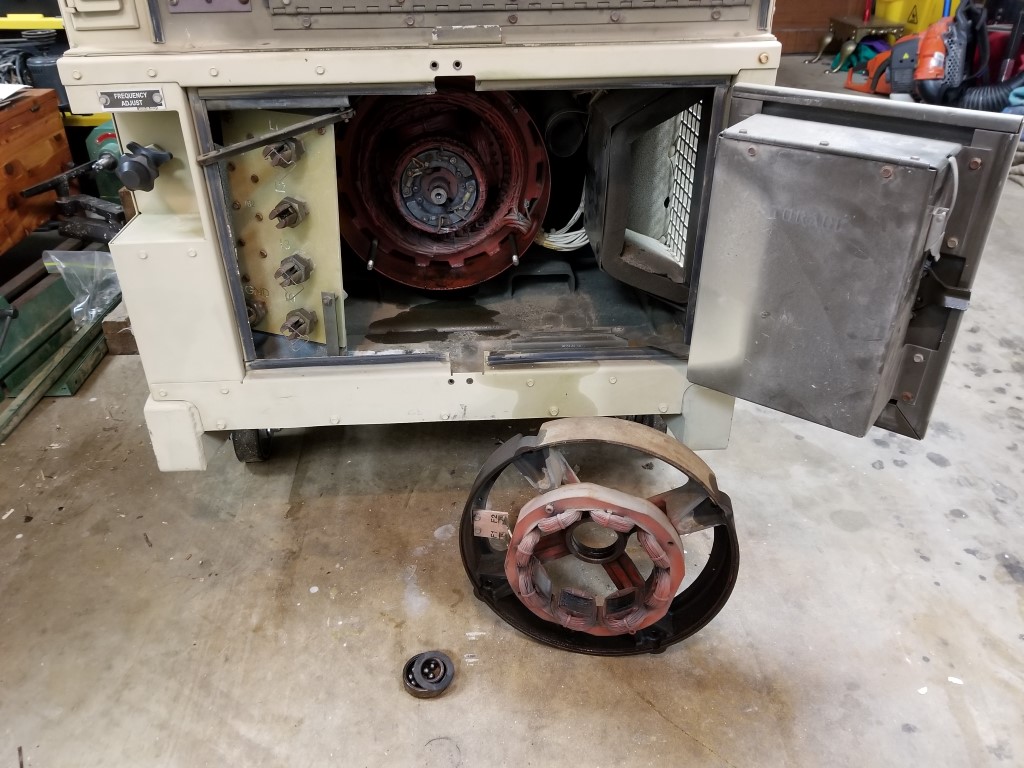
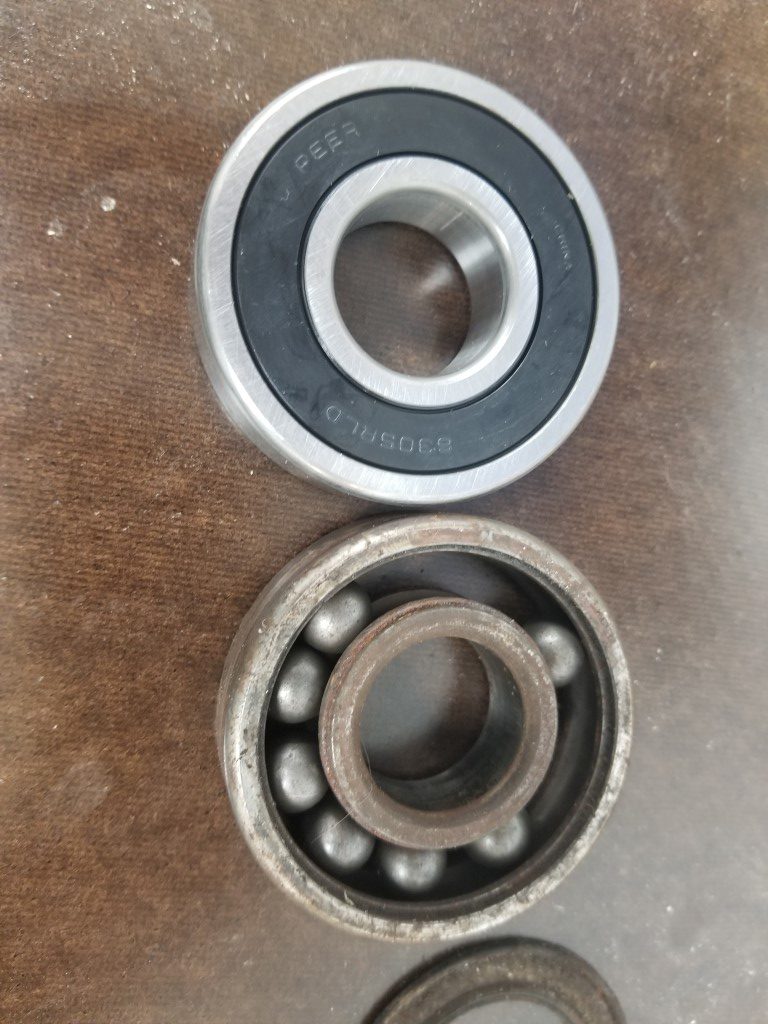
To get it running I first put in new batteries (2x 12v car batteries) and troubleshot some miscellaneous electrical issues (broken connections, dirty switch contacts, etc.). From there it would crank but not run; bleeding the air out out the fuel lines fixed this and it started OK. Once running there was an erratic low frequency rattle that I traced to a bad rotor bearing on the generator head. With this bearing replaced it then ran smooth/quiet. The last issue was twitchy voltage regulation that I traced back to a dirty potentiometer; with this cleaned it held a stable 240V @ 60hz under a variety of loads. Along the way it also got an oil/filter change and a coolant flush/fill.
Altogether this was a very quick project, just a few hours to get everything sorted out. Up next will be setting aside some space for it (probably combined with a new area for trashcans and firewood) and getting it wired in with a manual transfer switch. It’s a “10KW” generator but that rating is on the very conservative side; in reality it’s closer to a 15KW or more consumer unit whose ratings are on the optimistic side. This should be enough to run the lights, TV, well, microwave, and at least one zone of HVAC.
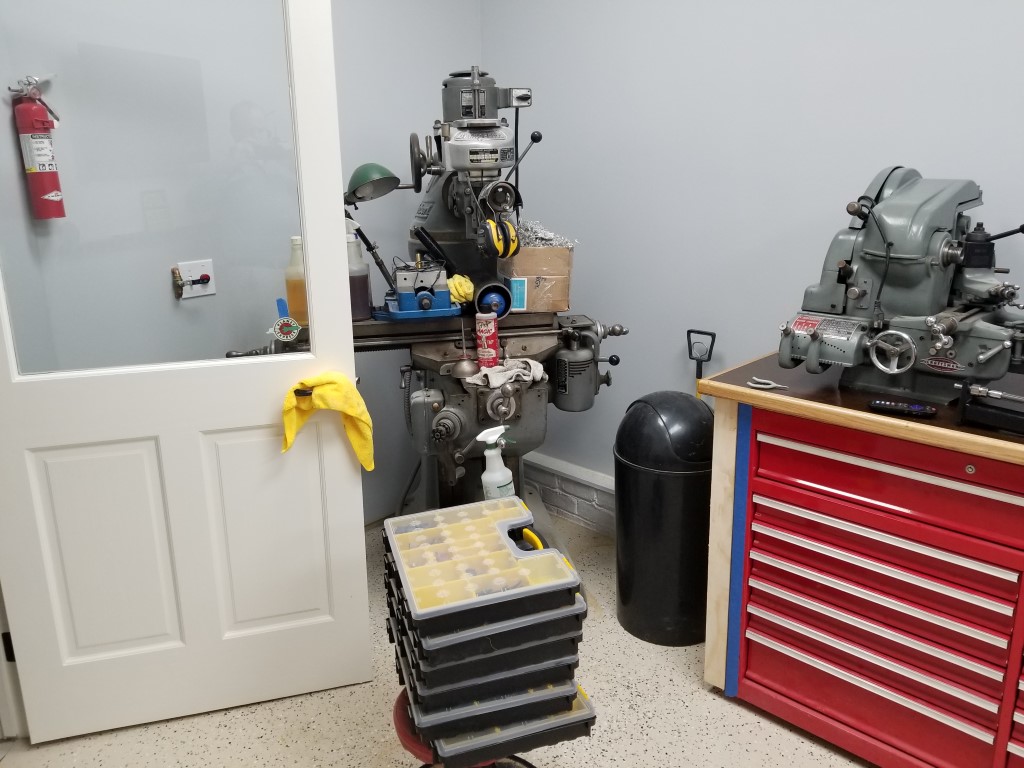
Small Parts Organization
Background:
The new shop has given me the opportunity to rethink storage of the miscellaneous small parts I have laying around: nails, screws, nuts, bolts, brackets, cable ties, electrical connectors, fittings, etc. The previous system I had was to sort by type (i.e. nails) into individual plastic shelf bins (the common Blue/Red/Yellow type). This was better than nothing, but the downside was that every time I needed something I had to dump the whole bin into a sorting tray and search.
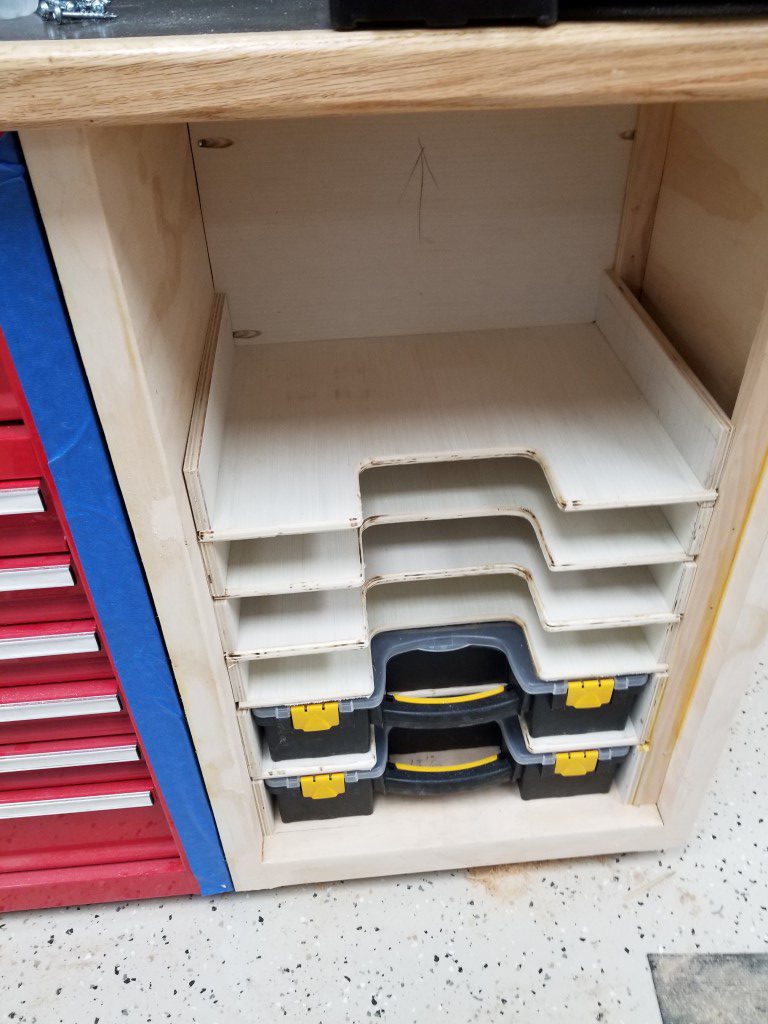
The new method uses a rack of portable parts storage cases. These cases give the ability to sort by main type (i.e. nails all in one case) but also by individual size (i.e. 1″ finish nails). The cases also have removable bins inside of various sizes; by swapping these around I’ll be able to optimize storage – swap bins between the cases that have more big parts vs those that have more small parts.
I considered the individual drawer style of parts organizers also; when I’ve had these in the past it seemed like I was constantly opening and closing the tiny drawers to look at parts from above; the drawers also easily jammed closed when full. The parts storage cases should prevent both of these problems.
(There are lots of similar projects online that sparked the idea, so this definitely isn’t something I can take credit for coming up with.)
Construction:
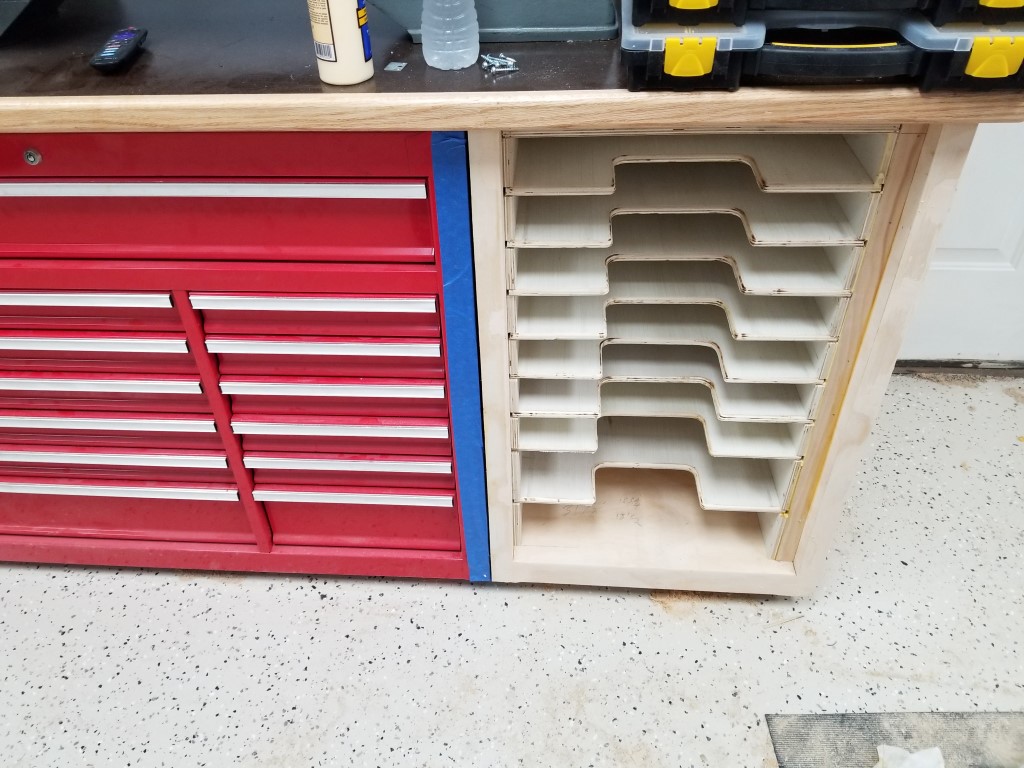
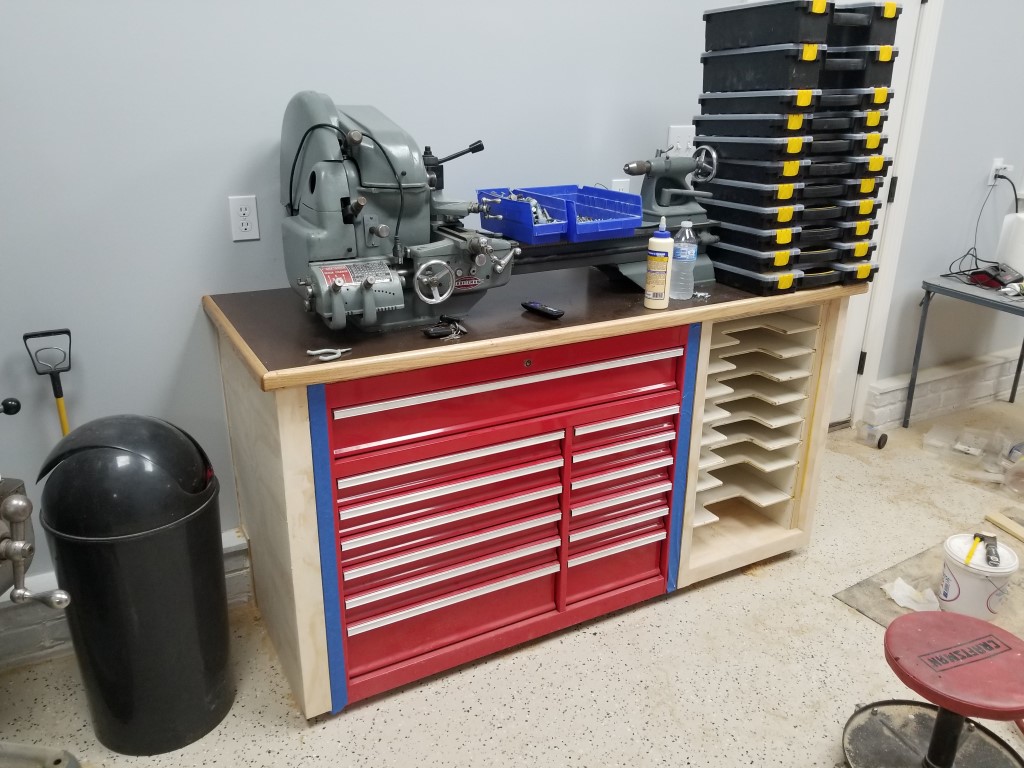
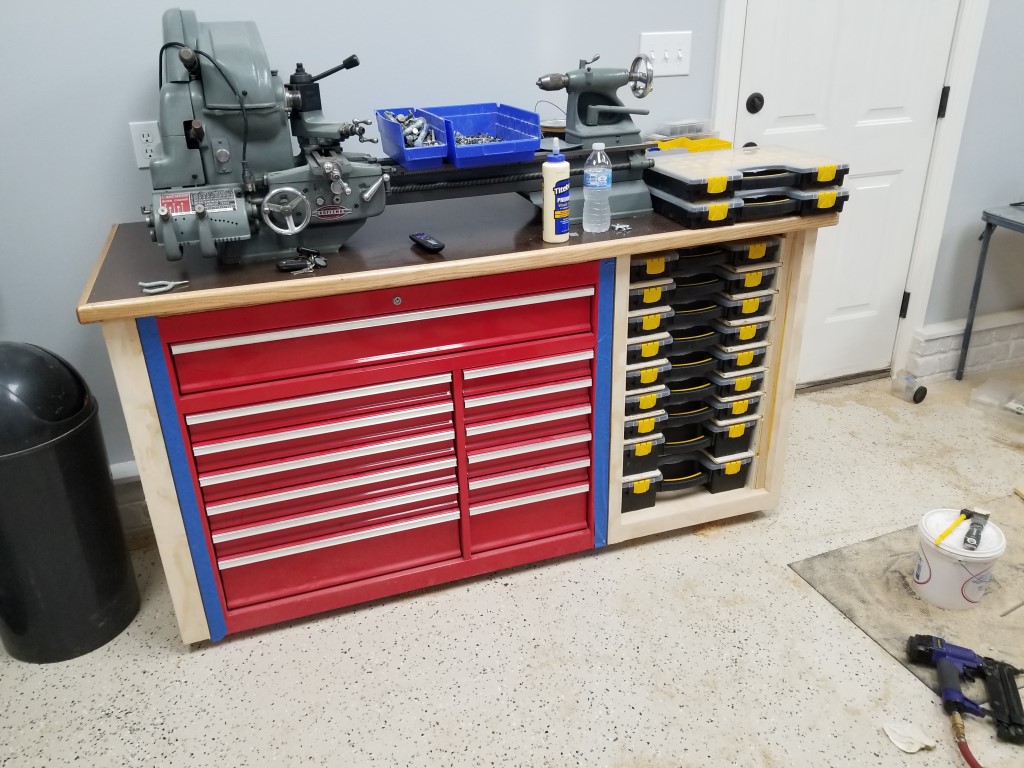
Last weekend I built a cabinet to house the ‘machinist’ toolbox used for the mill and lathe tools; the cabinet also supports the lathe itself. For the countertop I’m again using the “Norm Abrams” design – plywood topped with a varnished hardboard layer that’s cheap/easy to replace when it gets too beat up; I had these at the last shop and they worked really well. I left room in the cabinet for this parts organizer idea, so today I just needed to outfit it with shelves to support the parts cases. The rack consists of the shelves themselves as well as spacer blocks that help support the shelves and make it easy to get the correct spacing. The process for making the shelves was as follows:
- Rough cut each shelf from the plywood panel with a circular saw.
- Square and cut the shelf to final dimensions on the table saw.
- (For the first shelf) Drill holes at the corner of the handle area and finish cutting it out with the bandsaw.
- (For all other shelves) Clamp the shelf to the first shelf and trim out the handle area area with the flush cut router bit.
- Run the router over both front edges with a 1/4″ round-over bit.
There’s now an empty space in the cabinet behind the cases that I may eventually tap into and repeat the same idea using the smaller version of the cases; this would be accessed from the side of the cabinet, but for now it’s not needed.
I intentionally got a couple extra cases. This allows more options for swapping around internal bins, but primarily it’s so I have backups in case a case ever gets broken and exact replacements are no longer available.
All that’s left is to add an inset door (the cases are offset to the left to allow room for a door and hinges on the right), a slide-out platform at the top, and then finish trimming/sanding/painting everything.
(I also finished and painted the walls/trim then ground and epoxied the floor over the last several weekends, but I forgot to get in-progress pictures.)

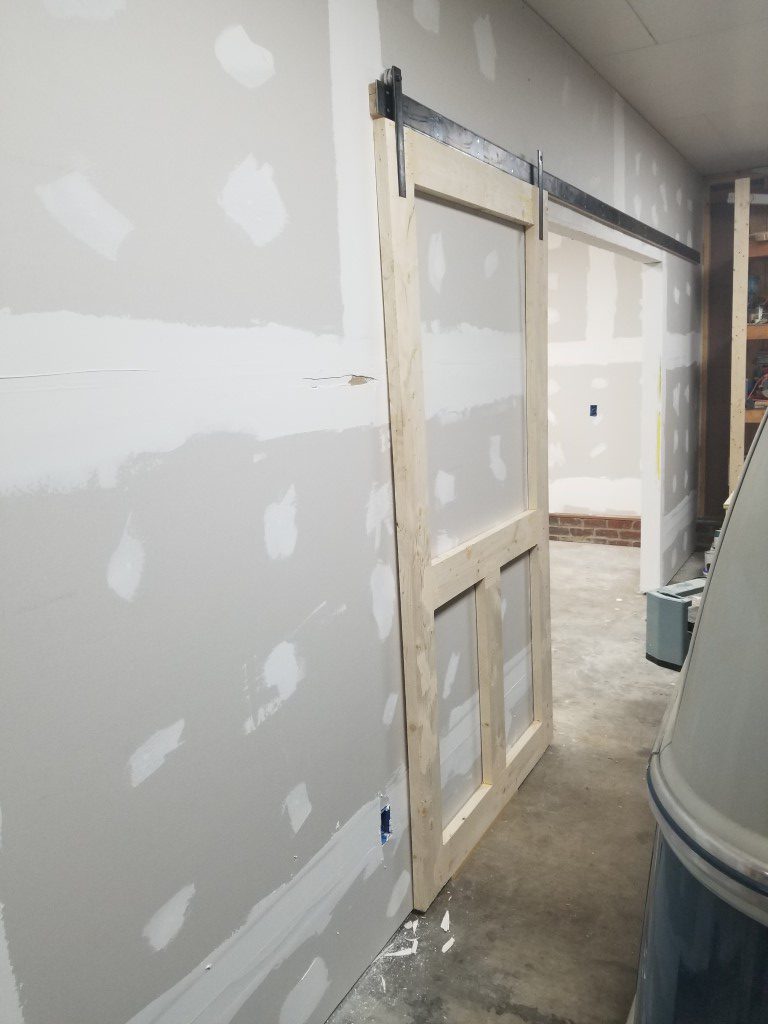
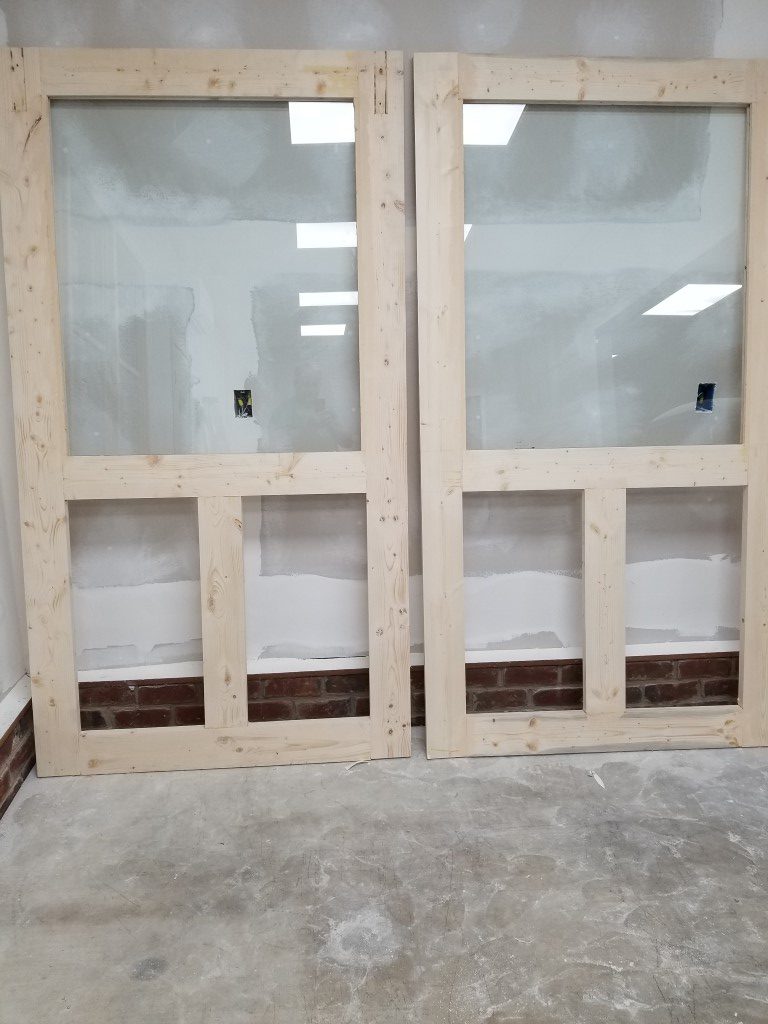
Sliding Doors
The shop floor plan allows for a large opening between the ‘far’ end of the shop and the auto repair/bus area. This will allow tools to be easily shared between both spaces; during a big auto project the repair bay can become an extension of the workshop. The opening is also big enough to bring in the front or rear of a vehicle if ever needed. When auto projects aren’t underway though I’d like to have doors cover this opening to prevent dust/mess from wood/metal project leaving the shop area and to save on shop heating/cooling costs.
The size of the opening presents a problem – swinging doors would have to swing ‘out’ of the shop to avoid hitting cabinets, and the large sweep would require moving anything parked on the garage side out of the way temporarily, kind of a hassle. To avoid this problem, sliding doors made the most sense.
The shop build project is being run with the materials cost set to minimum and the end-product quality set as high as is practical. This sounds unrealistic but is actually possible with the trade-off being time; it’s not a problem though since I count this as hobby time and there’s no particular deadline. The sliding doors are a great example of this – sliding doors and hardware are outrageously expensive compared to the raw materials cost. Building my own also gives me full control, in this case I wanted to avoid the farmhouse/barndoor/rustic look in favor of cleaner traditional/modern look. Over the last few weekends I’ve built the doors and tracks below, key points:
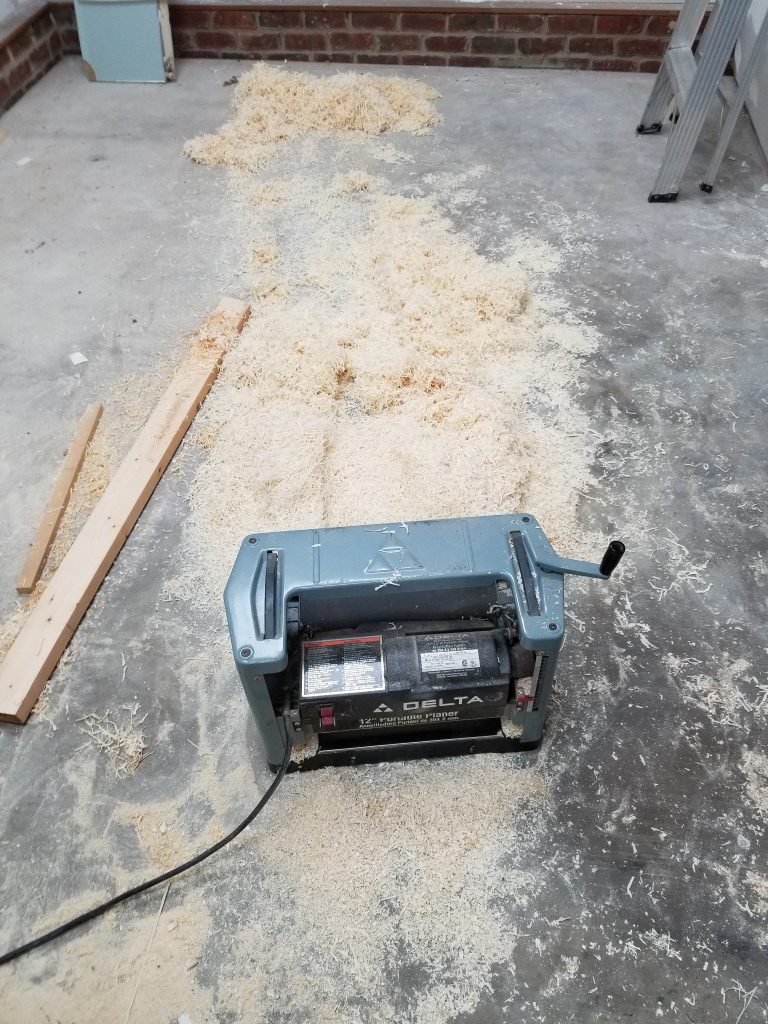
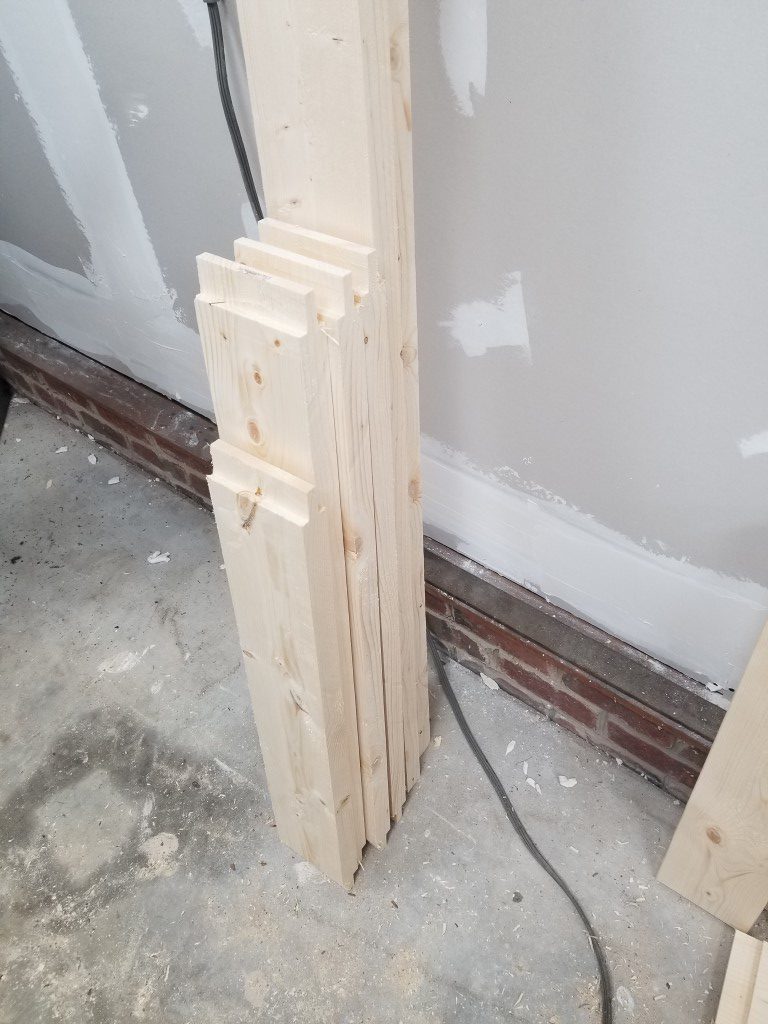
- Door frames from 2×6’s, planed down to standard 1 3/8″ door thickness
- Mortise and tenon joints connect frame pieces (tenons via table saw dado stack, mortises via router and chisel)
- Slide rail is two 3/16″ x 3″ x 10′ flat bar sections welded in the middle.
- Door bracket pins turned and threaded on lathe then welded to brackets.
- Aluminum rollers turned on the lathe, held to the brackets using standard 608 skate bearings.
- Brackets recessed into door frame and secured to the doors with studs welded to back side for a completely smooth front.
- 1/4″ Tempered glass sourced from local glass shop.
- Groove along bottom of door and small bottom bracket keep door located against the wall and limit inward overtravel.
- Roller to door top spacing and roller flange width prevent door from lifting/falling off rail.
There’s a good bit of finishing work still left, but I’m happy with the results so far.


Shop Insulation
The shop is coming along well and this weekend the bulk of the insulation was installed. Friday night we picked up R15 Roxul batts for the walls and installed in just few hours. The attic was another story though and all of Saturday and Sunday AM were spent crab walking over attic joists installing baffles. The baffles are needed to keep the blow-in insulation from falling out of the attic area and into the soffits. The roof over the garage has a shallower pitch towards the edges (if you visualize a pizza hut roof you’re not far off) which made it especially tricky to get access.
Once the baffles were up we picked up the blow-in insulation Sunday mid-day and had it all blown in in couple hours. The high pallet of insulation looked really odd on the trailer, but was secured well. Even compressed it’s not very dense, this was ~900lbs maybe ~1100lbs with the machine.

Fireplace Screen
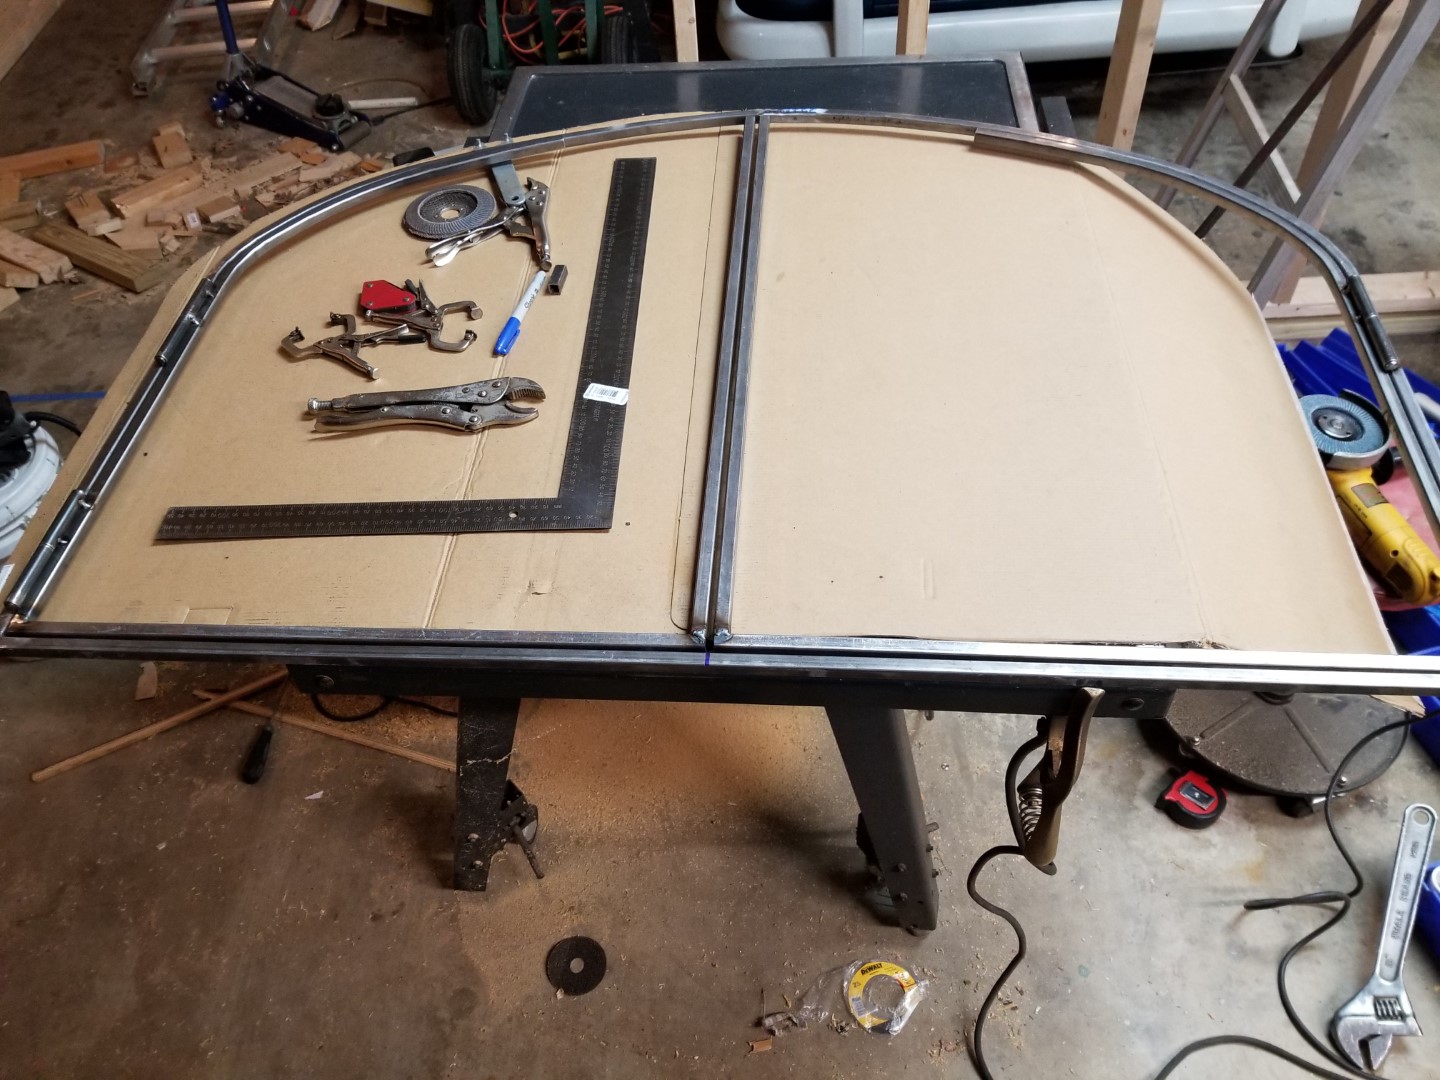
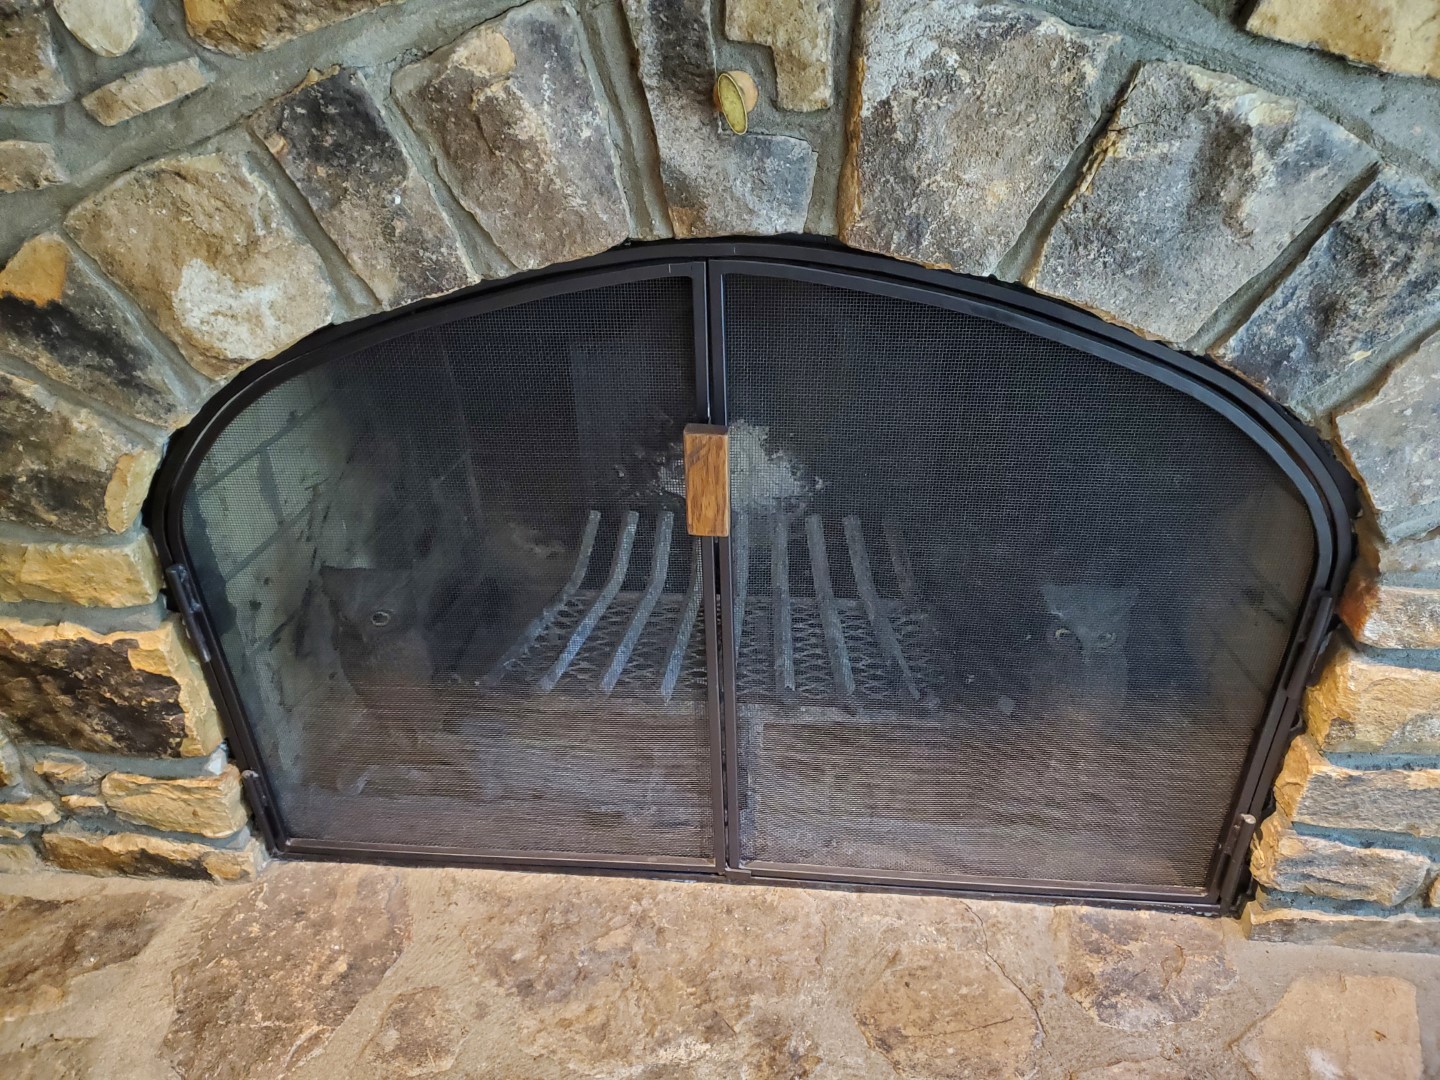
The new place has an open stone fireplace which presents two problems: #1 When there is no fire, the cats could access it and track soot and ashes around, and #2 when there is a fire there’s no protection from sparks, shifting logs, etc. The previous owners had a free-standing screen – this wasn’t left behind and didn’t address either problem well, so I decided to make a custom screen/door to enclose the fireplace. This started by bending an outer frame from 1/2″ square tube to fit the inside of the fireplace opening. I did this in several segments and welded them together.
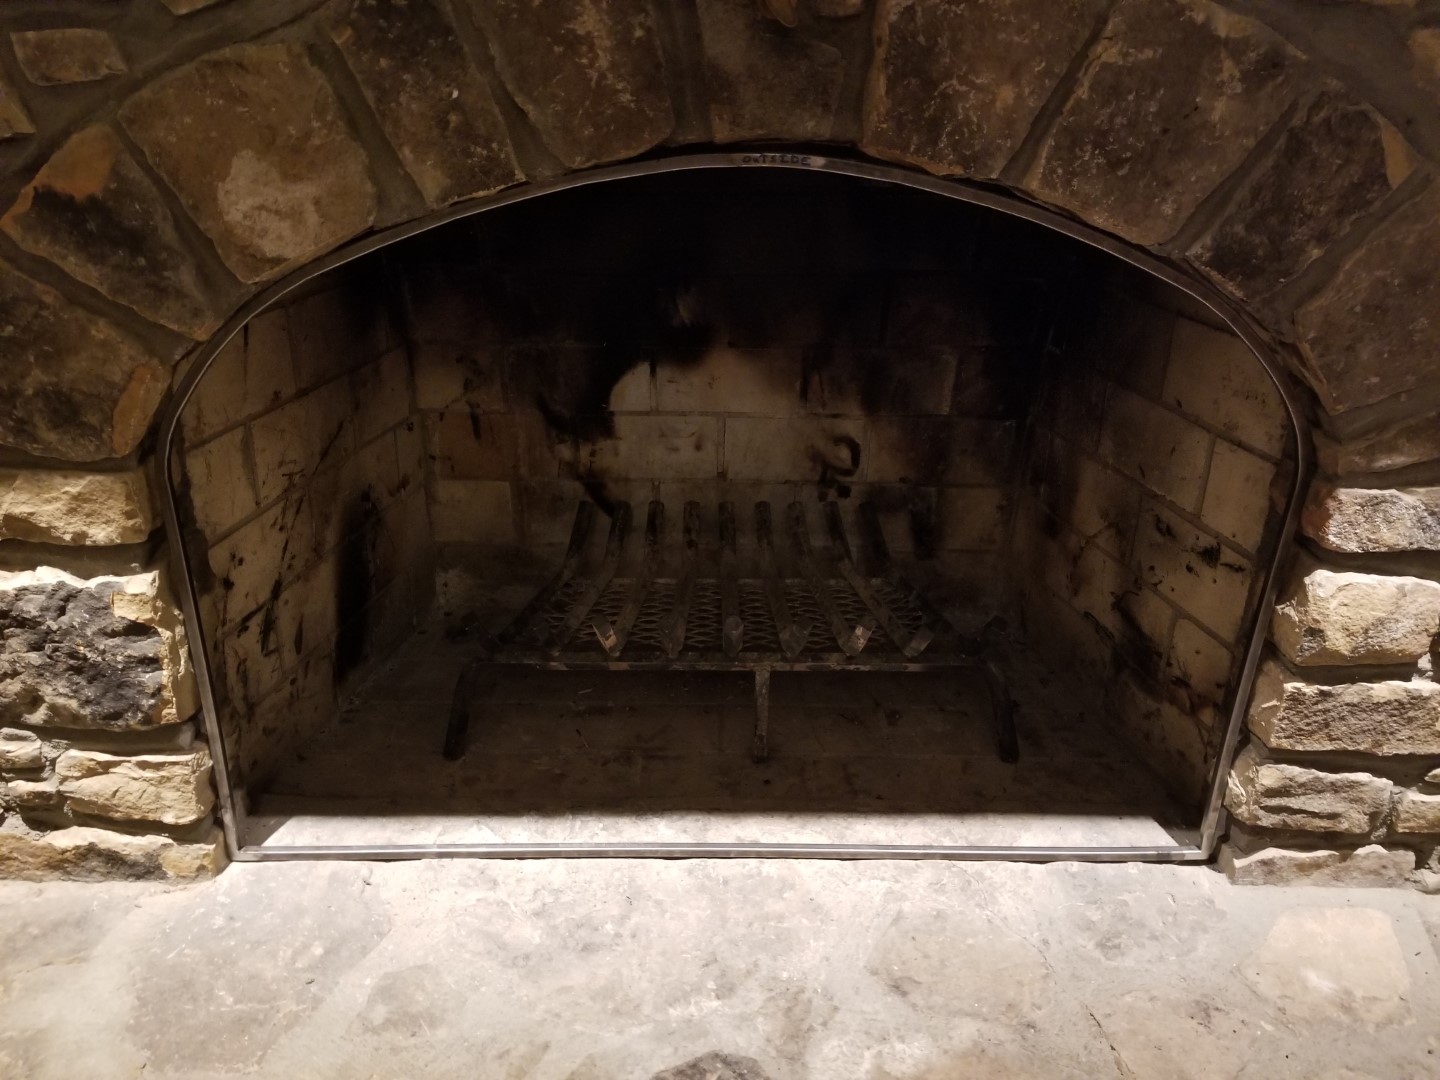
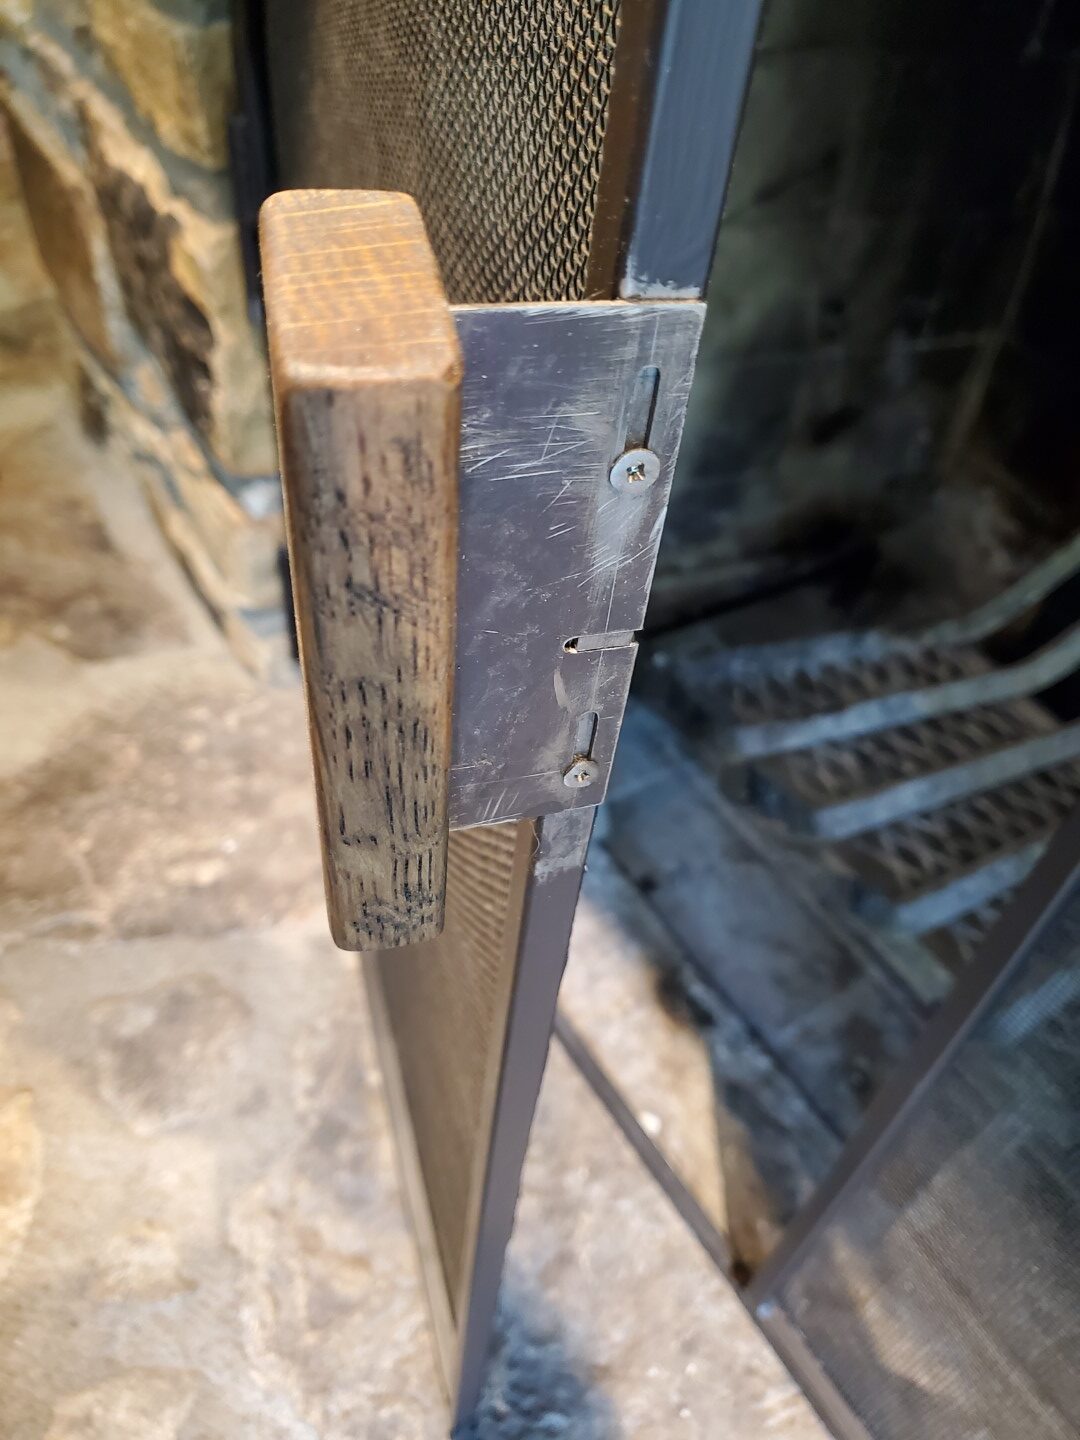
Once the outer frame fit well I made two doors to fit inside. The doors attach to the frame via hinges I made from scrap steel tubing and round bar – when fully open there’s just enough room to lift the doors off the hinges if ever needed for cleaning/maintenance.
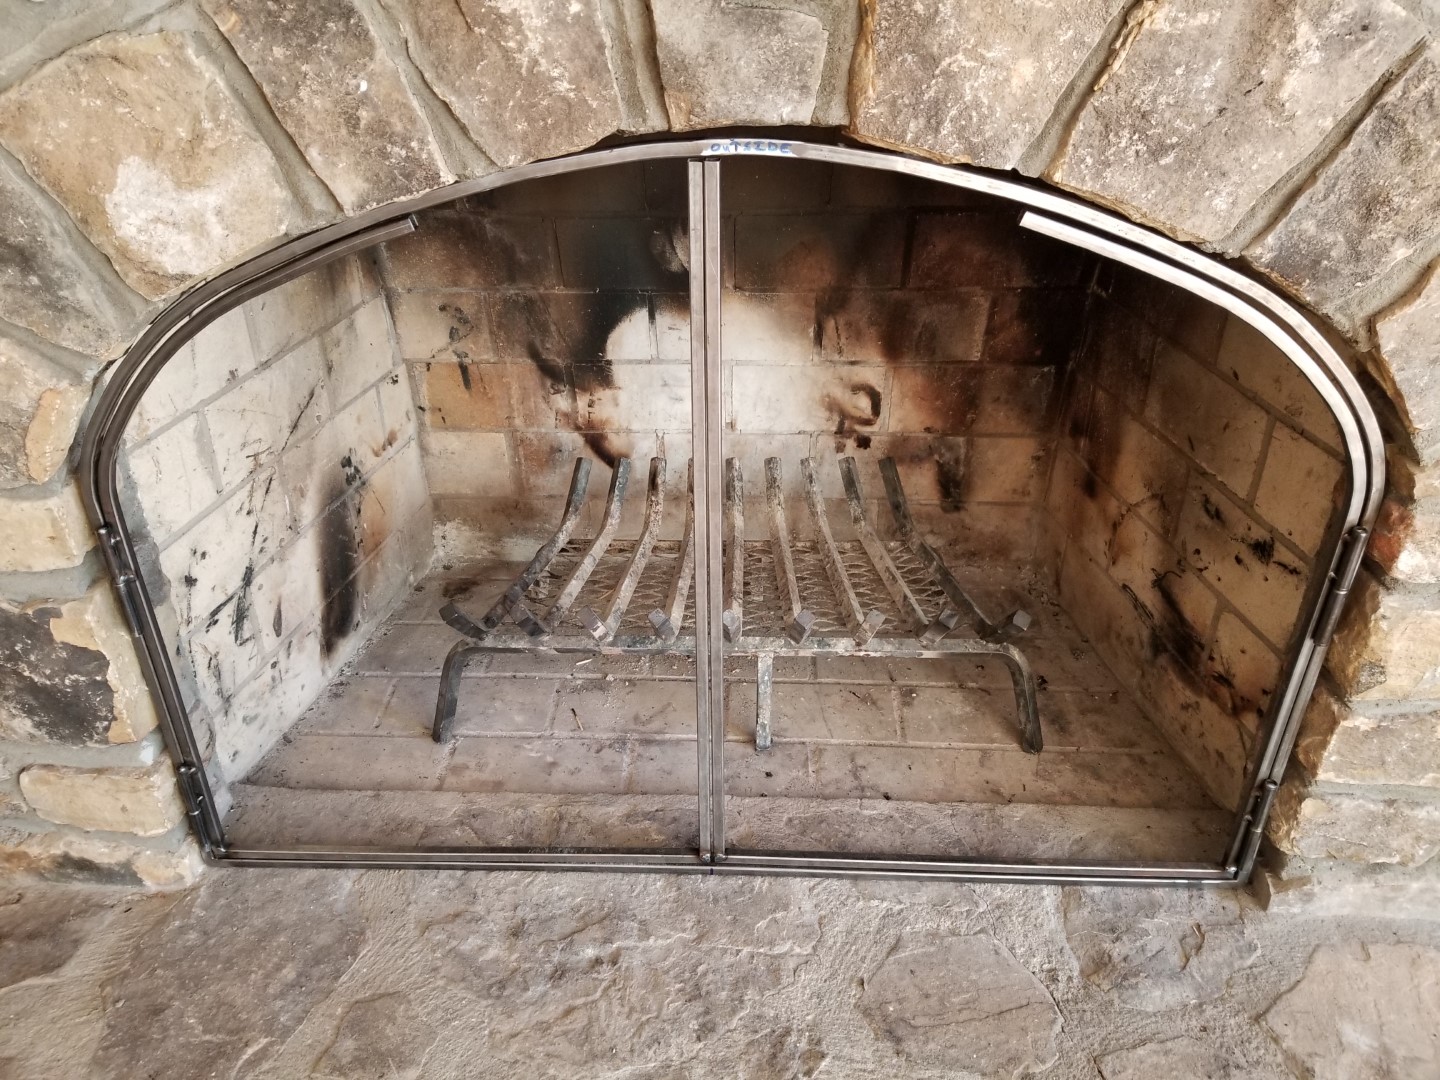
The left door locks to the bottom of the frame via a round bar that slides up/down inside the door frame. I made a tab on the end of the bar that protrudes through the frame and engages with the handle that’s attached to the frame with slots; it also has a tab to keep the right door latched in place. Since stone is irregular there were inevitable gaps, these were filled by tracing the gap onto cardboard and then these strips of cardboard were used as templates to cut out sheet metal strips. The sheet metal strips were secured to the back of the frame with self-taping screws; since the surfaces are rough this also locked the frame in place. The sheet metal was then sealed to the stone with furnace cement and all of it painted with high temp paint.
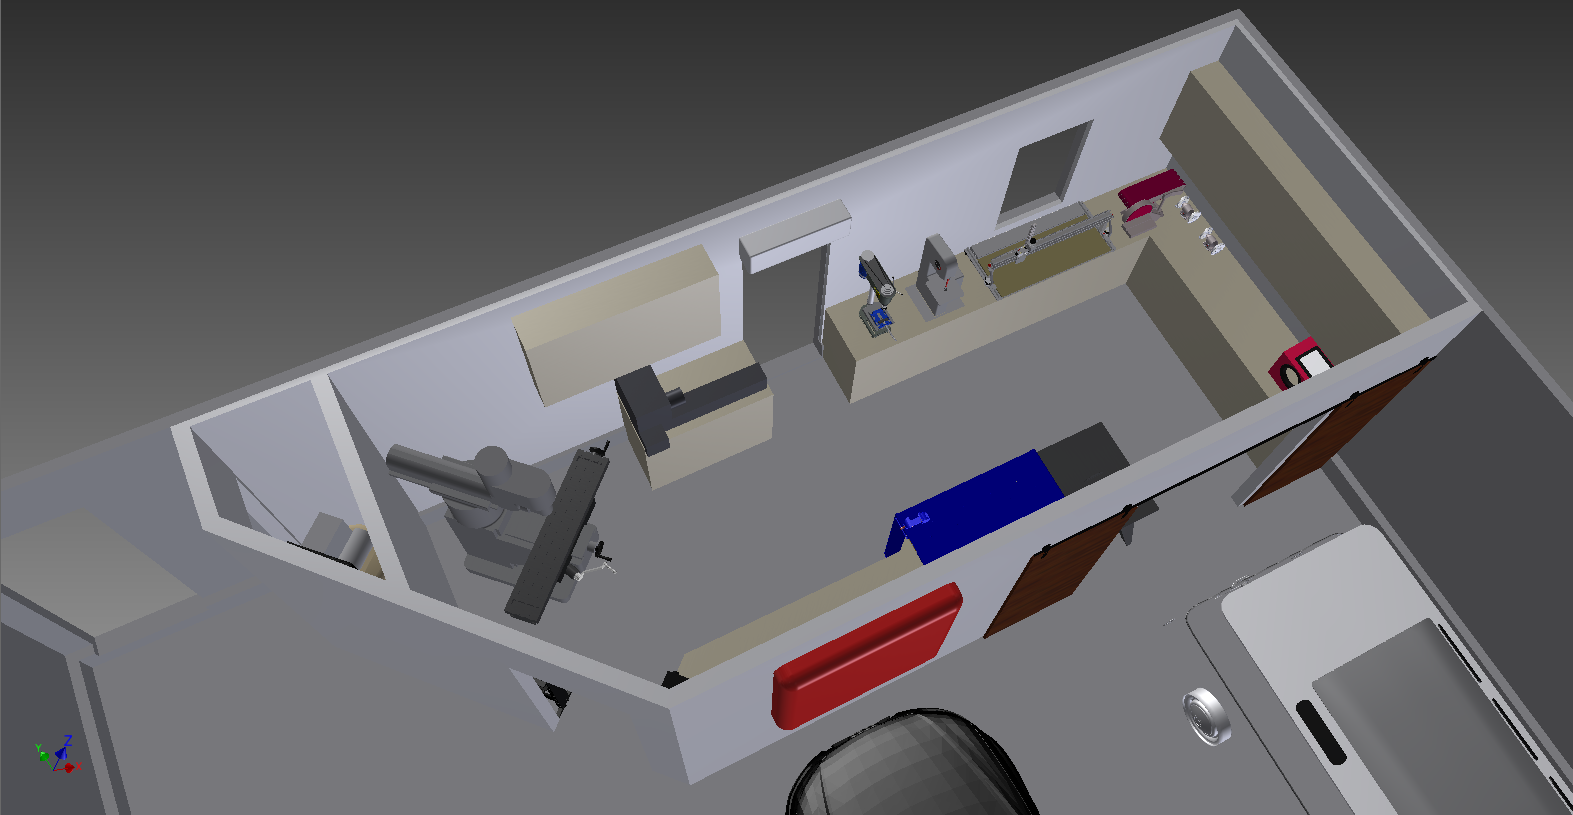
New Shop
It’s been over a year since the last update but with good reason: we’ve moved. As a result of the move I’ve been busy with a long list of projects to get the new place up to standard. It isn’t exactly a complete fixer-upper, but it definitely is/was behind on a lot of maintenance and upkeep.
With this change comes more garage space; the plan is to have more dedicated areas in the garage to better serve the three (sometimes conflicting) purposes of: #1 Machine Shop / Wood Shop, #2 Auto repair bay (Doubles as Bus storage), and #3 parking for commuter cars. Key to this idea is building a partition wall between garage and shop areas – cars will no longer get covered in sawdust during projects, and the extra wall will create more wall space for workbenches, machines, and storage.
The design has part of the partition wall at 45deg to make the commuter parking area larger for easier loading/unloading. This also leaves some space for a utilities closet to house the air compressor, dust collection, and the house’s existing central vac unit. Putting the utilities in a small ‘lean-to’ shed on the exterior like I had at the old place would have been a better use of floor space, but there really was no good place for it on the exterior and that would have added more complexity.
I’ll be building 100% of this as I have free time, so it may take a while. Realistically completion will probably be about this time next year.
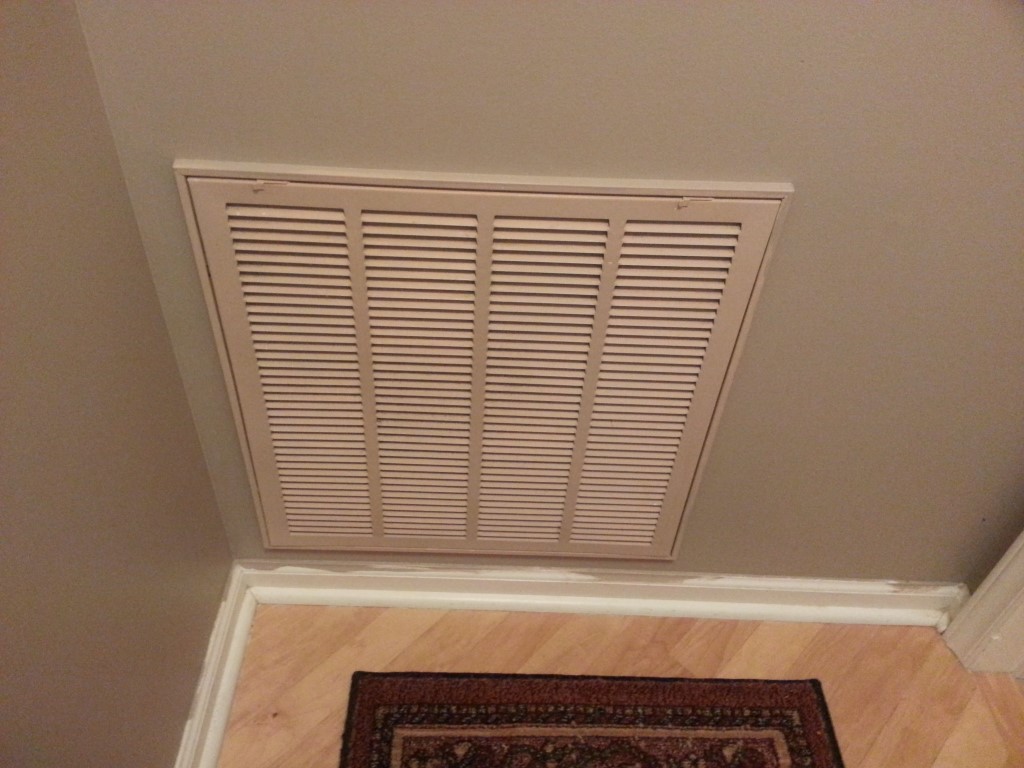
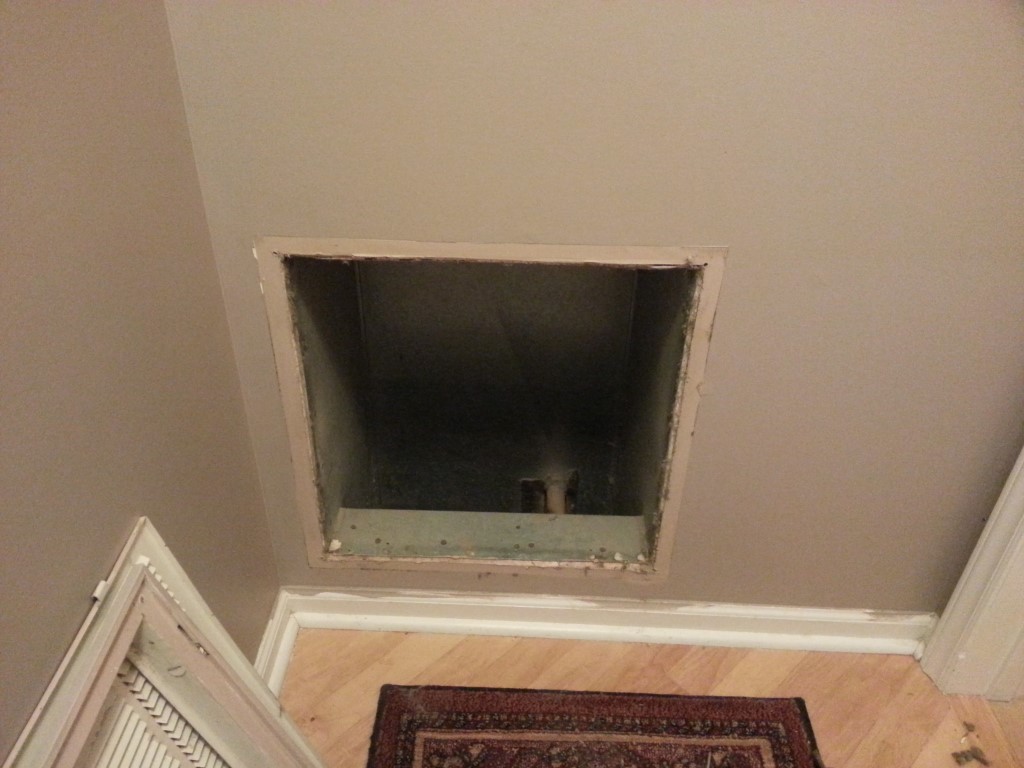
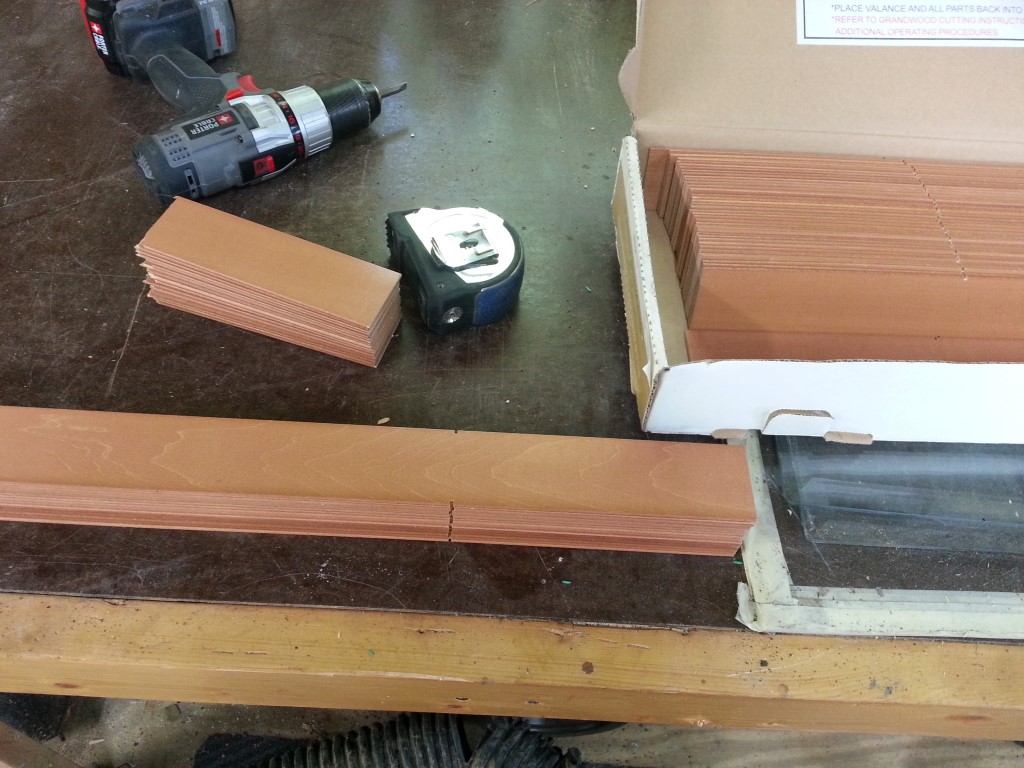
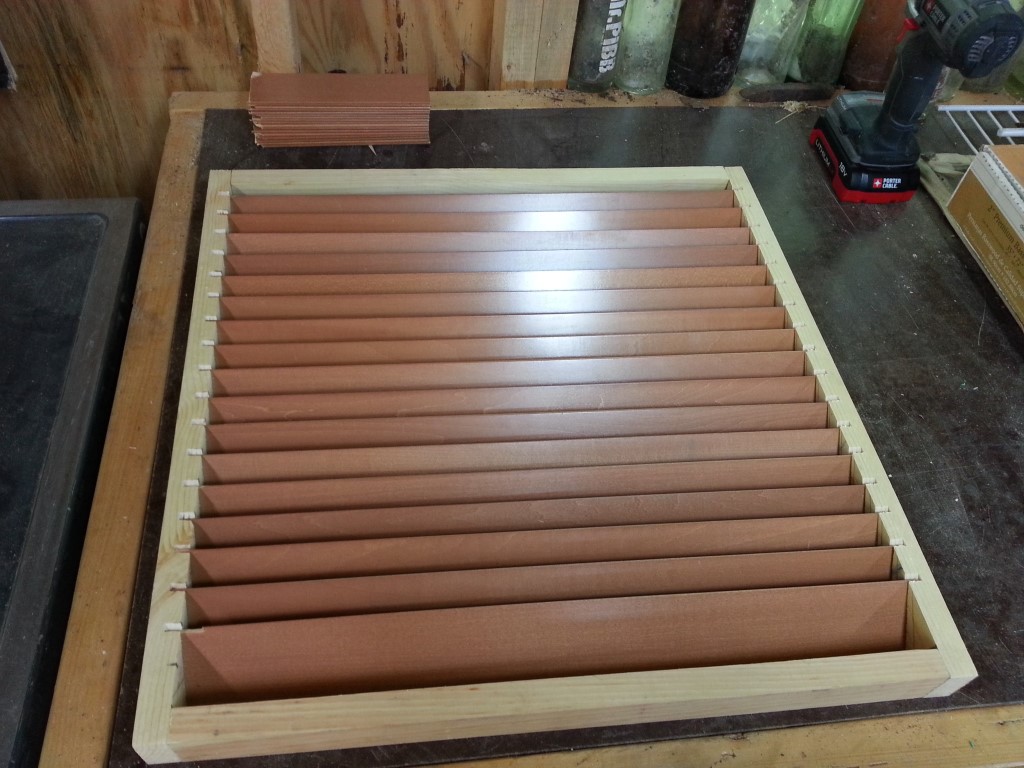
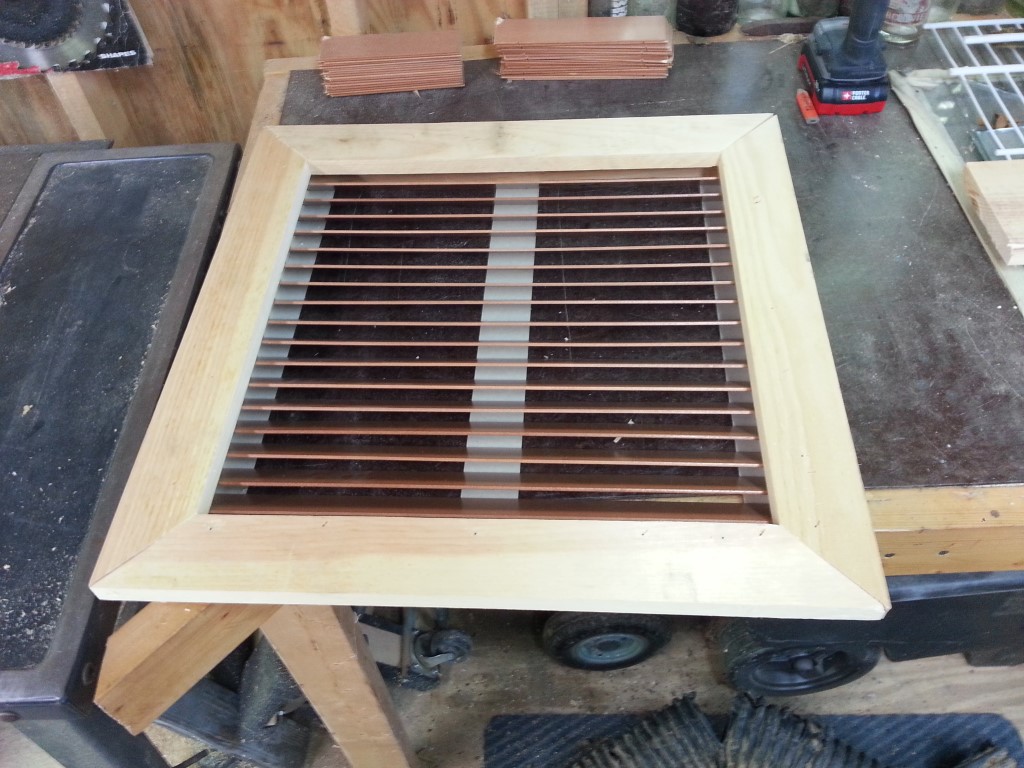
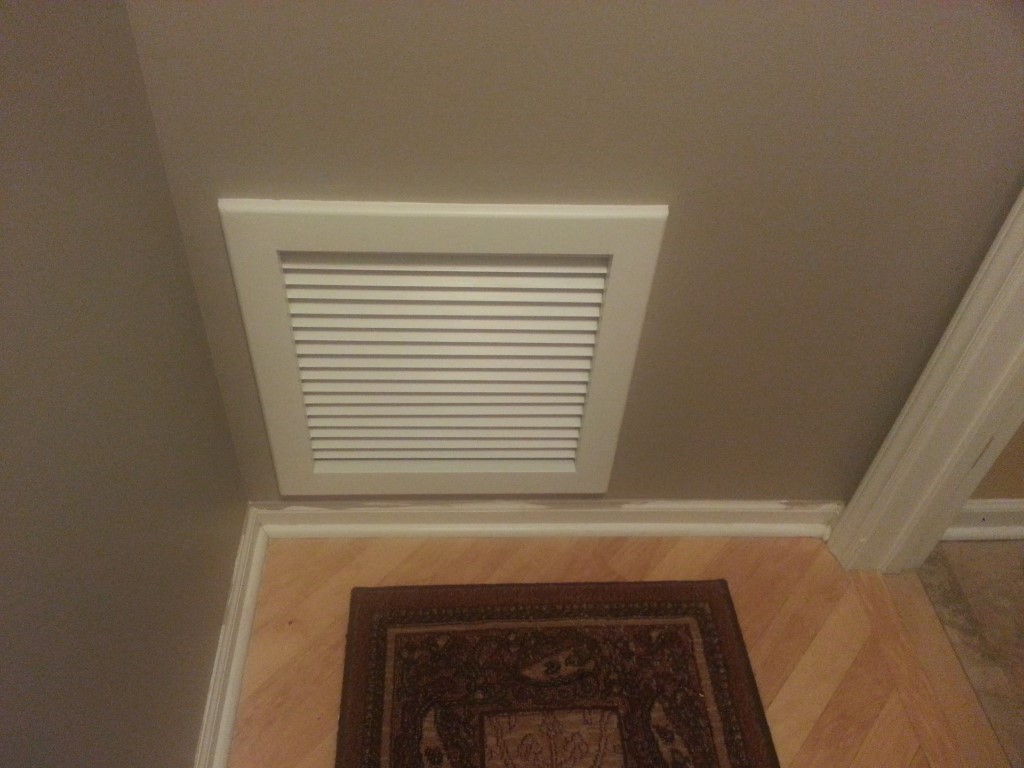
Building a better air return
Today, as part of a repainting project, I constructed a new air return out extra slats from wooden blinds and some scrap wood. Nothing was wrong with the existing metal return other than being ugly, so it will get added to the scrap metal pile and possible used on some metalwork project. All the materials were scraps from other projects, so total cost was just some paint/glue/staples and a few cents of electricity. As a bonus, the new return seems to be quieter and less restrictive than the metal version.
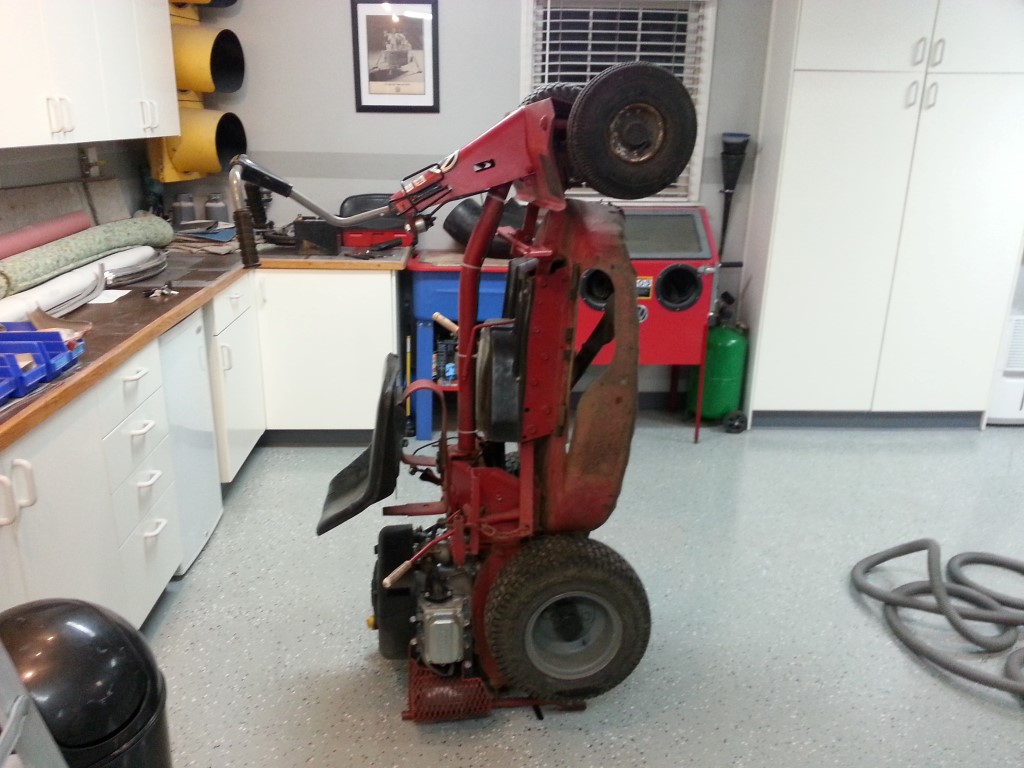
Garage floor finished, leaf harvest begins
I didn’t get “after” pictures from the garage floor project, but it’s visible in the mower pictures below. Overall it turned out very well and will be much easier to keep clean.
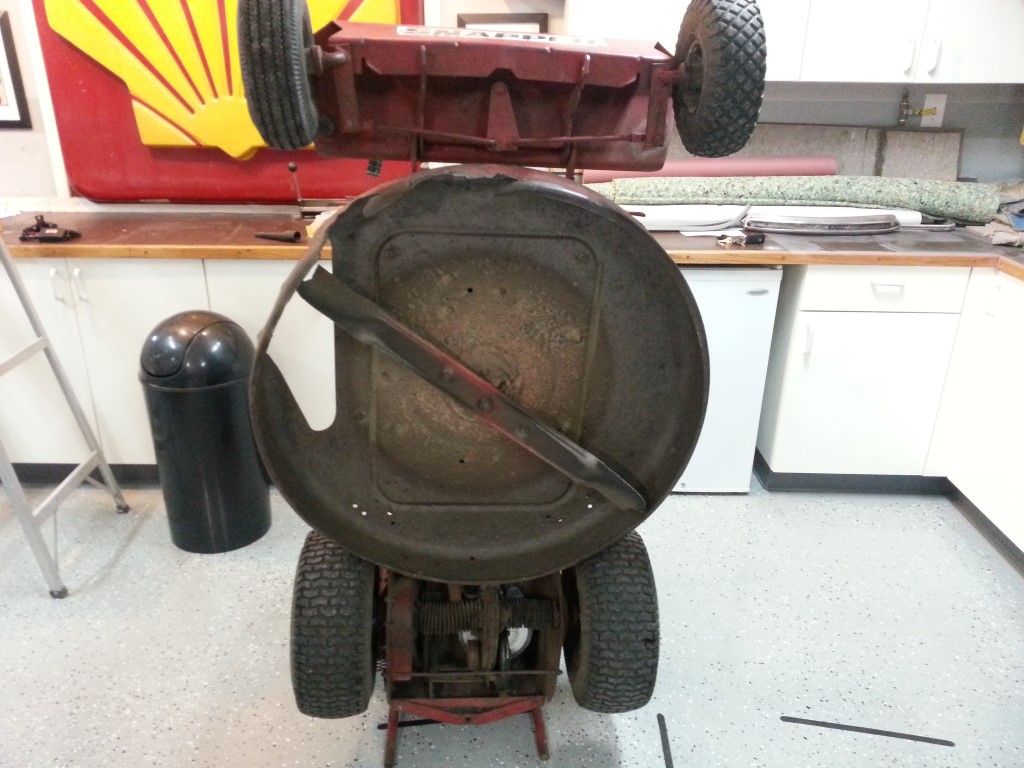
The leaves are falling this time of year and if left alone they are able to form a mat several inches thick over the entire yard/house/driveway/garage every few days. To combat this in years past I’ve used an arsenal of leafblowers, rakes, and mowers; the secret weapon in this arsenal though is the 33″ snapper rear engine rider from the mid 1970’s. It’s not great as a mower since the long single blade does not conform to the terrain; but as a leaf collection device there’s nothing better since the single long blade moves tons of air (think airplane prop). This moving air carries all of the leaves/sticks/nuts off of the yard and into the collection bag.
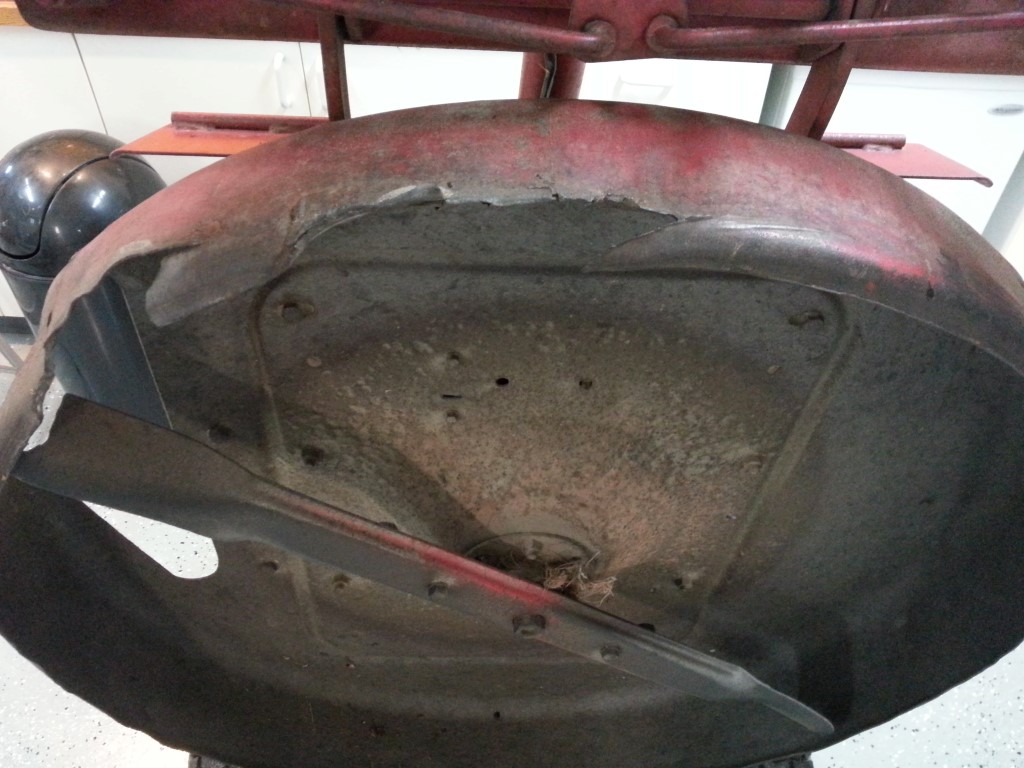
The mower’s deck had taken a beating from using it for trail-clearing; and once the deck deformed enough the blade began to wear against it. I’m replacing the blade and welding the deck back together so it can get back to clearing leaves. In the process of fixing the deck I may also add some sort of reinforcement or “cow catcher” to the front to prevent future damage.